There are few things our boat didn’t come equipped with, and davits was one of them. A lot of boats have really nice custom stainless steel davit systems off the stern to hold their dinghies out of the water. Not a big deal though, this just means we get to hoist the dinghy up onto the bow when we want to take it out of the water. To us, its a luxury we don’t need right now. It would cost a pretty penny to fabricate a custom davit system for the Mary Christine.
Of course we had to do a couple exploratory fishing trips when we first bought our new vehicle, but then we had to get it out of the salt water ASAP. Even just a few days floating around in this marina was enough for sea life to start growing on the bottom. The algae was super slimy and there were tiny little barnacles starting to grow.
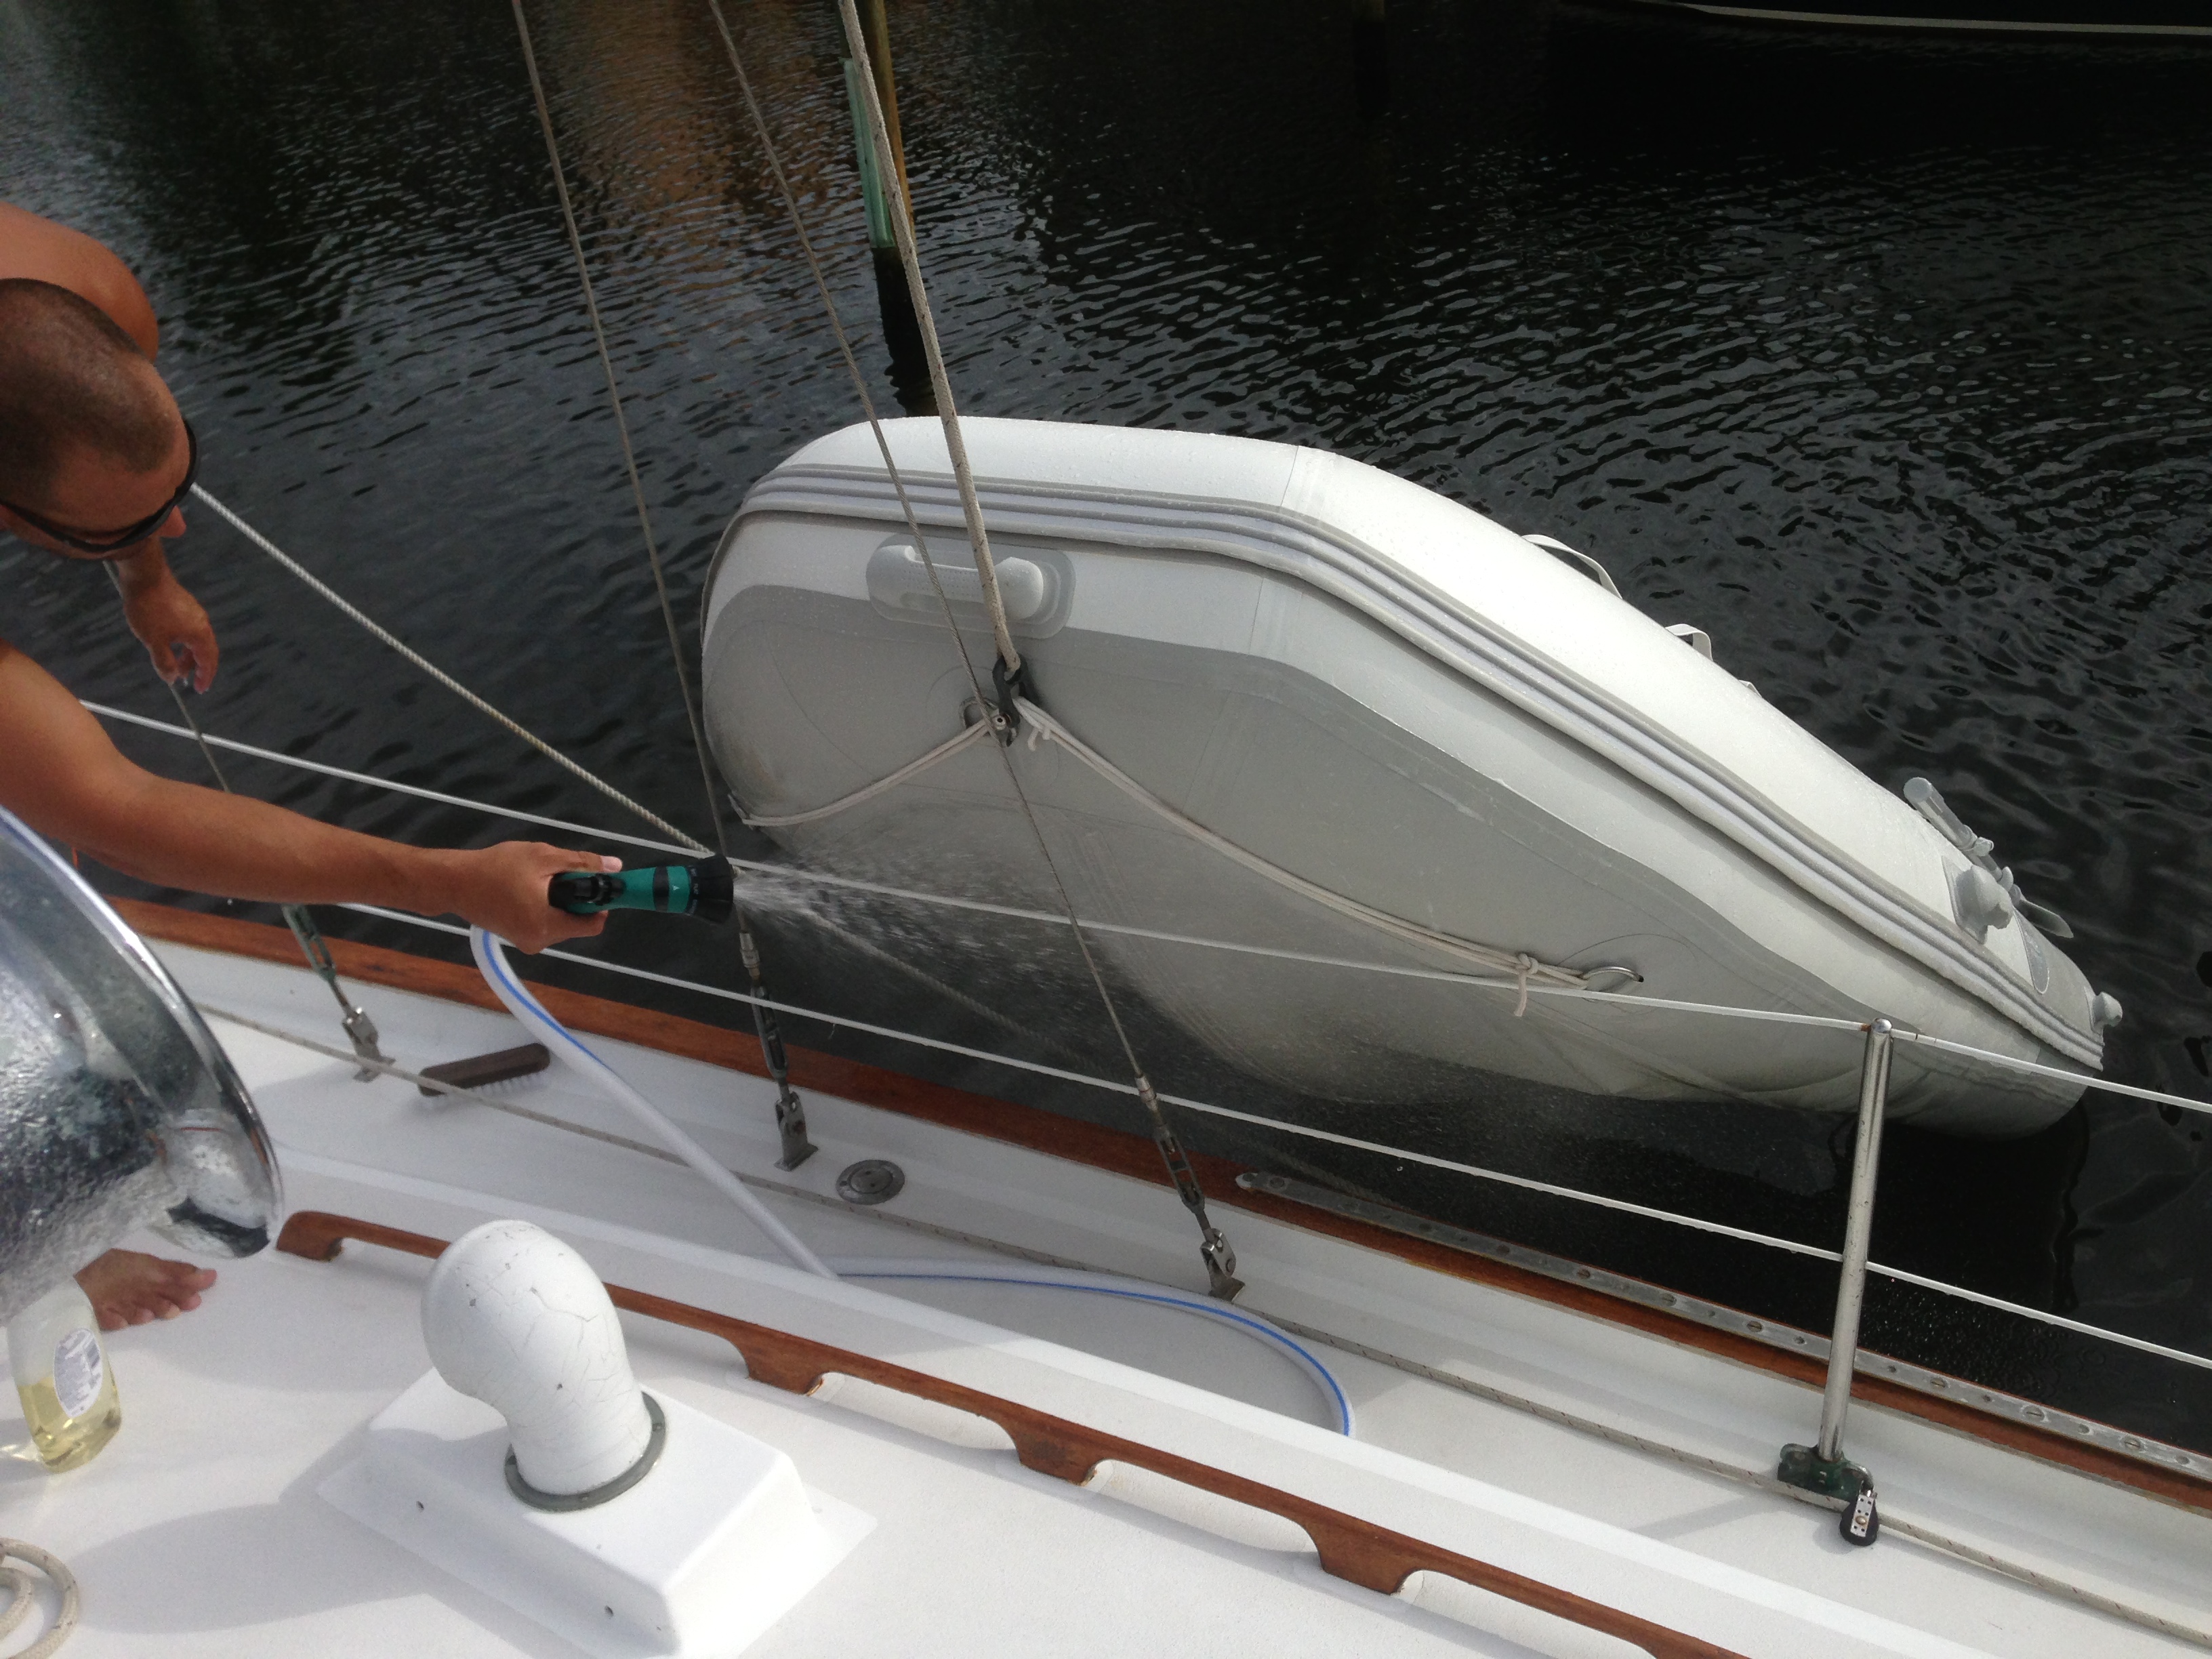
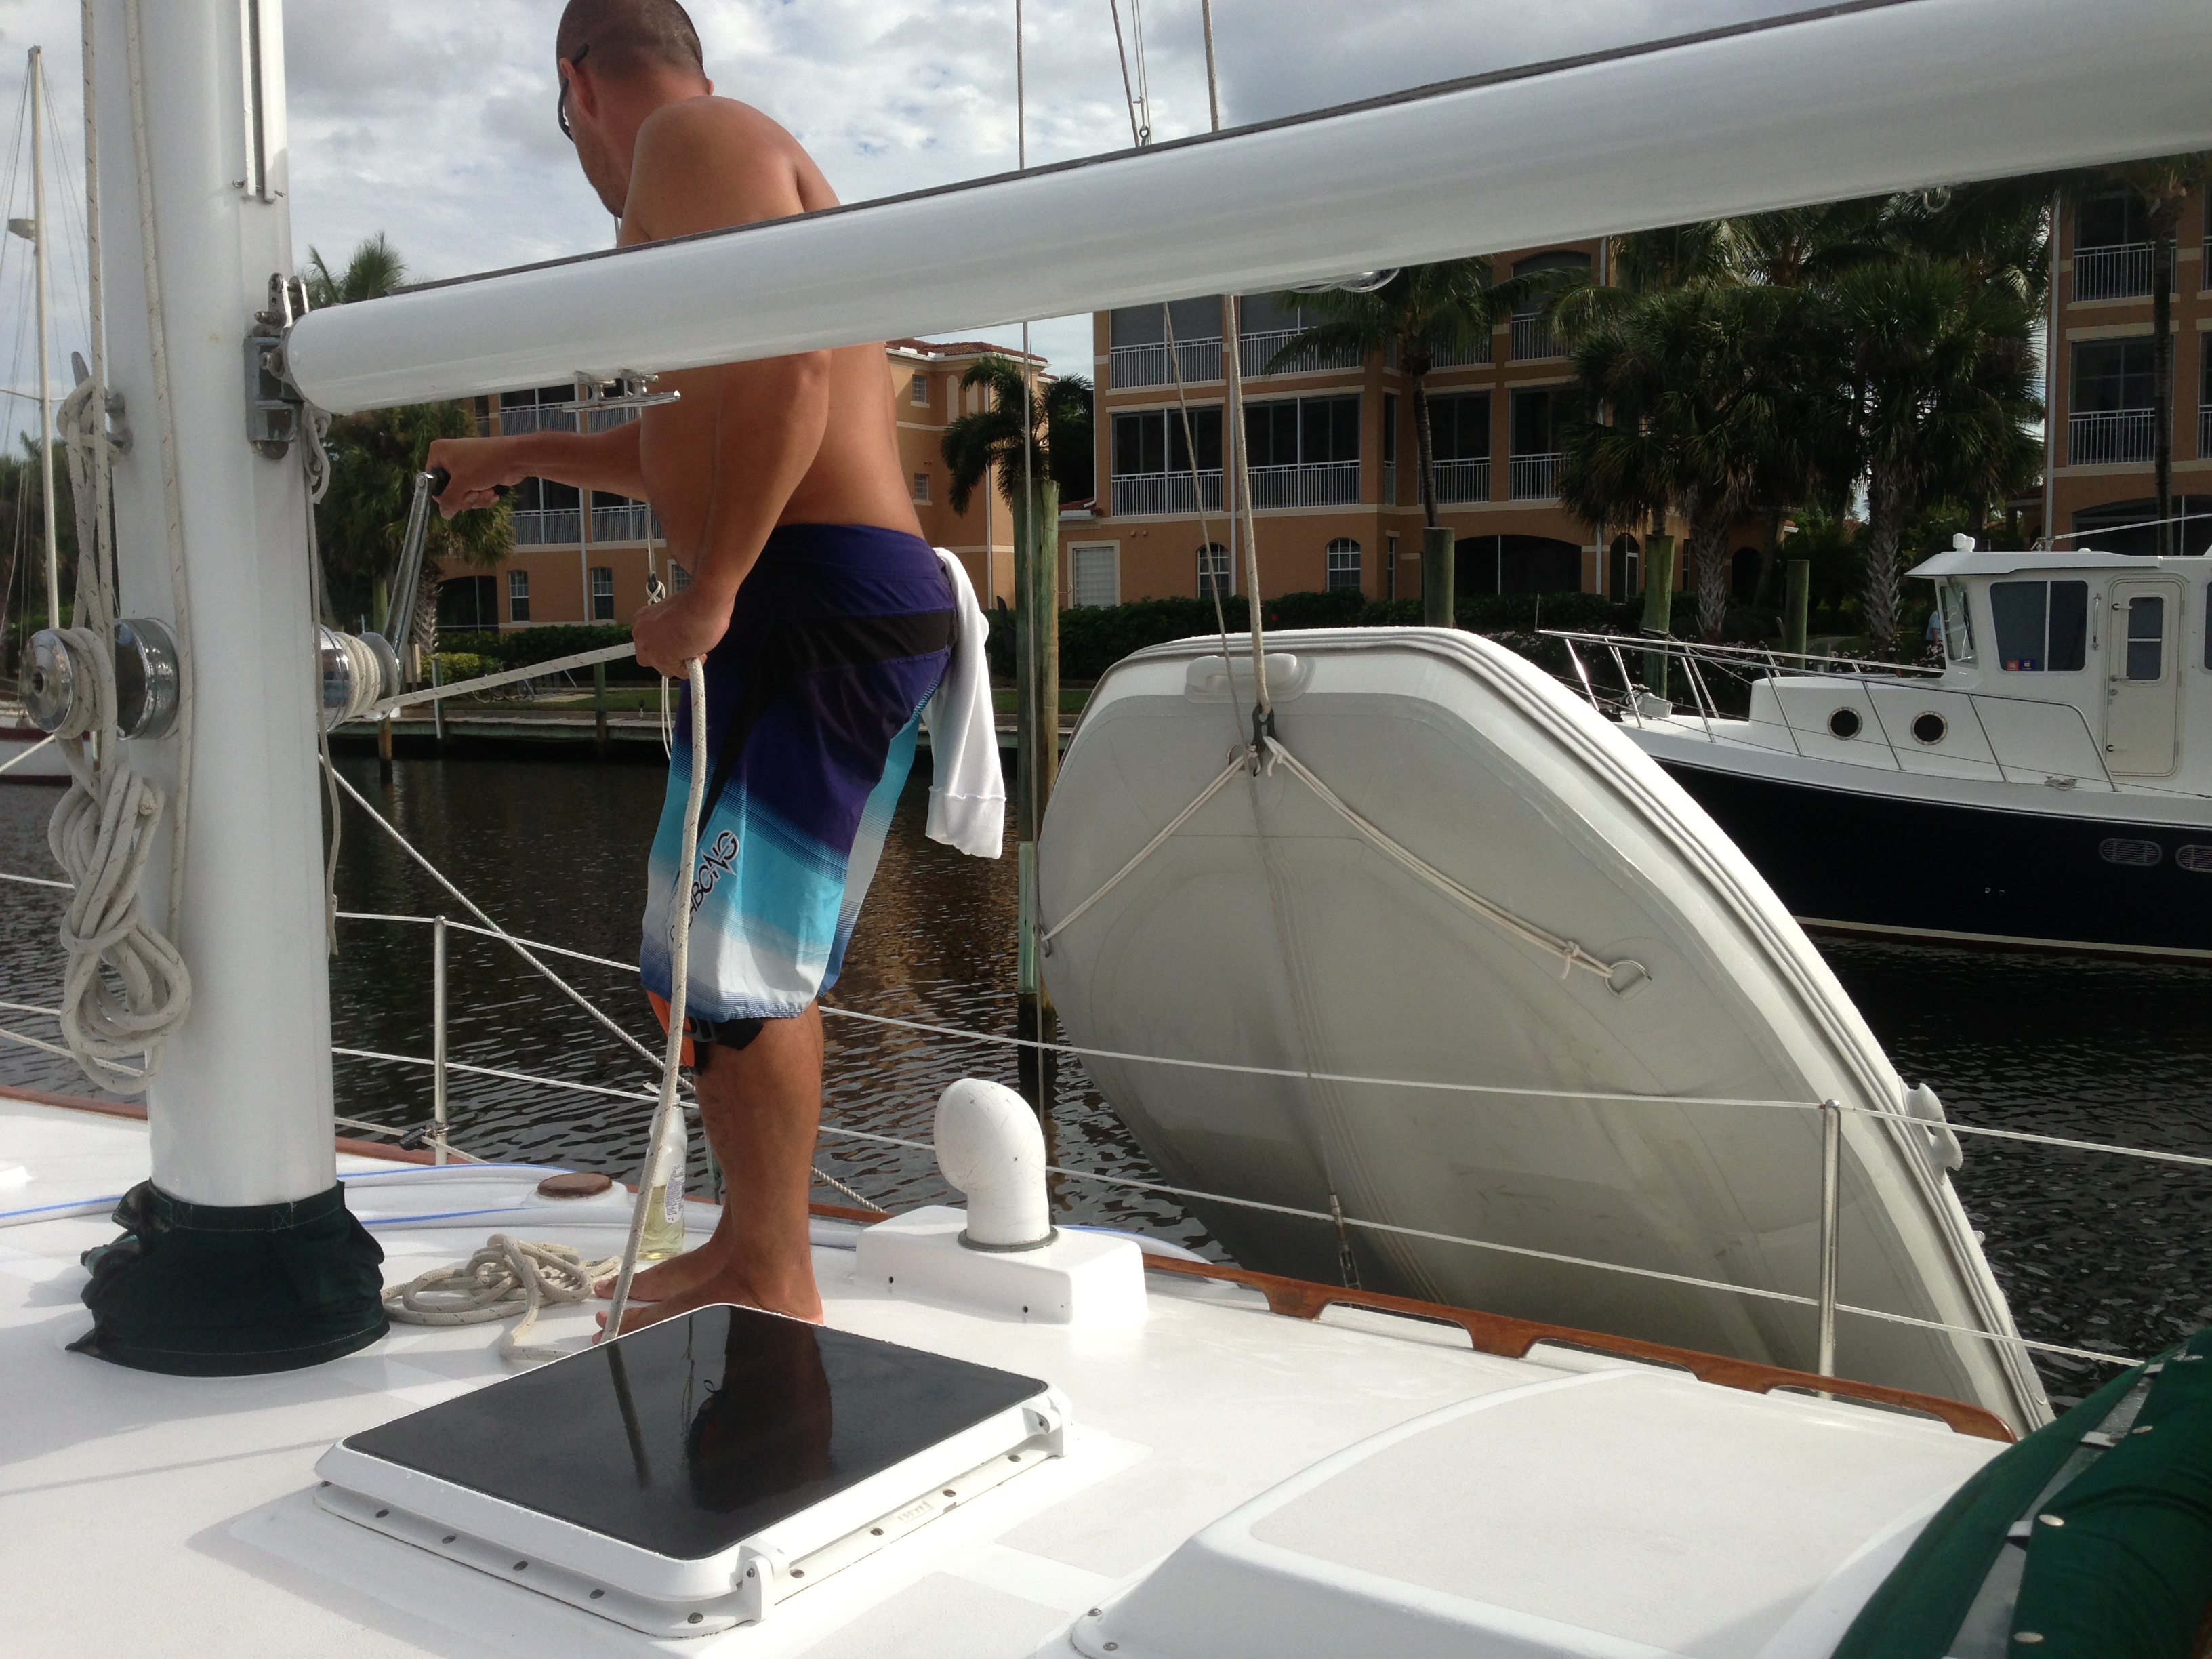
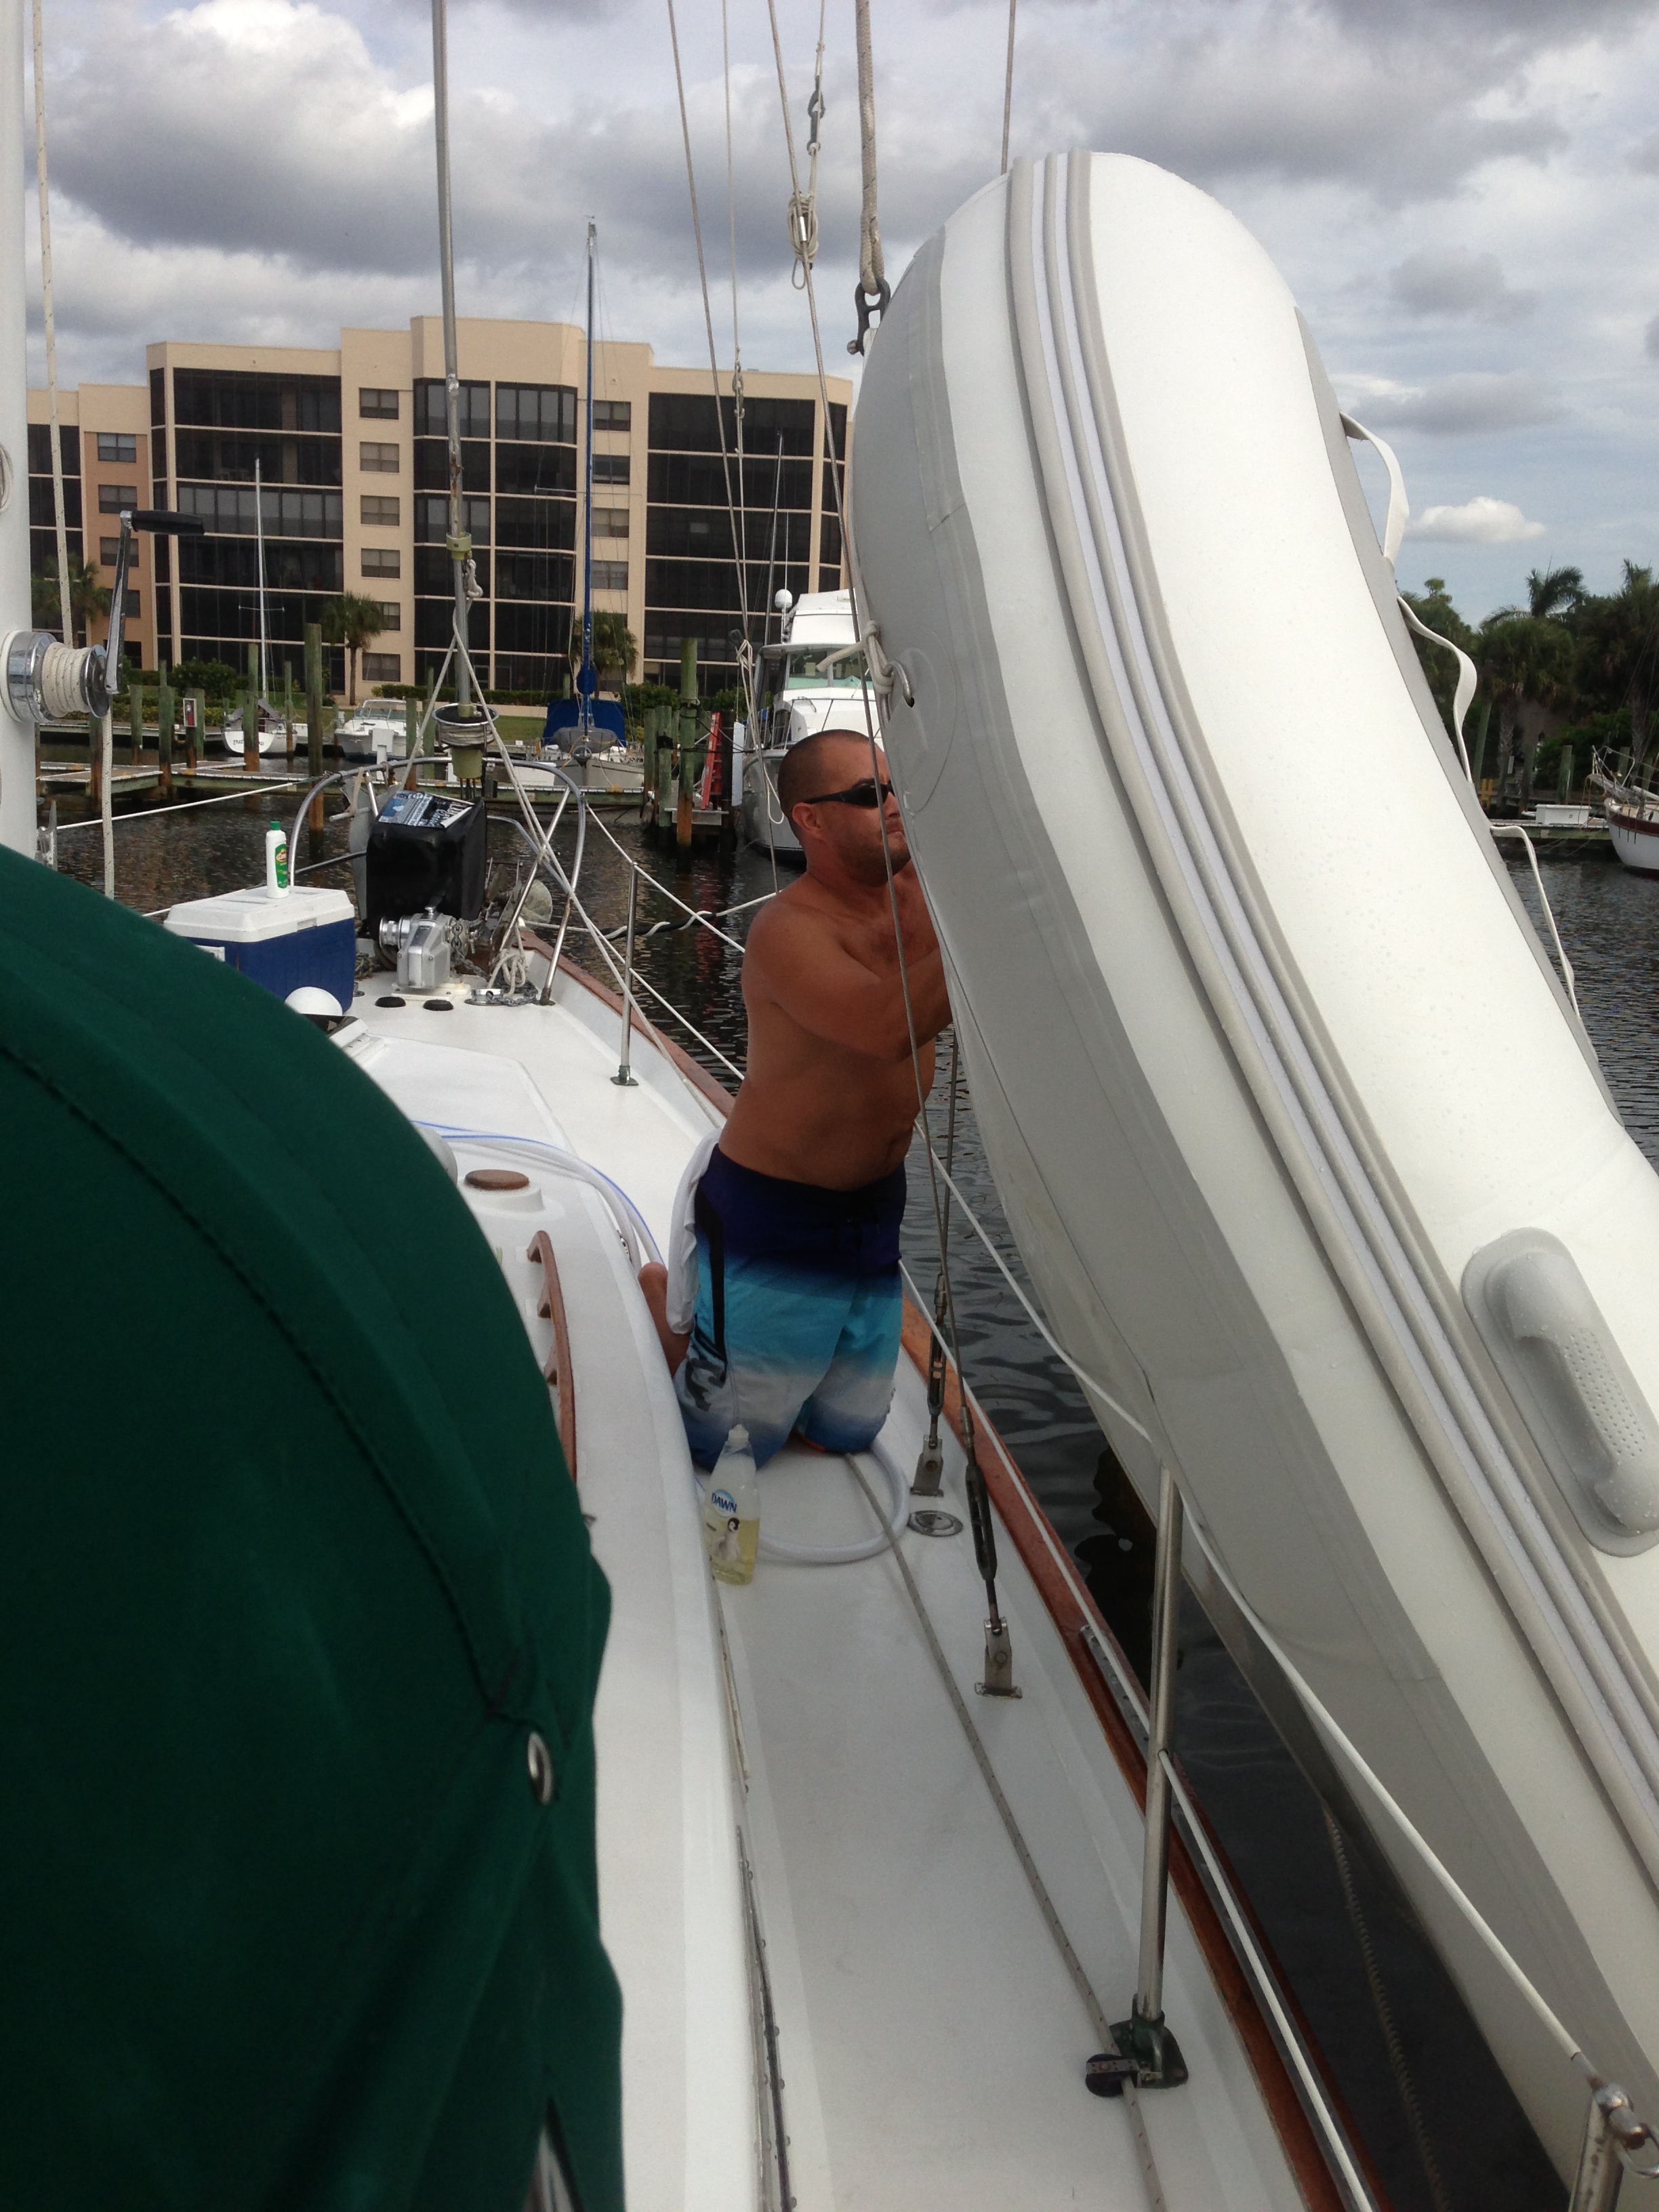
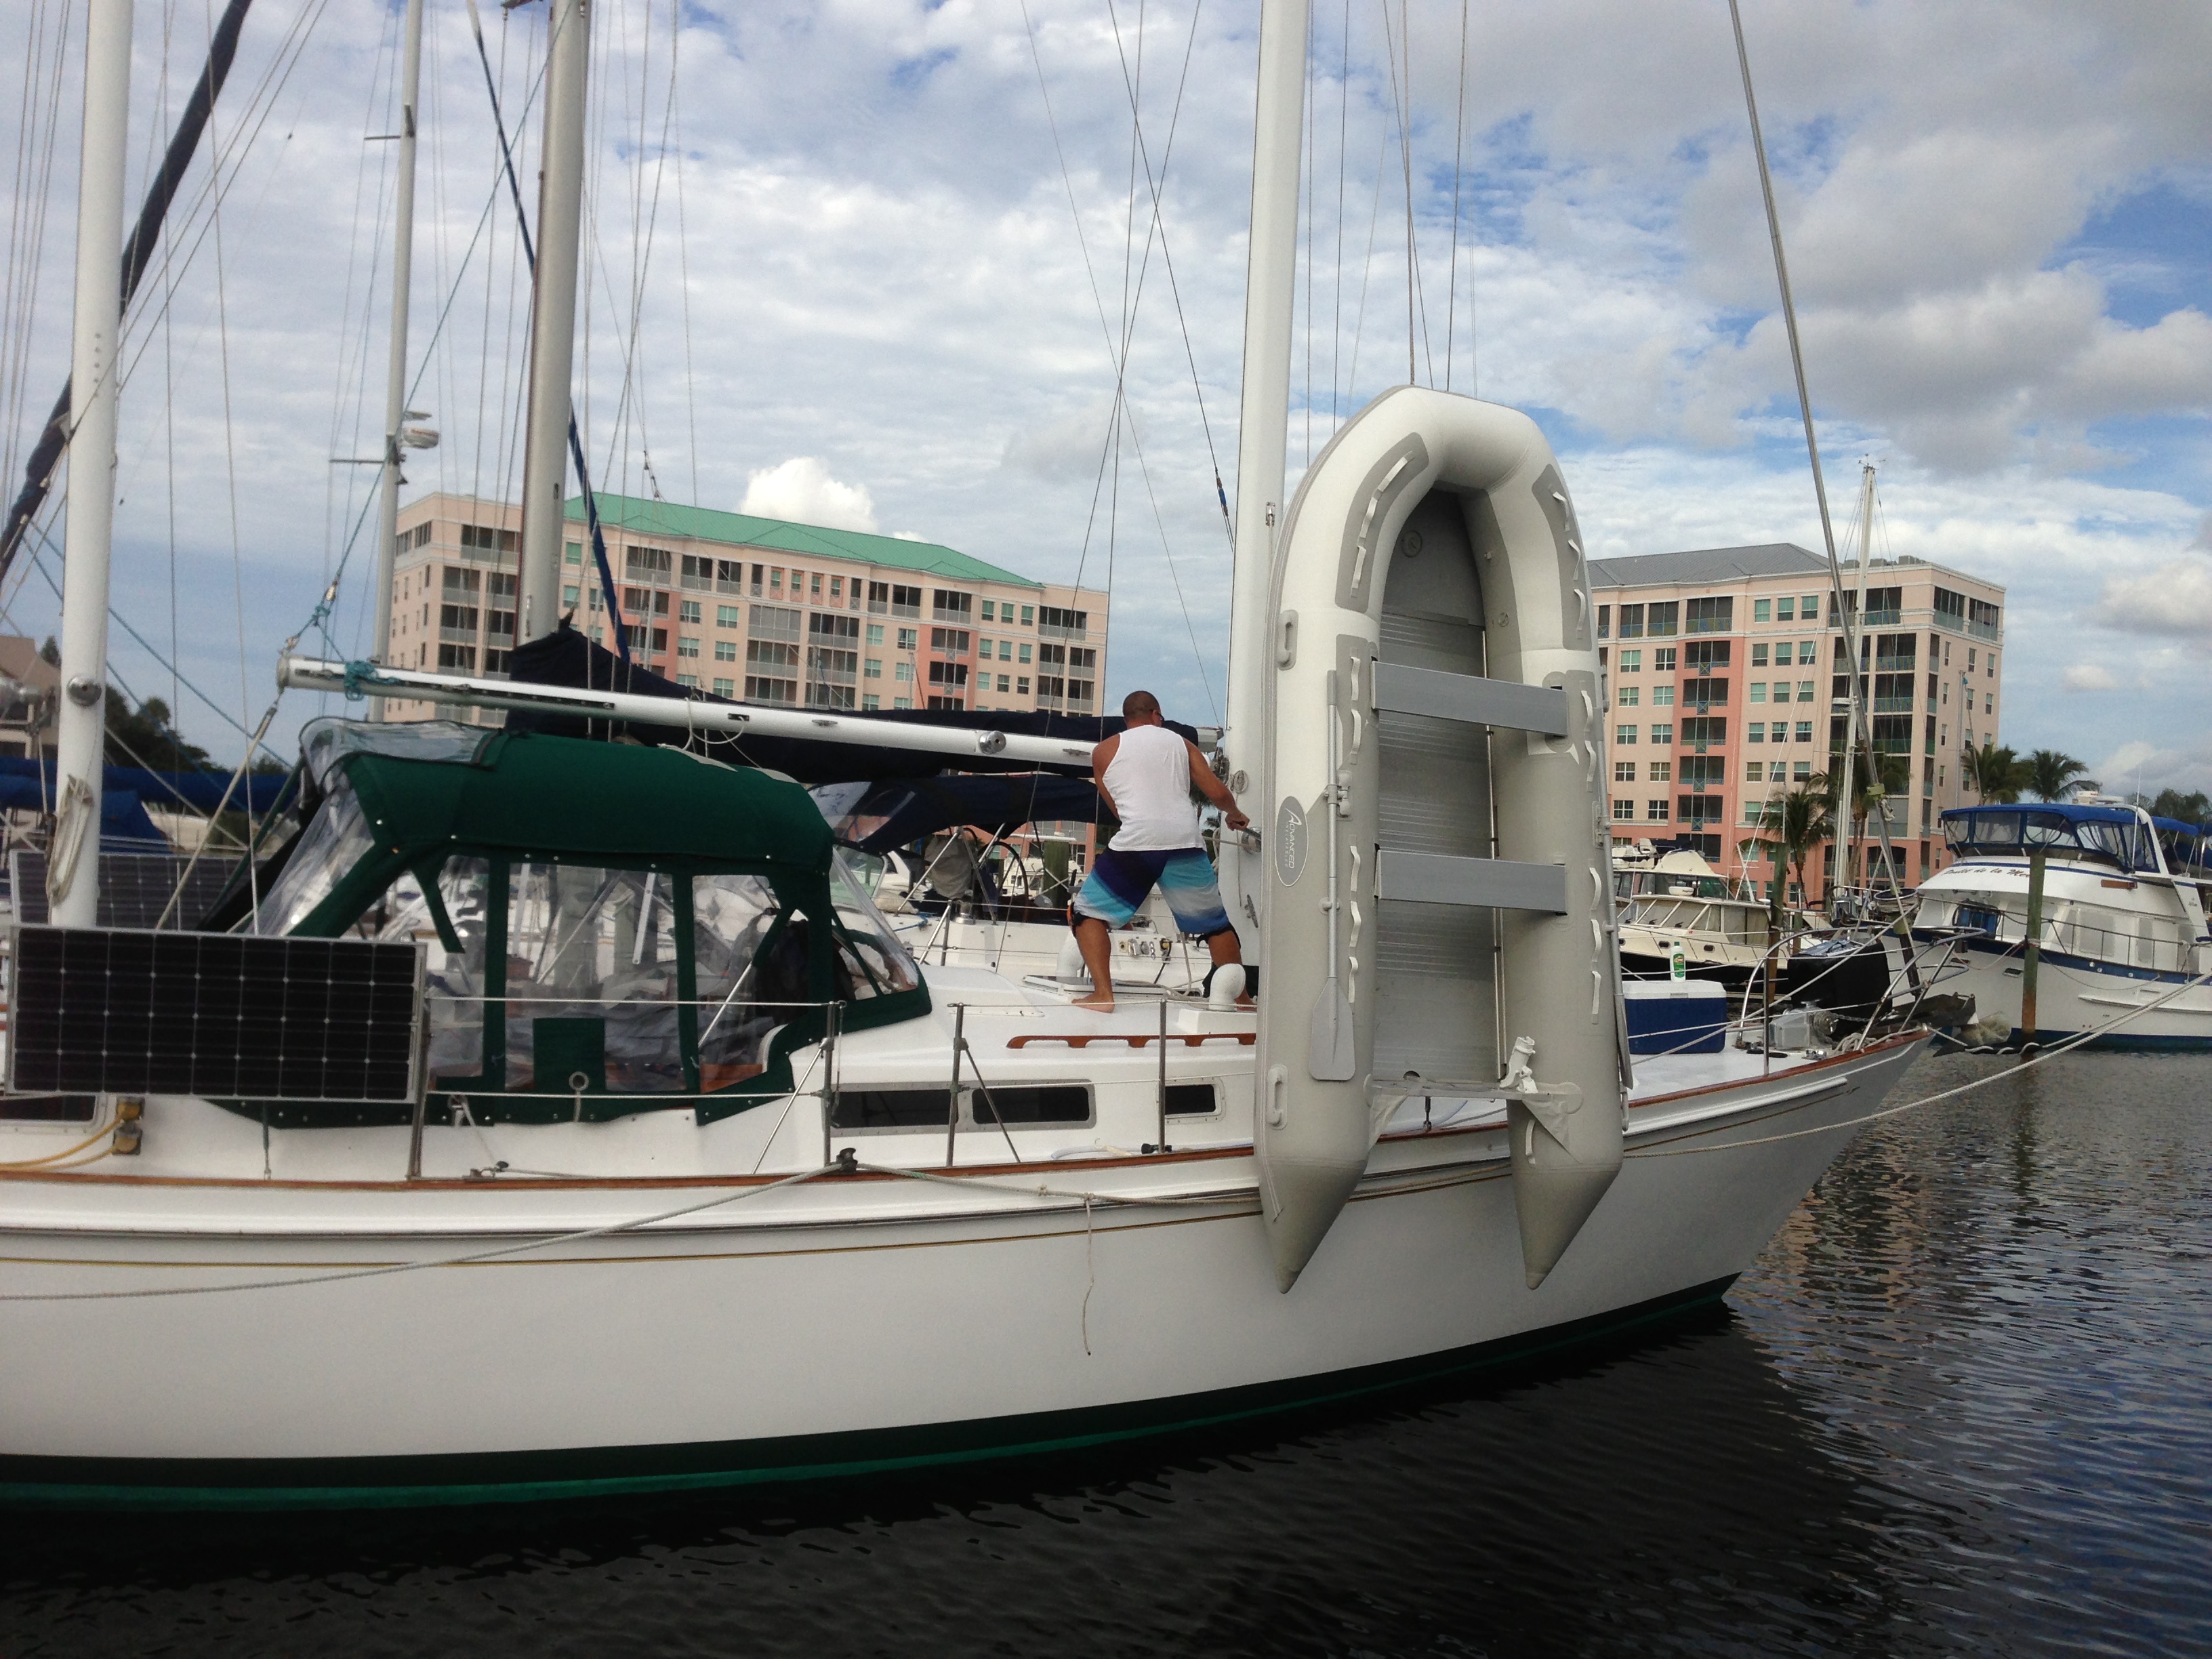
First we had to rig up a makeshift 3-point bridle to provide a little extra support instead of just using a single D-ring for the lifting. Next, we hooked up our main halyard to the D-ring hooks and started to winch the dinghy up out of the water along the side of the boat. The dinghy is roughly 110lbs (with the aluminum floor boards in) so having that winch makes it way easier to raise it up.
A little soap, water and couple of deck brushes took off a majority of the slime.
Up Up and Away! Peter got the dinghy up and over the lifelines while I helped guide it into position on the foredeck. That thing looks frickin HUGE when its up in the air!!
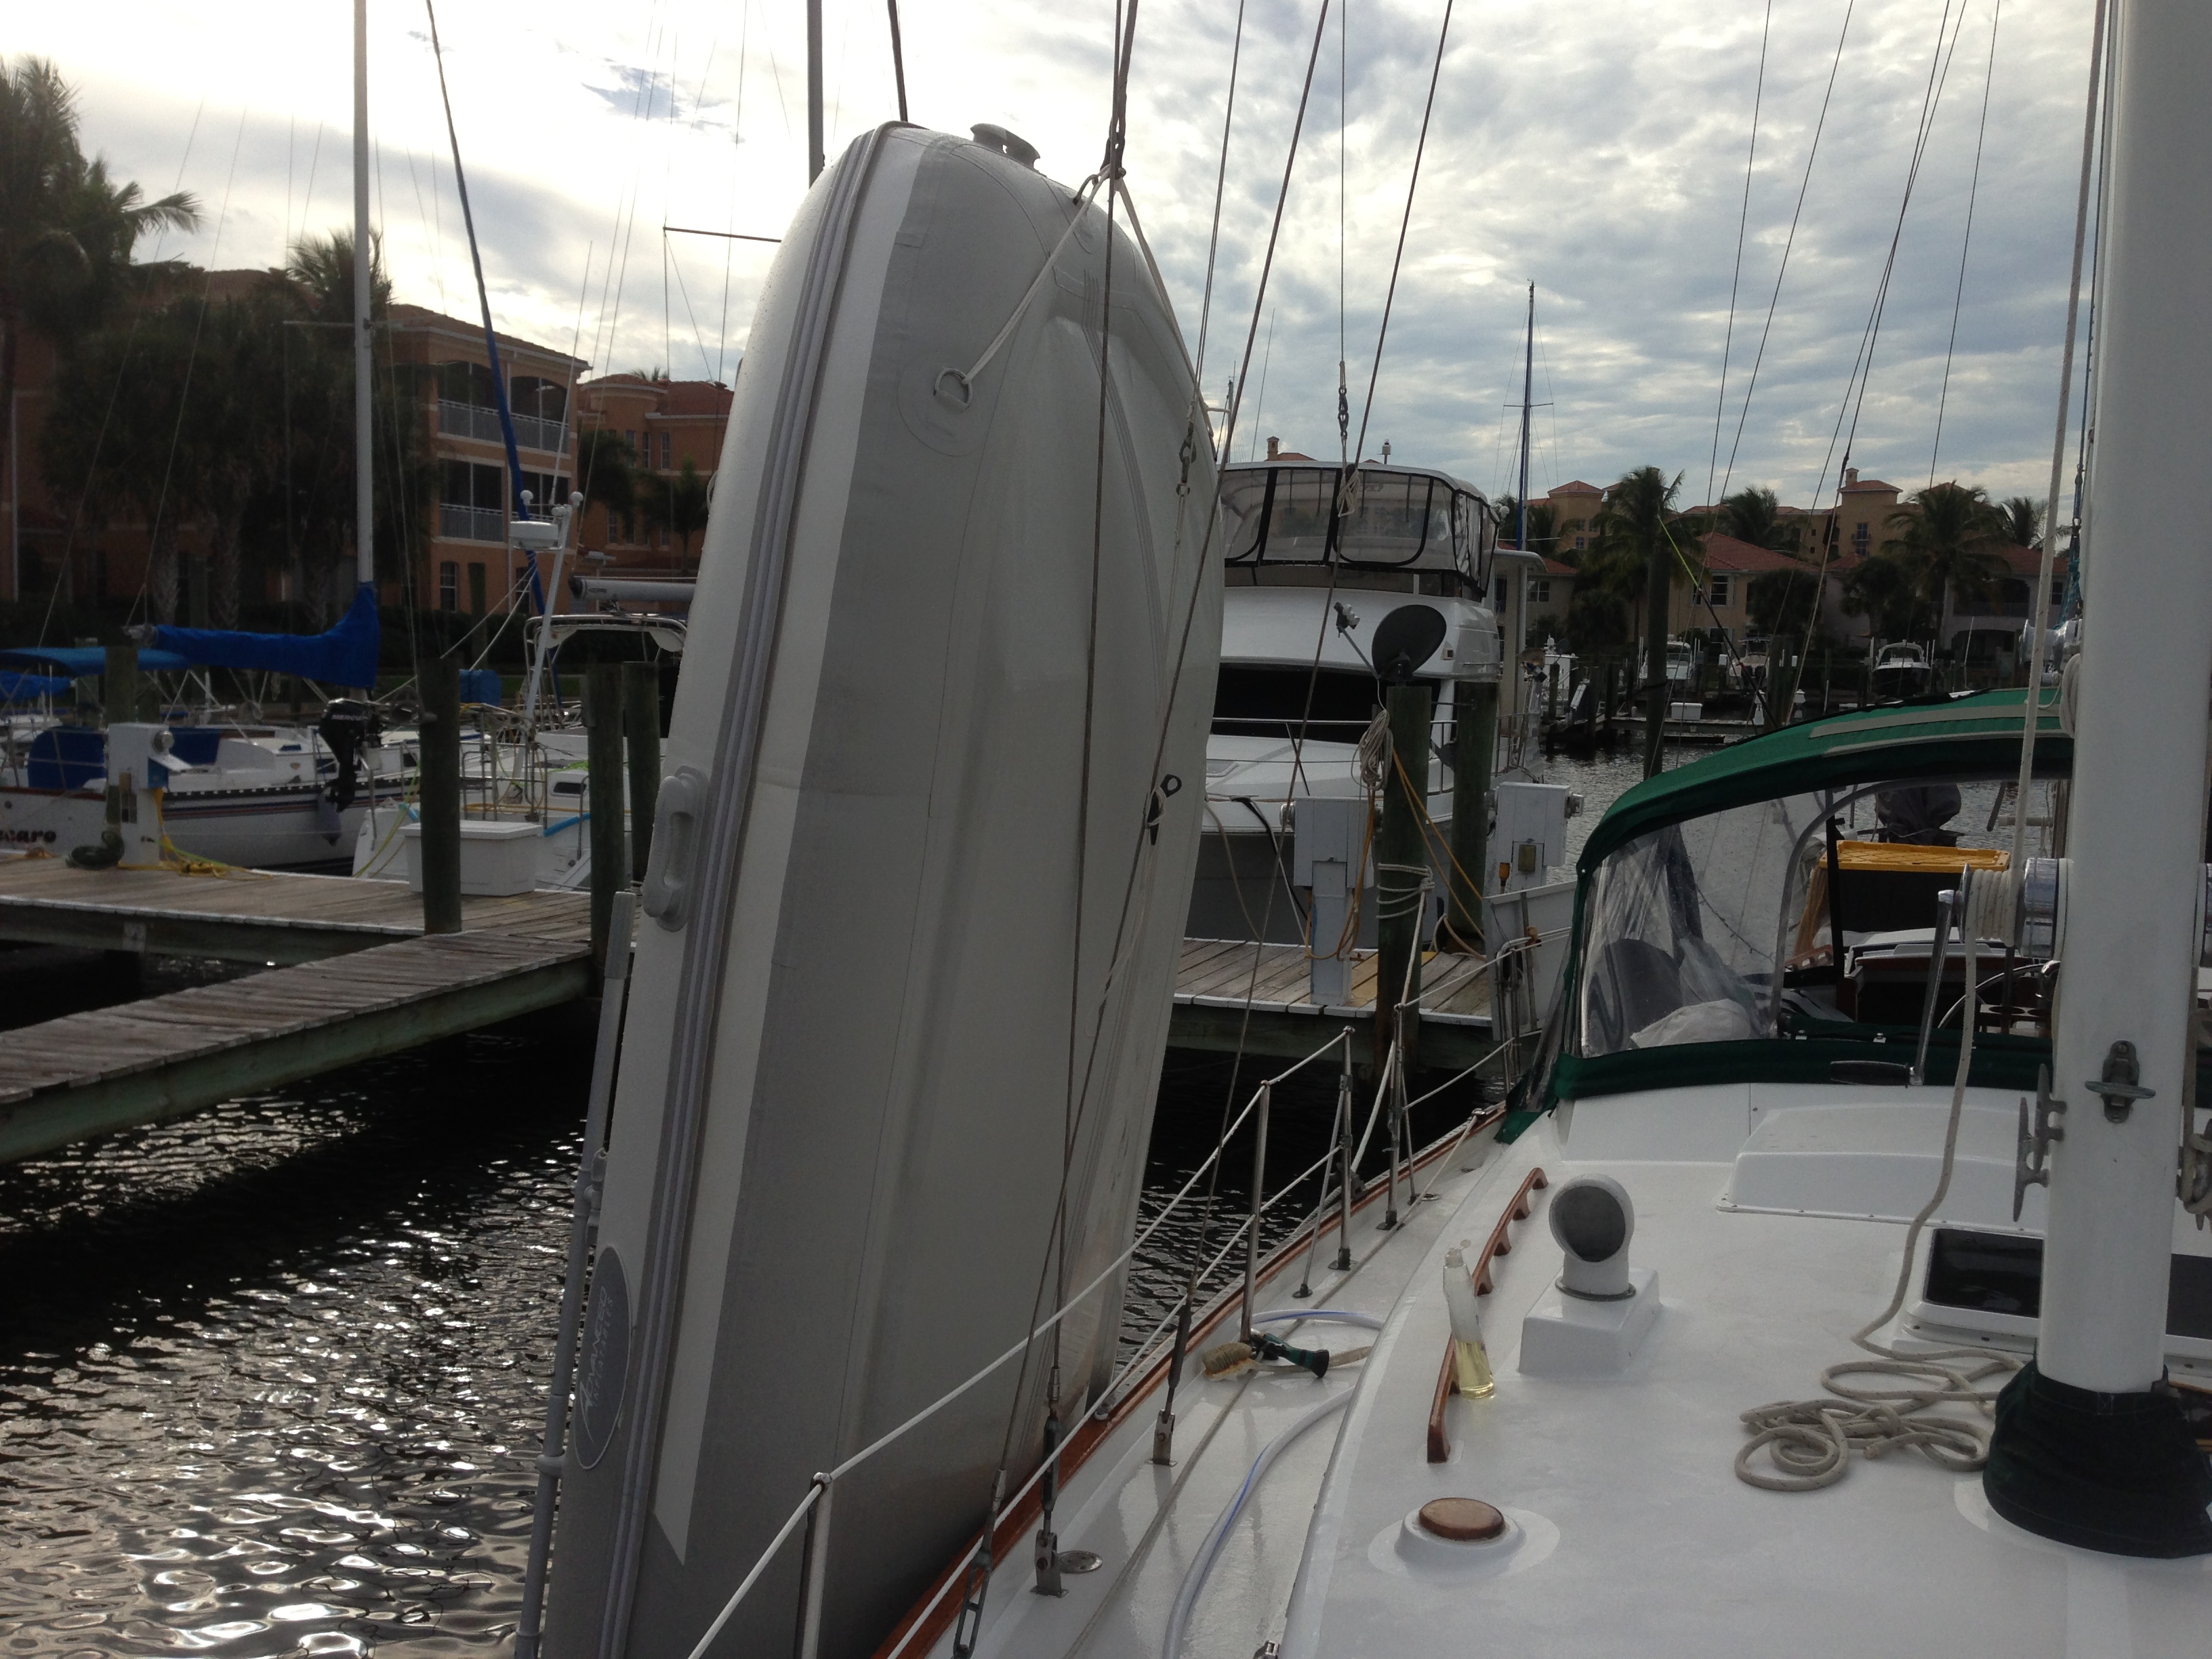
We found an old tannish brown sail cover at the used marine trading store and it just so happened to be long enough and wide enough when opened up all the way to cover our massive 12′ tender. It may not look pretty and some of the edges are a little torn but it’ll do the job!! It was only $20 and it will help protect the PVC from the wicked UV rays that we’re going to be in for a long time. Without some sort of protection, the PVC just doesn’t last very long at all, so we’ve been told. For now, our camo tie down straps will be holding it down. We’ve taken her out in 20knot winds this past weekend and didn’t have a problem at all with the cover coming loose. It’ll work until it doesn’t work anymore ;)
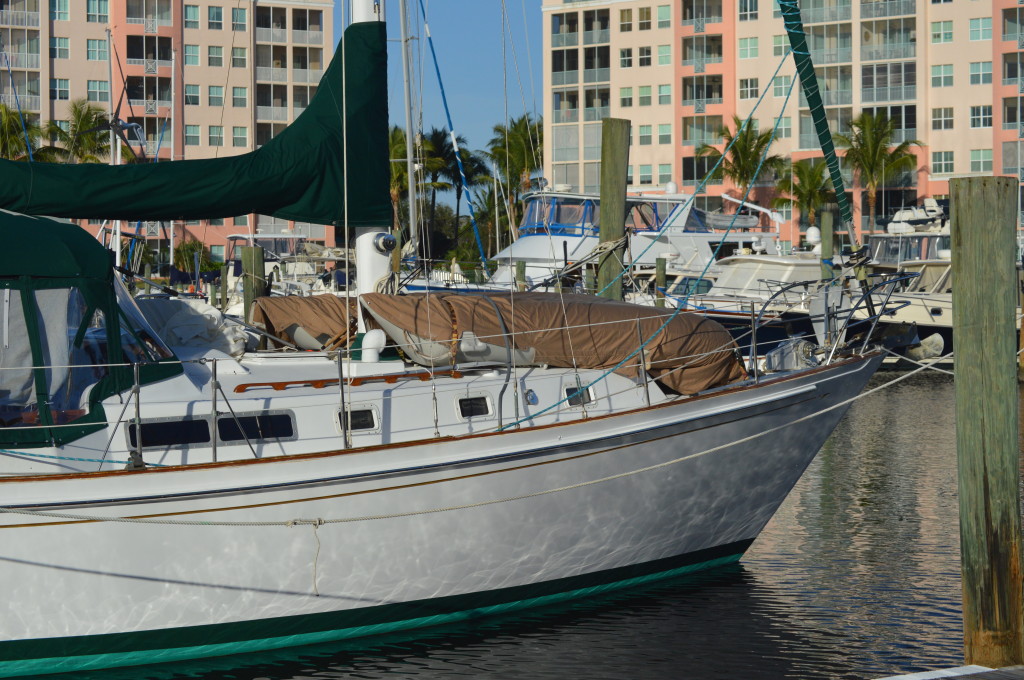
(Did anyone notice we’re getting closer to the waterline? :) After we fill up the fuel tanks and get all the provisioning before setting sail to the Bahamas we should be sitting right at the dark green stripe!)
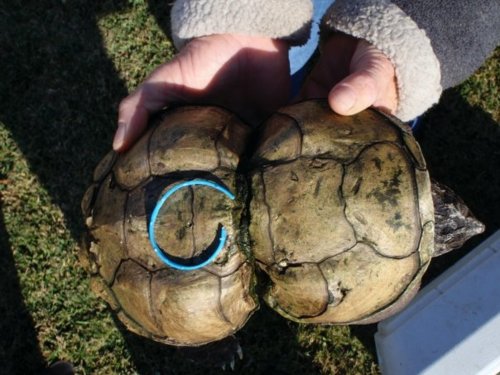
A turtle severely deformed from a piece of plastic that was wrapped around its shell when it was small
Its becoming common knowledge worldwide that trash is a big problem. When we were little, our elementary schools were just starting recycling programs to teach kids about the importance of REDUCE, REUSE and RECYCLE. Today, more and more business are making a conscious effort to “go green” and make environmentally friendly business decisions. There are industries entirely devoted to sustainable practices to reduce the human impact on our planet.
Once we leave the dock we are going to have to make some serious changes to the way we deal with our trash. There is no garbage man that will cruise up to the side of our boat to collect our trash once a week. There is no back yard to compost our garbage. There is no recycling center to give us a refund on cans and plastic bottles and take them away for us. Many of the islands we will be visiting will have less than ideal dumping areas and some won’t have any at all. So what do we do with it all? Just dump it overboard? No way!! We’ll be storing the items that cannot be dissolved until we get get to a proper disposal area. Check out how long it takes for these items to dissolve in the ocean:
Paper bus ticket: 2-4 weeks
Cotton cloth: 1-5 months
Rope: 3-14 months
Woolen cloth: 1 year
Painted wood: 13 years
Tin can: 13 years
Aluminum can: 200-500 years
Plastic bottle: 450 years
Source: Hellenic Marine Environment Protection Association (HELMEPA)
How about glass? I’ve read it can take something like an estimated few million years!! But who knows…
We LOVE the ocean and are choosing to change to a lifestyle that is 99% based on ocean life. We will be sailing, fishing, surfing, beach combing, paddleboarding, and swimming ALL THE TIME. If we can make even a small difference and help protect the ocean environment then we will. We don’t want to see any wildlife like the poor turtle with the deformed shell, or dolphins caught in nets, or other sea creatures washed up on the beach that have died from being trapped in or eating trash. We can only hope that if we respect the sea, it will take care of us in return and help us to continue living this amazing adventure.
We’ve heard of tips like crushing, cutting and reusing our garbage while at sea but we still aren’t sure what the best way is to deal with our trash. God forbid we attract bugs because of failing to rinse something out or put it in a sealed container. Our main trash can in the galley is a plastic can with a lid and foot pedal and lined with a plastic bag. We plan on bringing some big heavy-duty garbage sacks to store other trash that can’t stay inside, but we aren’t sure what to do with it yet. Some cruisers put it in the dinghy when hanging off davits, but we don’t have davits. We will surely dispose of all trash we can on shore when provisioning, but as new cruisers I’m sure we will end up with more trash than we’d like until we get the hang of it ;)
Please let us know what you do with your trash when you know you’ll be gone cruising for a long time! All suggestions are welcome :)
Now for the technical stuff…
Our survey noted that our garbage discharge placard was not up to snuff. It was one of the (get this – only three!!) mandatory fixes we must do to be in regulation. How awesome were our previous owners!? They took such good care of this boat, it was amazing how it all came together and how we found the perfect boat at the right time. The other two mandatory survey items to resolve were an inoperable navigation light (easy peasy) and an improperly affixed Hull ID Number. Theres a much longer story to why the HIN is wrong, but with some super determined detective skills I got it all figured out. Maybe we’ll post about that another day :) If you have ANY questions about the National Vessel Documentation Center and registering your vessel with the Coast Guard just ask us!! It really is a simple process and if you like to take the DIY route it’s totally possible – even when you don’t have the vessel history. I’m happy to help if anyone needs it.
The Waste Management Plan regulations are ridiculously confusing to say the least. It would be simple if there weren’t updates, but there are all these amendments and new requirements and new language and a bunch of other mumbo jumbo that’s really tough to sift through. I spent all day trying to find which verbiage is the most current and what we need to do for our boat. If you’re interested in the requirements then keep reading :) Don’t forget to leave us a comment and let us know of any good tips for trash management while at sea!
The U.S. Coast Guard published an Interim Rule on February 28, 2013 to implement the revised MARPOL Annex V garbage regulations. The amendments to Annex V entered into force both internationally and domestically on January 1, 2013. The Interim Rule revises 33 C.F.R. Part 151 to reflect U.S. requirements under Annex V and can be found at www.gpo.gov/fdsys/pkg/FR-2013-02-28/pdf/2013-04616.pdf. In addition, the Coast Guard issued a policy letter, Interim Guidance for Revised MARPOL Annex V Implementation (CG-CVC Policy Letter 13-01), to aid U.S. and foreign flag oceangoing vessels in ensuring compliance with the revised Annex V interim guidance to these new amendments.
As a 42′ recreational vessel we are not required to perform record keeping of garbage discharge, but we are required to have a Waste Management Plan IN WRITING, and display a placard (minimum 8″x5″ according to the interim revisions).
This is the Sample Placard for Waste Discharge we will be using as suggested within the USCG Letter in the link above targeting crew and shipboard operations on vessels of more than 7.9 meters (26 feet) in length overall:
DISCHARGE OF ALL GARBAGE INTO THE SEA IS PROHIBITED
EXCEPT WHEN SPECIFICALLY ALLOWED
The MARPOL Convention and U.S. law prohibit the discharge of most garbage from ships. Only the following garbage types are allowed to be discharged and under the specified conditions.
Outside Special Areas designated under MARPOL Annex V:
Comminuted or ground food wastes (capable of passing through a screen with openings no larger than 25 millimeters (1 inch)) may be discharged not less than 3 nautical miles from the nearest land.
Other food wastes may be discharged not less than 12 nautical miles from the nearest land.
Cargo residues classified as not harmful to the marine environment may be discharged not less than 12 nautical miles from the nearest land.
Cleaning agents or additives in cargo hold, deck and external surfaces washing water may be discharged only if they are not harmful to the marine environment.
With the exception of discharging cleaning agents in washing water, the ship must be en route and as far as practicable from the nearest land.
Inside Special Areas designated under MARPOL Annex V:
More stringent discharge requirements apply for the discharges of food wastes and cargo residues; and
Consult Annex V and the shipboard garbage management plan for details.
For all areas of the sea, ships carrying specialized cargos such as live animals or solid bulk cargoes should consult Annex V and the associated Guidelines for the implementation of Annex V.
Discharge of any type of garbage must be entered in the Garbage Record Book.
Violation of these requirements may result in penalties.
Special Areas:
The special areas are the Mediterranean Sea area, the Baltic Sea area, the Black Sea area, the Red Sea area, the Gulfs area, the North Sea area, the Antarctic area, and the Wider Caribbean region, including the Gulf of Mexico and the Caribbean Sea. These are areas which have particular problems because of heavy maritime traffic or low water exchange caused by the land-locked nature of the sea concerned.
The Wider Caribbean region means the Gulf of Mexico and Caribbean Sea proper, including the bays and seas therein and that portion of the Atlantic Ocean within the boundary constituted by the 30° N parallel from Florida eastward to 77°30′ W meridian, thence a rhumb line to the intersection of 20° N parallel and 59° W meridian, thence a rhumb line to the intersection of 7°20′ N parallel and 50° W meridian, thence a rhumb line drawn southwesterly to the eastern boundary of French Guiana.
In Summary, the only permitted discharges in Special Areas are:
Food Waste comminuted or ground permitted ≥12 nm, en route
Cargo residues contained in wash water permitted ≥12 nm, en route
Cleaning agents and additives contained in cargo hold wash water permitted ≥12 nm, en route
Cleaning agents and additives in deck and external surfaces wash water permitted
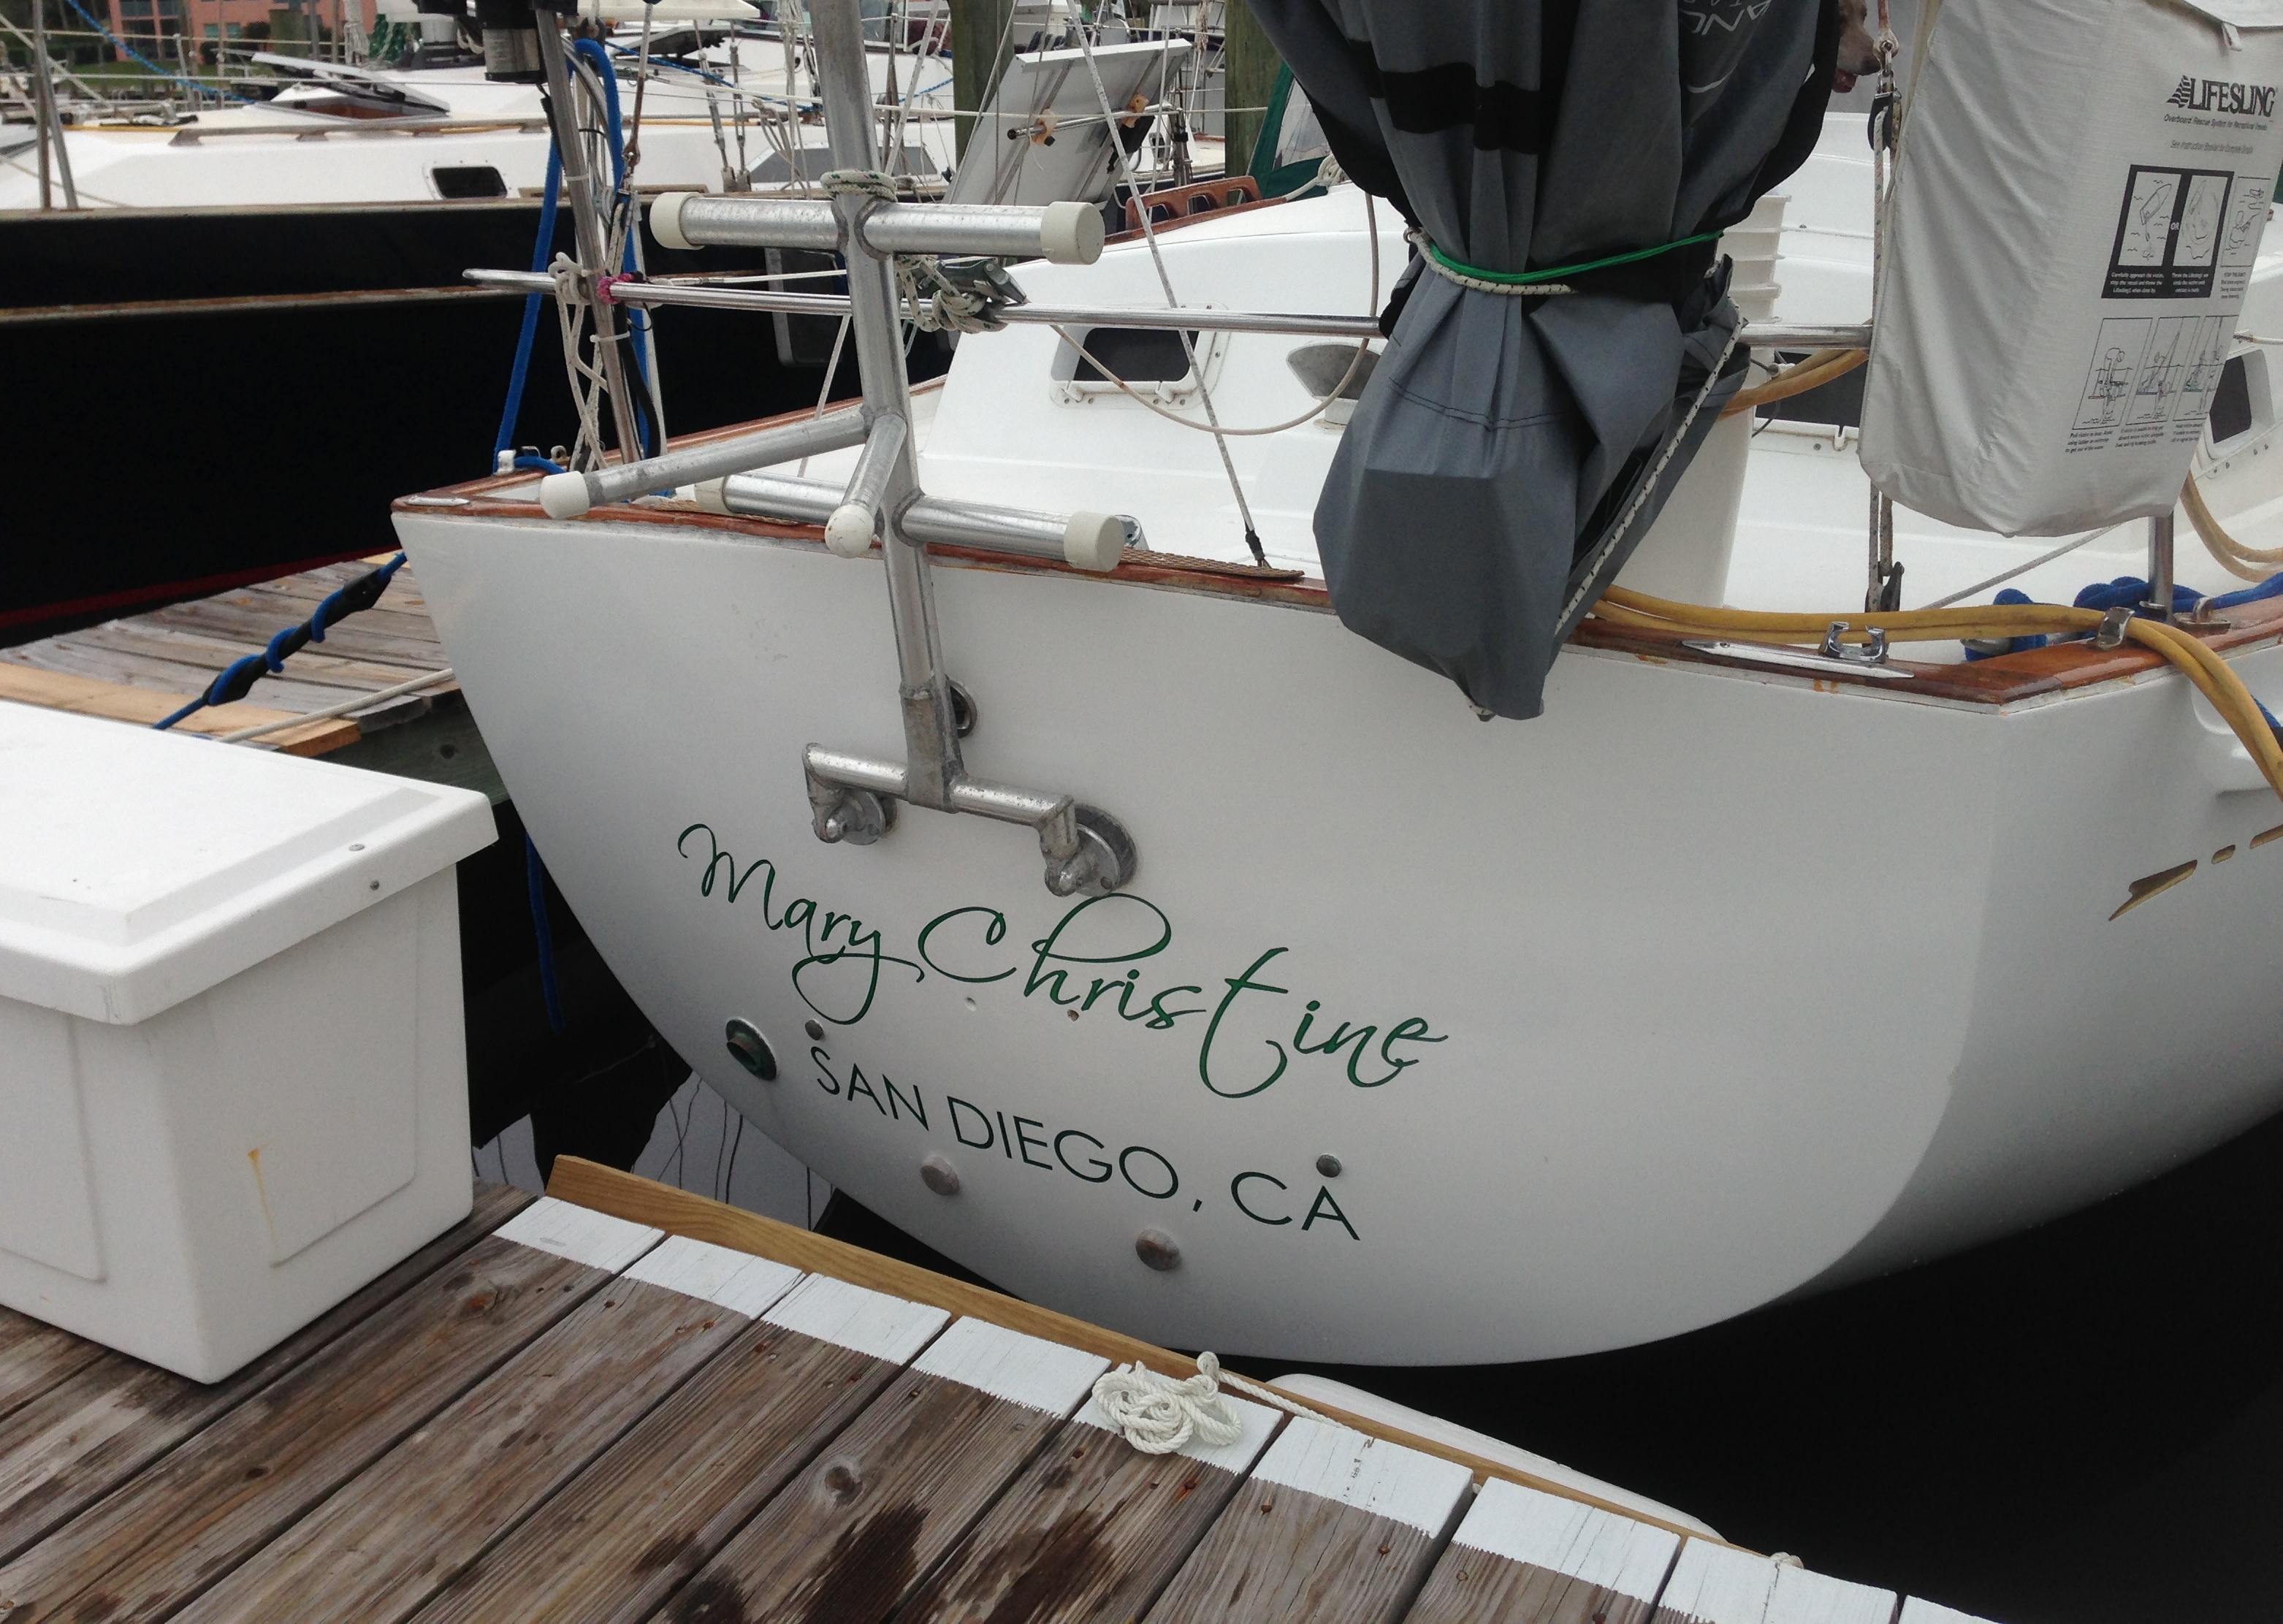
Rumor has it that it’s bad luck to change a boat name. This didn’t faze us though. Peter and I knew we wanted the name of our boat to mean something special to us. We didn’t want to call her a name that someone else had given her because then it would always feel like she wasn’t ours. Also, she isn’t just a boat to us, she is our HOME filled with love and joy. Her name needed to represent something safe, something protective, and above all something dear to our hearts.
Ever wonder why ships are always referred to as a SHE?
Naval History and Heritage Command says “It has always been customary to personify certain inanimate objects and attribute to them characteristics peculiar to living creatures. Thus, things without life are often spoken of as having a sex. Some objects are regarded as masculine. The sun, winter, and death are often personified in this way. Others are regarded as feminine, especially those things that are dear to us. The earth as mother Earth is regarded as the common maternal parent of all life. In languages that use gender for common nouns, boats, ships, and other vehicles almost invariably use a feminine form. Likewise, early seafarers spoke of their ships in the feminine gender for the close dependence they had on their ships for life and sustenance.”
There’s a lot of old sayings and poems out there about why a ship is called a She. I can’t seem to find the original sources, but this is my favorite:
“We always call a ship a ‘she’ and not without a reason. For she displays a well-shaped knee regardless of the season. She scorns the man whose heart is faint and doesn’t show him pity. And like a girl she needs the paint to keep her looking pretty. For love she’ll brace the ocean vast, be she a gig or cruiser. But if you fail to tie her fast you’re almost sure to lose her. On ships and dames we pin our hopes, we fondle them and dandle them. And every man must know his ropes or else he cannot handle them. Be firm with her and she’ll behave when skies are dark above you. And let her take a water wave – praise her, and she’ll love you. That’s why a ship must have a mate; she needs a good provider. A good strong arm to keep her straight, to comfort her and guide her. For such she’ll brace the roughest gales and angry seas that crowd her And in a brand new suit of sails no dame looks any prouder. The ship is like a dame in that she’s feminine and swanky; You’ll find the one that’s broad and fat is never mean and cranky. Yes ships are ladylike indeed, for take them all together the ones that show a lot of speed can’t stand the roughest weather.” – Anonymous
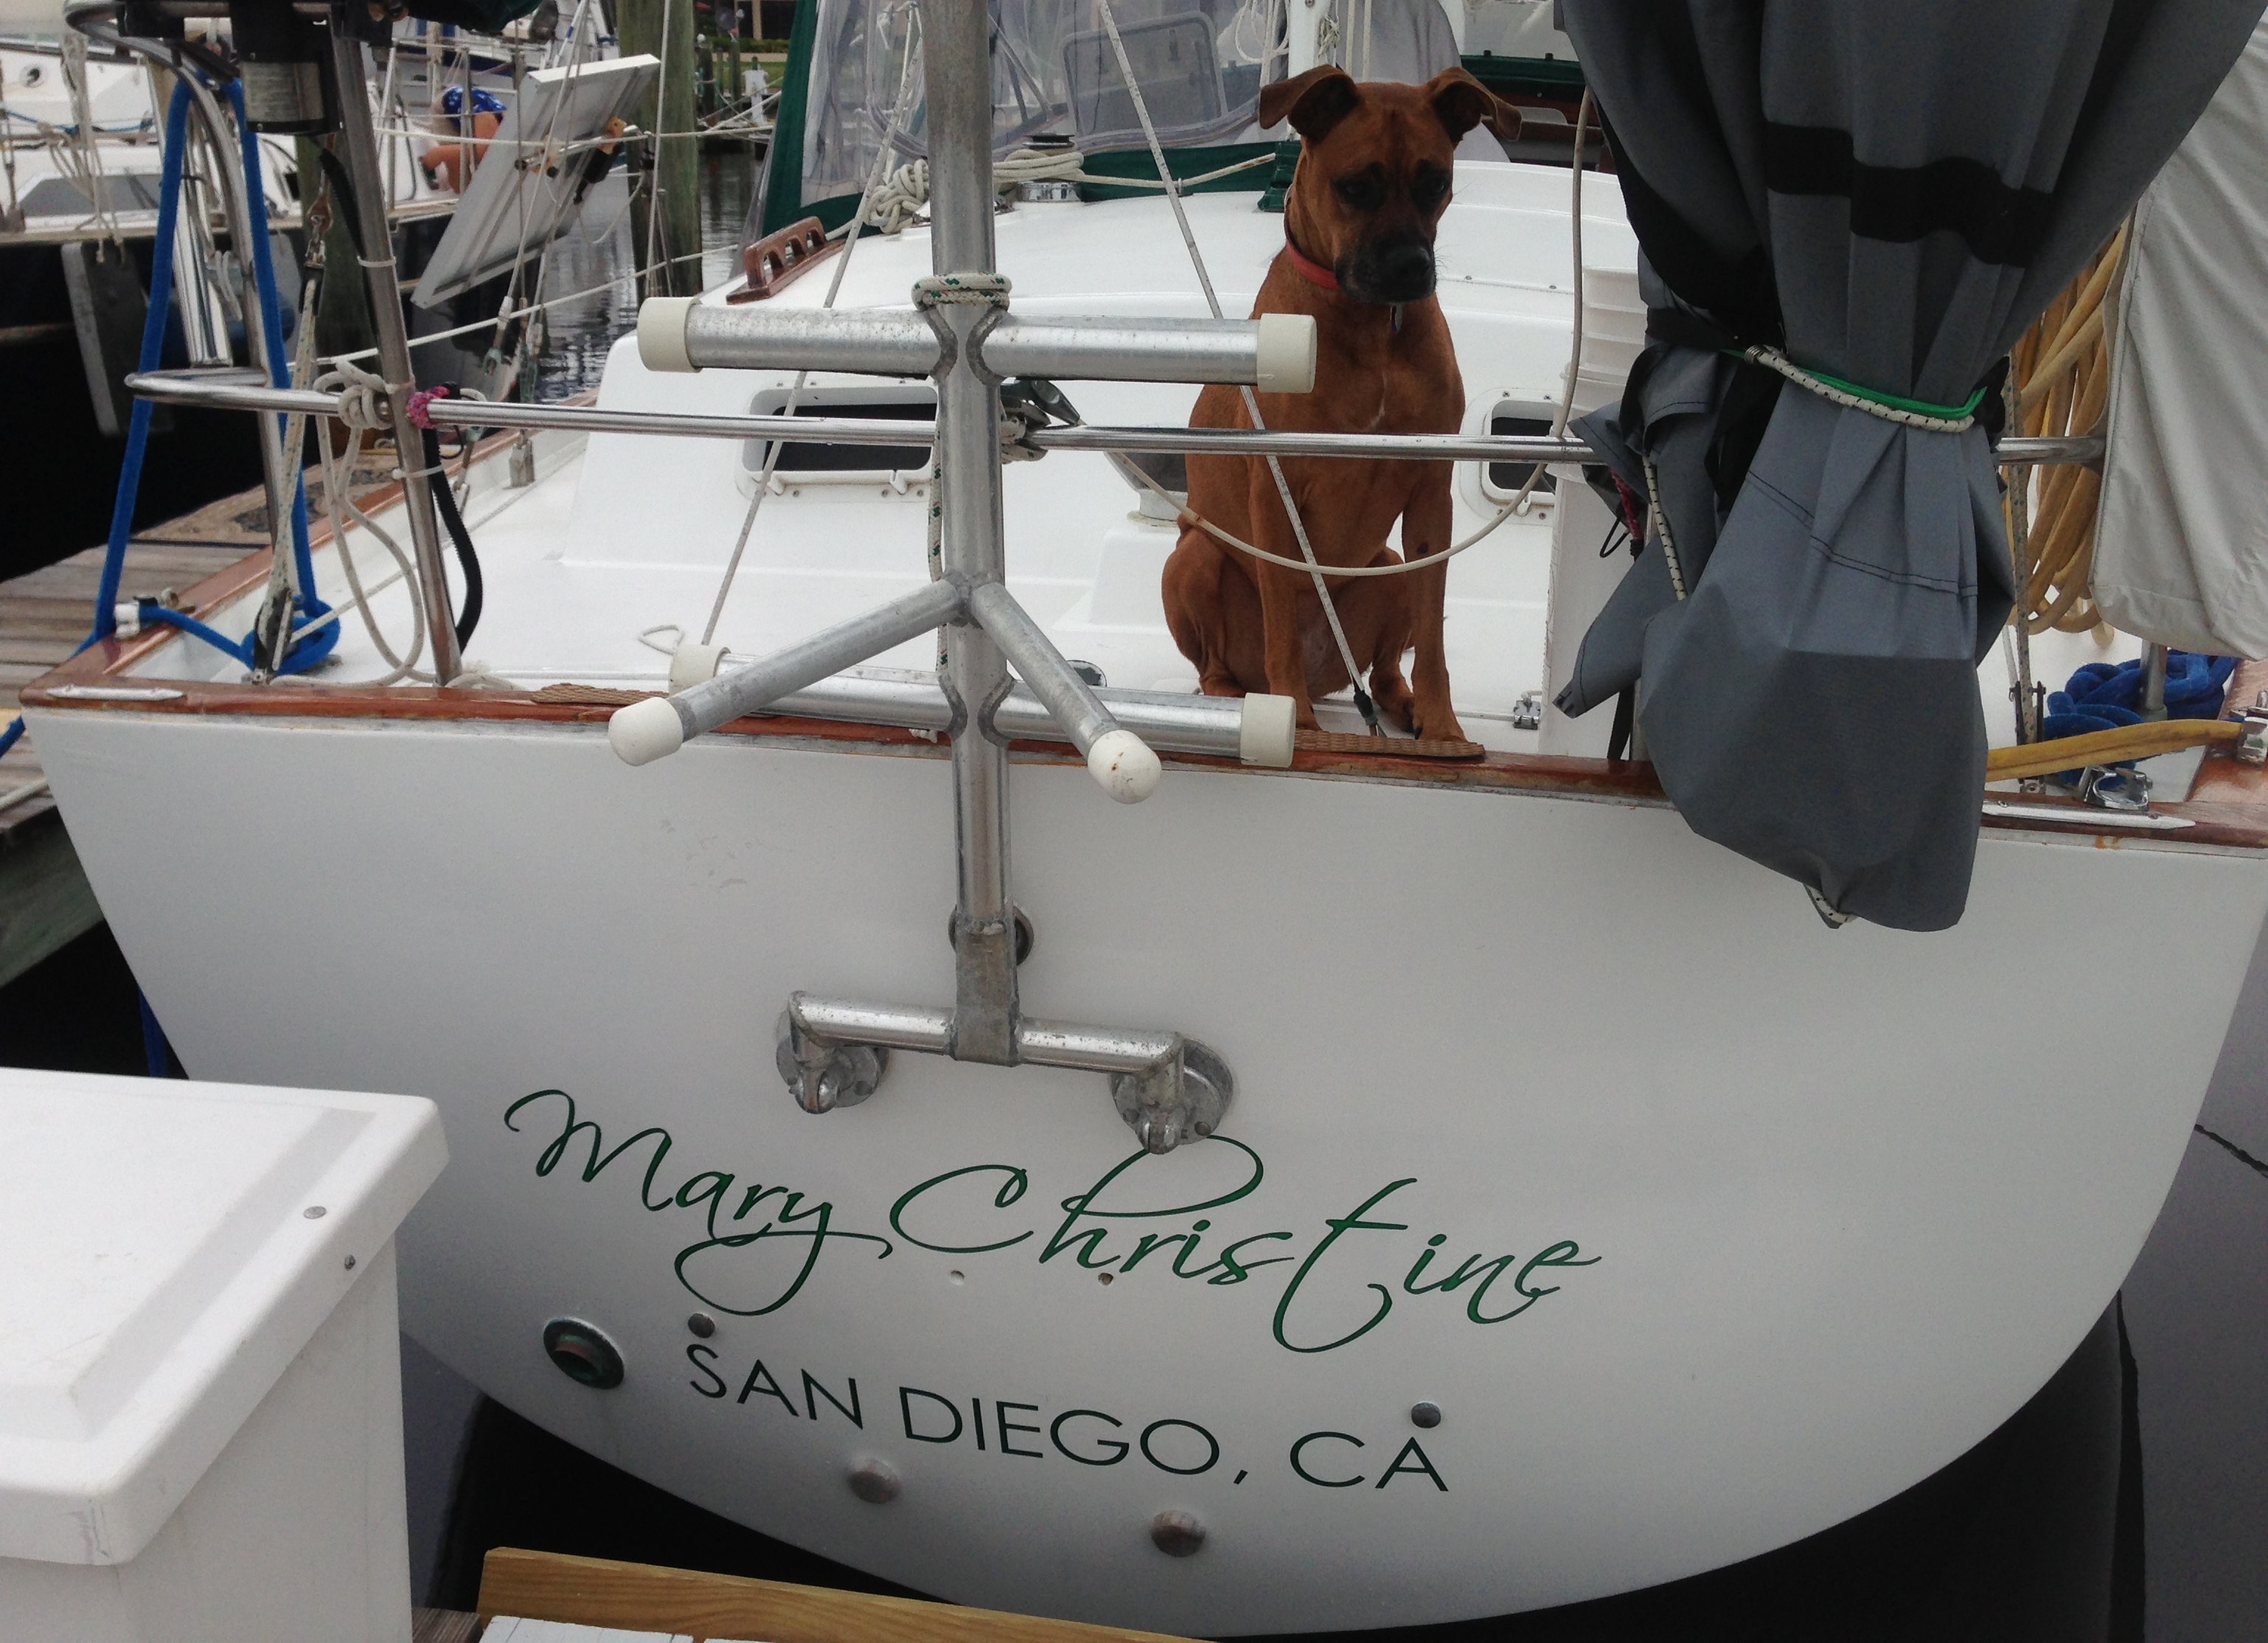
Without question, we named our boat “Mary Christine” in honor of Peter’s mother, Mary Christine Pieschel. She passed away in 2012 after a long battle with breast cancer. We know she will watch over us and keep us safe as we begin this amazing journey. Although she won’t be here in person, she will be with us in spirit each and every day. After we decided on the new name, we had to follow certain steps to get everything changed over properly. We made sure to put the new name on all of the closing documents when making the purchase, and of course listed Mary Christine as the new vessel name when filing the transfer of Certificate of Documentation with the National Vessel Documentation Center (US Coast Guard).
We had heard there were ways to avoid the bad luck associated with changing the name so with a little research we found some “good” superstitions to protect us. We aren’t overly superstitious people but when it comes to a legend like this one, it’s better safe than sorry!! There were quite a few different versions out there on how to appease the sea and wind gods and purge the old name from the Ledger of the Deep but we decided on the Denaming and Renaming ceremonies described on caribbean-pirates.com. Click ‘here’ for the thorough instructions we followed. Just for good measure, we did all three of the denaming options listed.
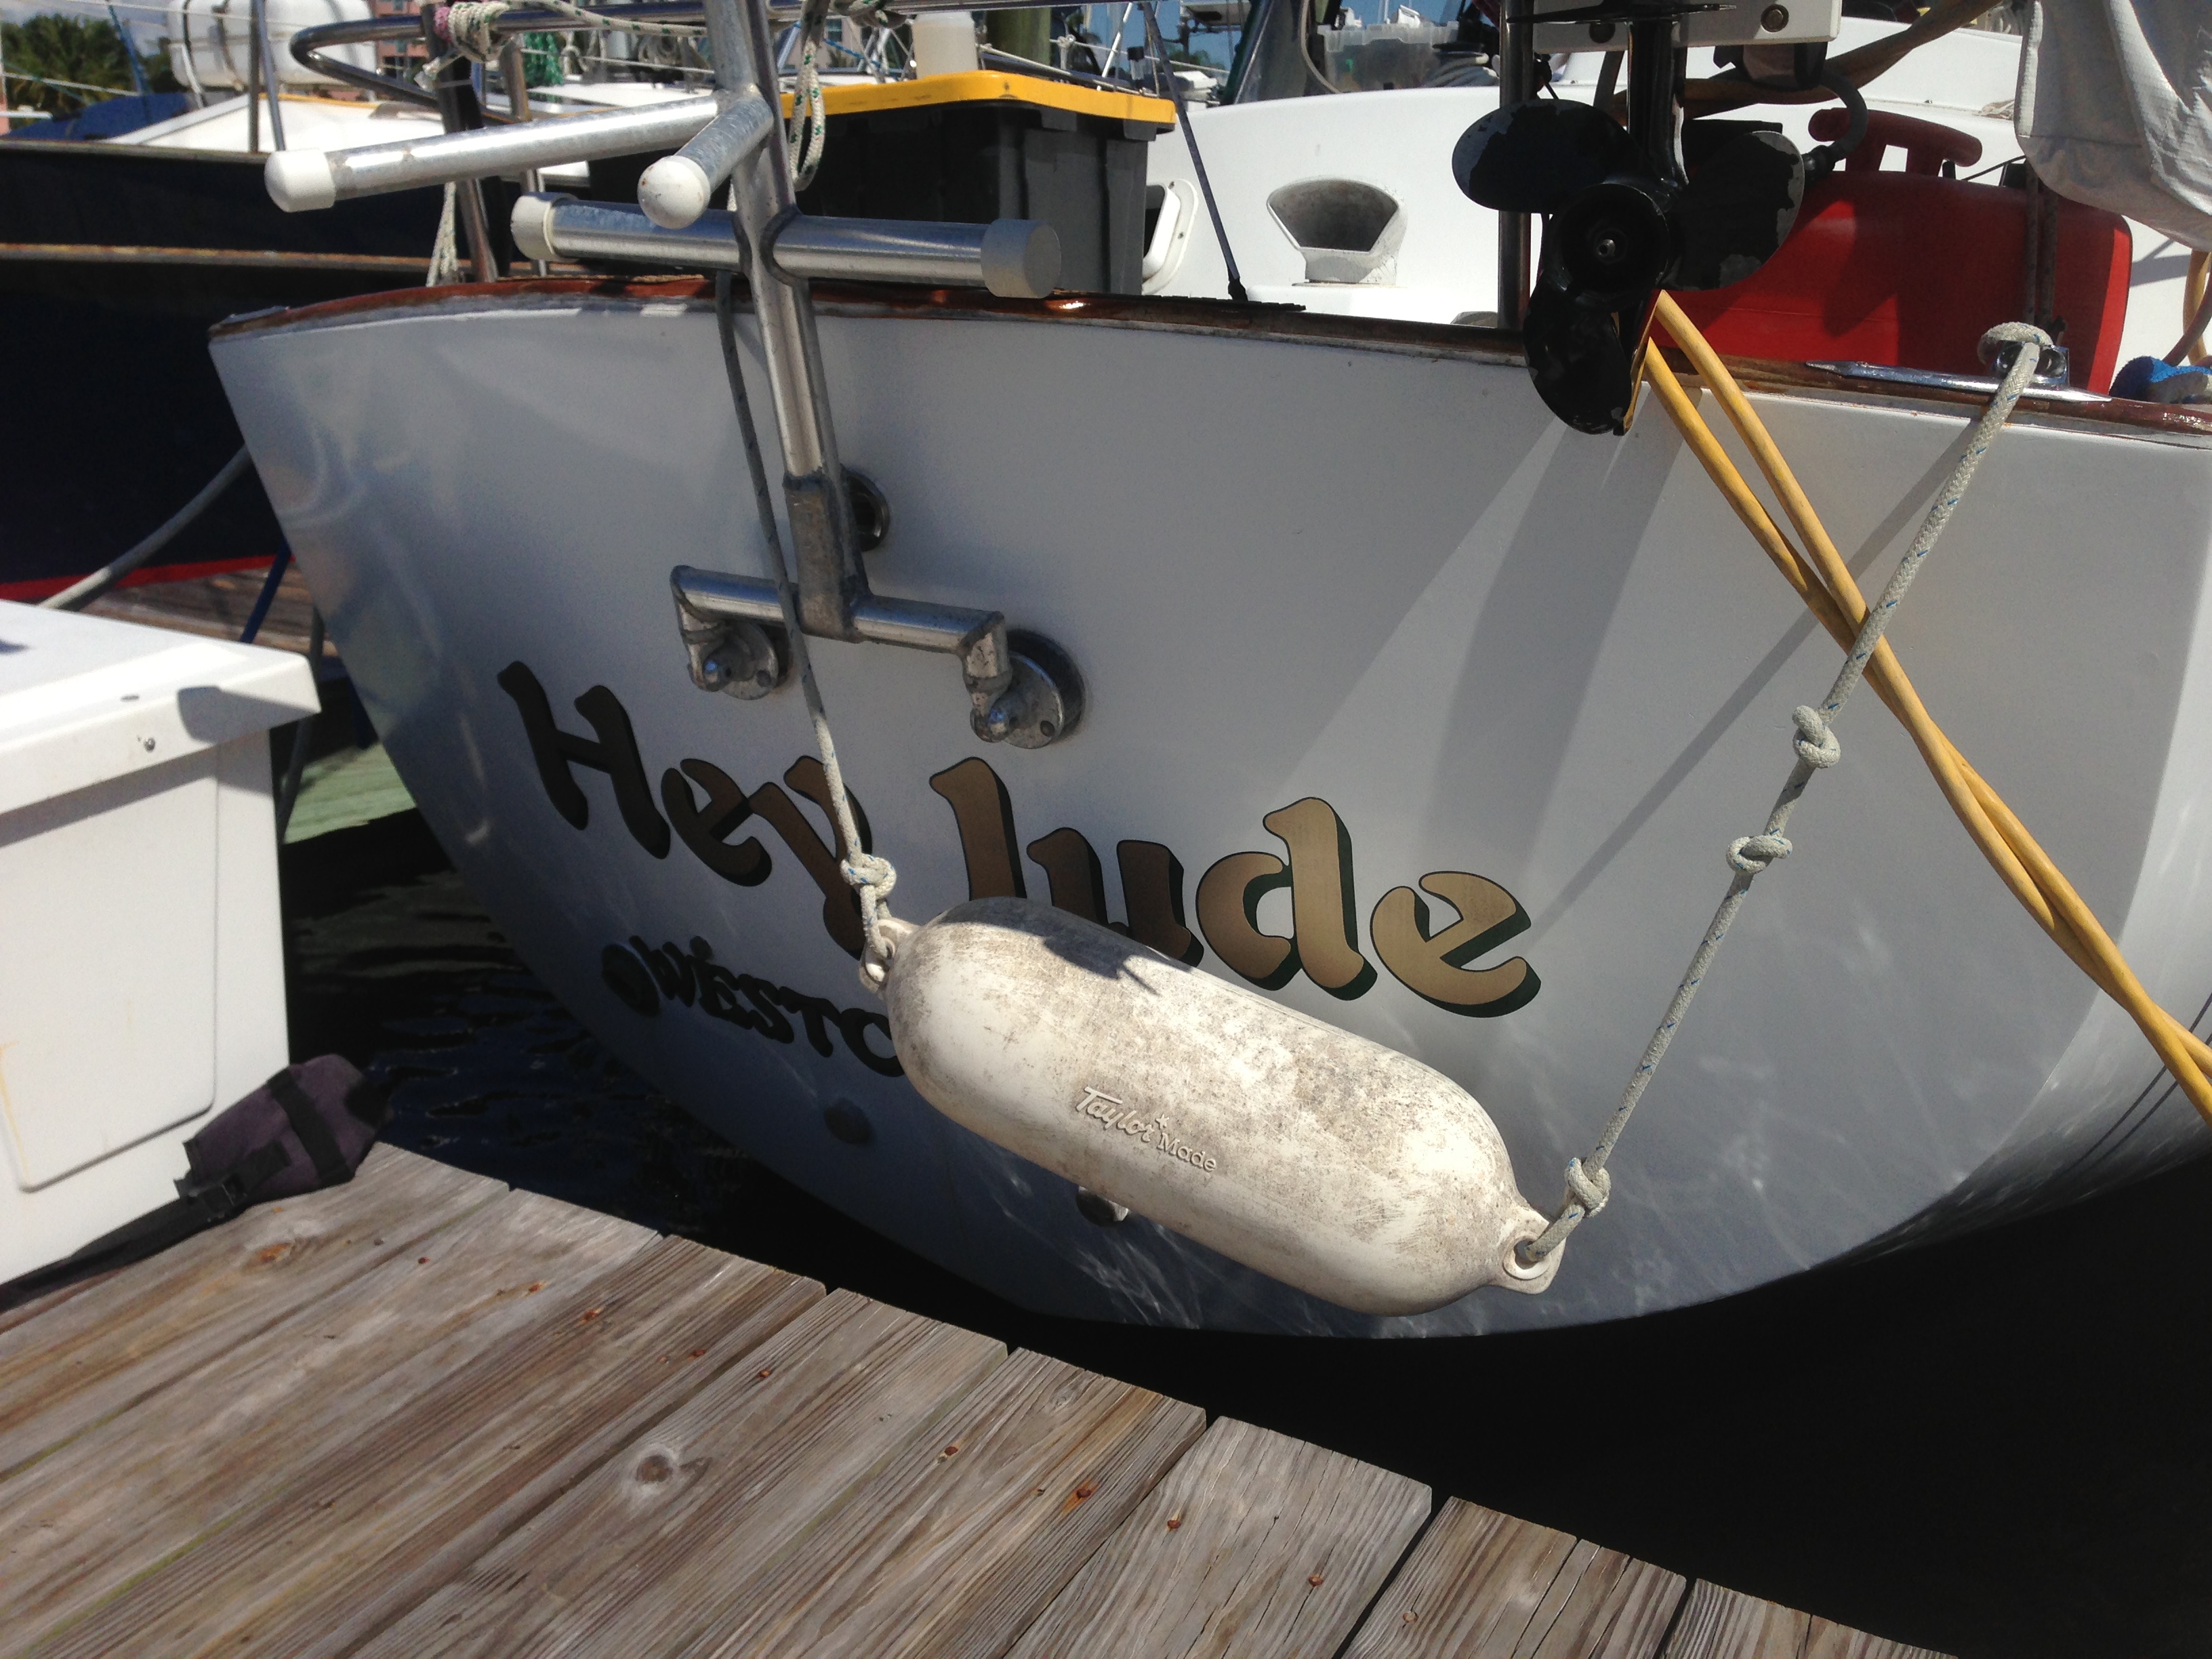
This began with taking off EVERY item on the boat that had the old name written on it. I will say this… the previous owners did a STELLAR job of making sure they had everything labeled. I found “Hey Jude” written inside book covers, on the edges of all the charts they left us, on the cover of all the manuals, on the life jackets, and even on the propane tanks! Good thing we have already needed to refill the propane tanks and taken them out of the wet locker in the aft deck, or we wouldn’t have seen that the old name was written several times all over both tanks and underneath where they were bolted down. Permanent marker would suffice to make the existing permanent marker lettering illegible, but we tore off everything else we could physically remove.
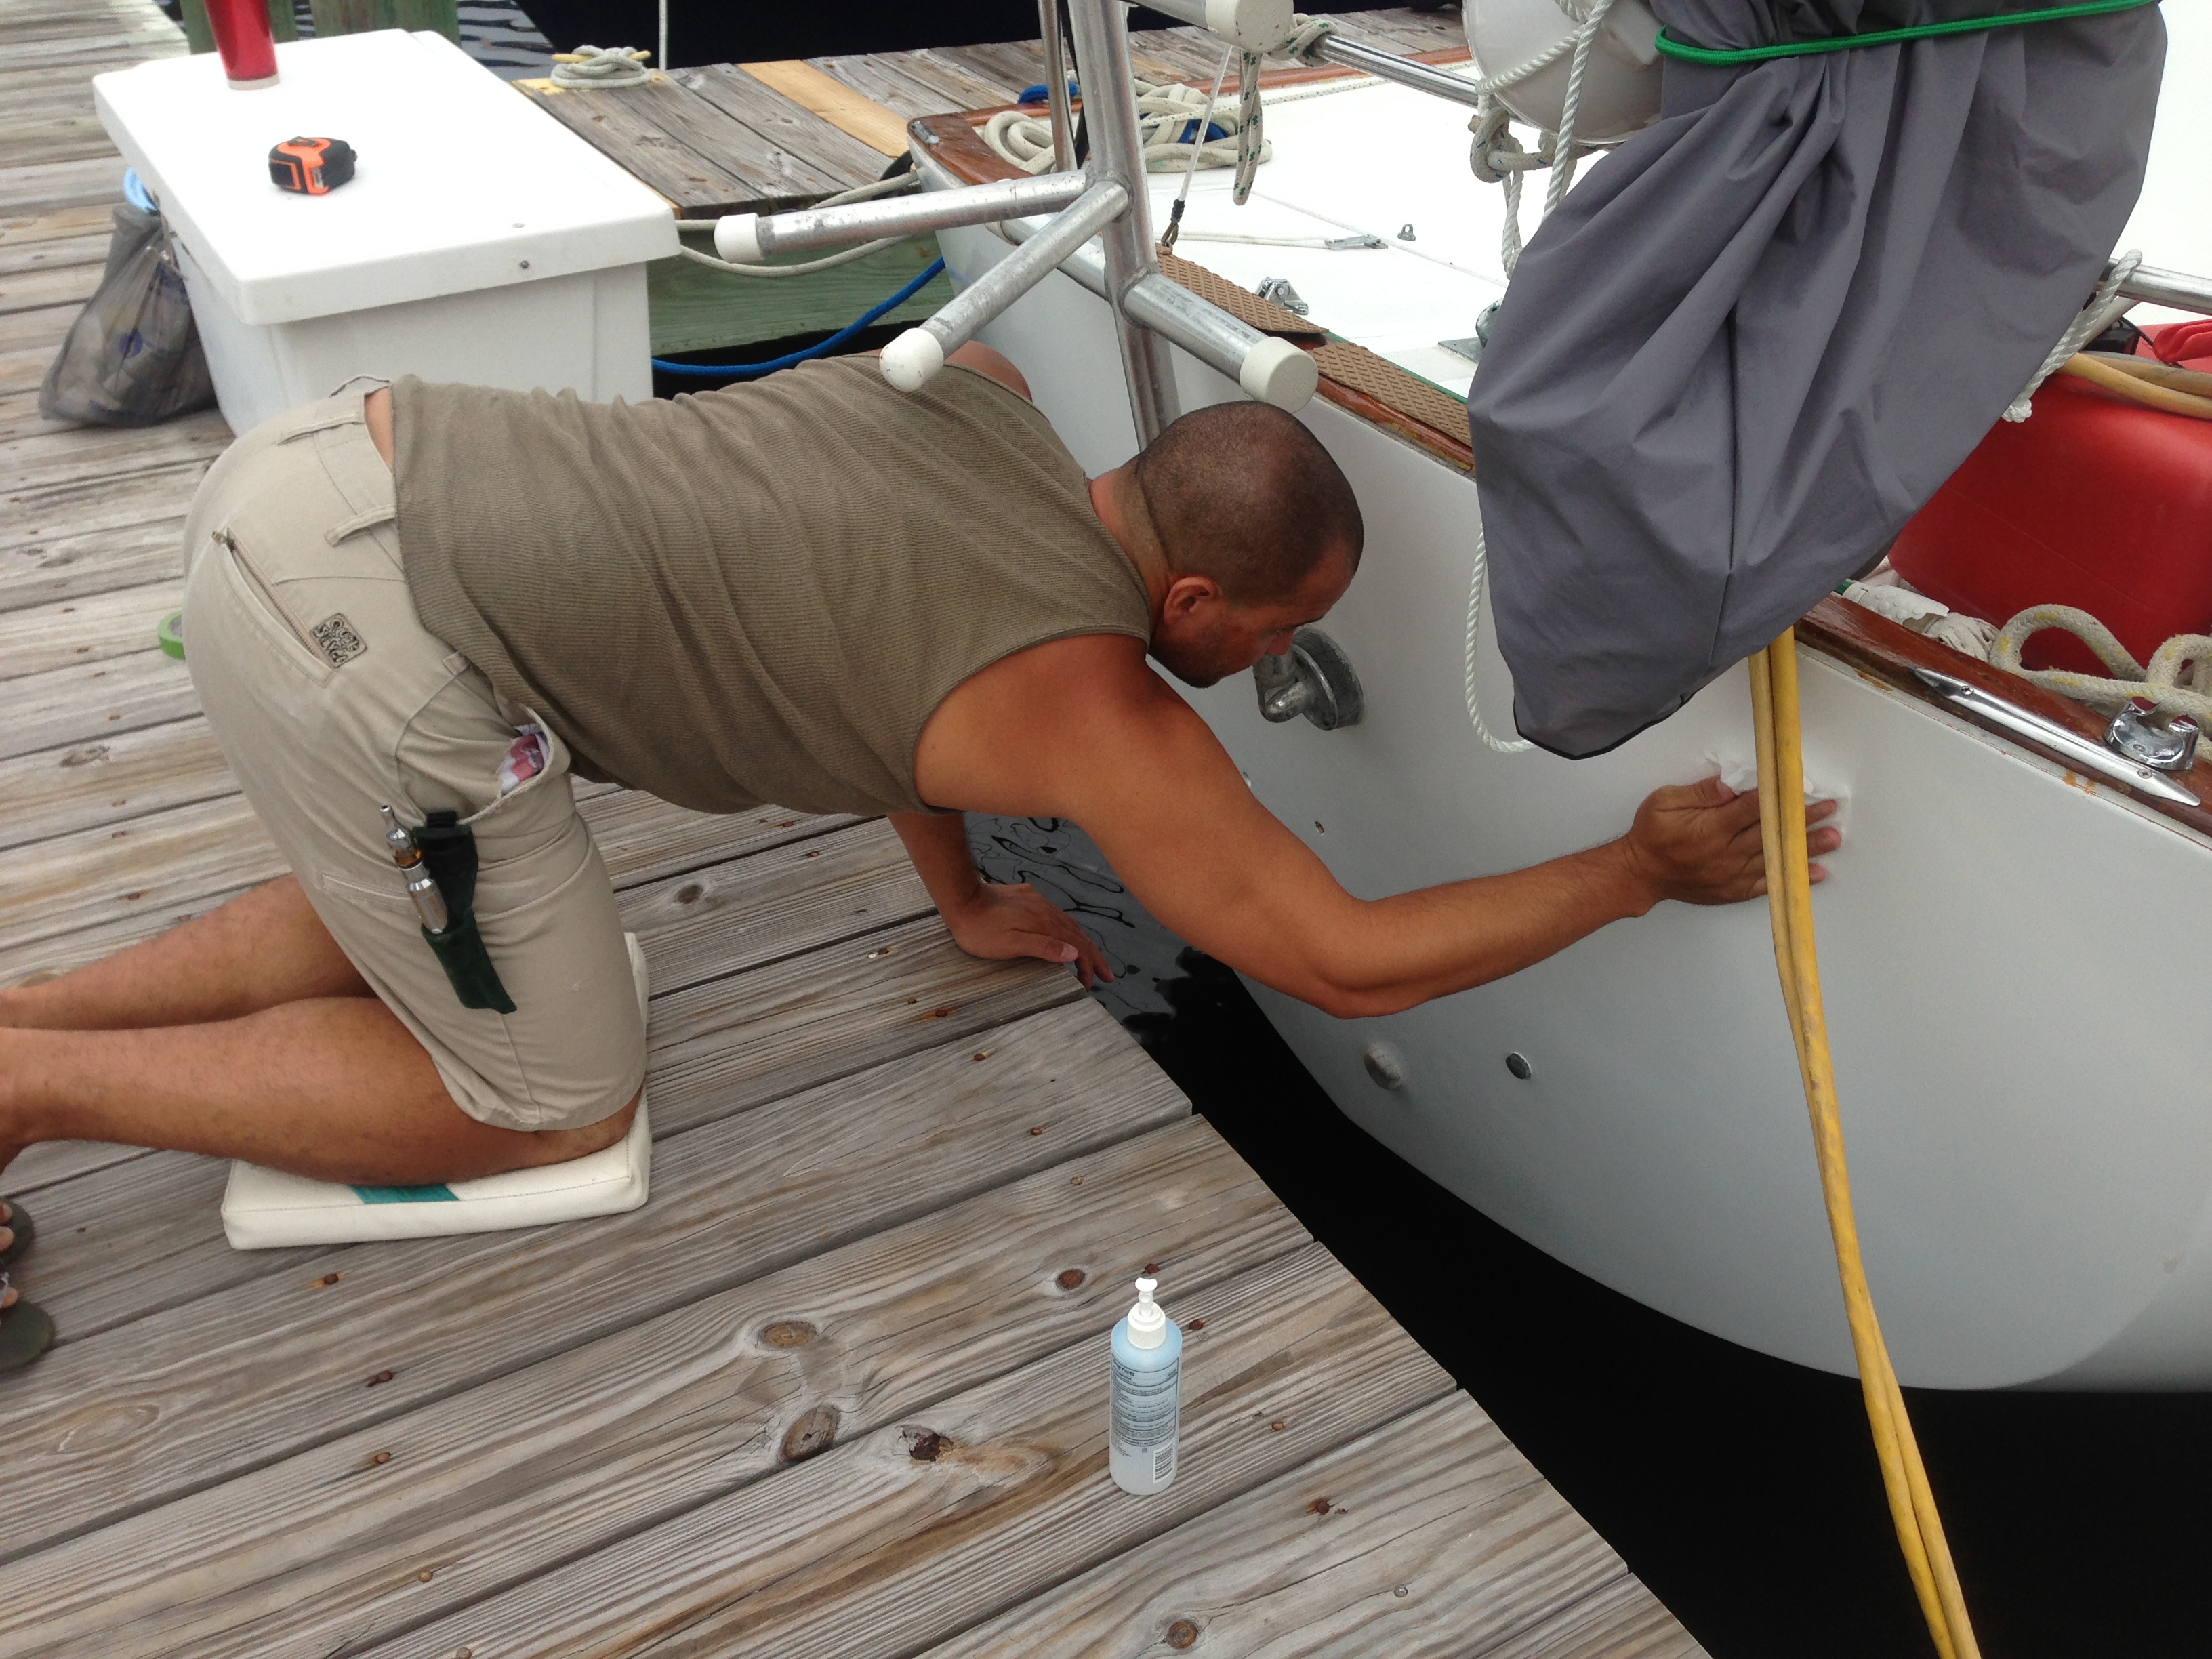
The last piece that had to be removed was the vinyl lettering on the transom. Lucky for us, it was just vinyl and not painted on. I waited for high tide and brought my wireless Jambox out to the stern. Tunes definitely eased the monotony of this job. Its been a long time since I’ve laid out in the sun on a dock but this was the perfect opportunity for me to catch some rays so I changed into my bikini and grabbed a towel, a cold pop, my tunes, some sunscreen and a hat. I tried using a scraper but my nails did a better job. The outside of the lettering was more difficult since it was a single layer of vinyl. The center was thicker and peeled off much easier, especially on the larger letters. About a 1/3 of the way into it, I beckoned for help in fear of taking all day. With Peter’s help I was able to take some pictures and got every last bit peeled off.
She looked so naked!!! The UV damage wasn’t bad at all since there was a relatively new paint job on the hull. We cleaned the transom up with a little soap and water, and some rubbing alcohol in a few spots that still had adhesive stuck on. The next step was to continue with the Denaming ceremony to purge the old hame from the Ledger of the Deep and to send the ashes of the old name out with the tide.
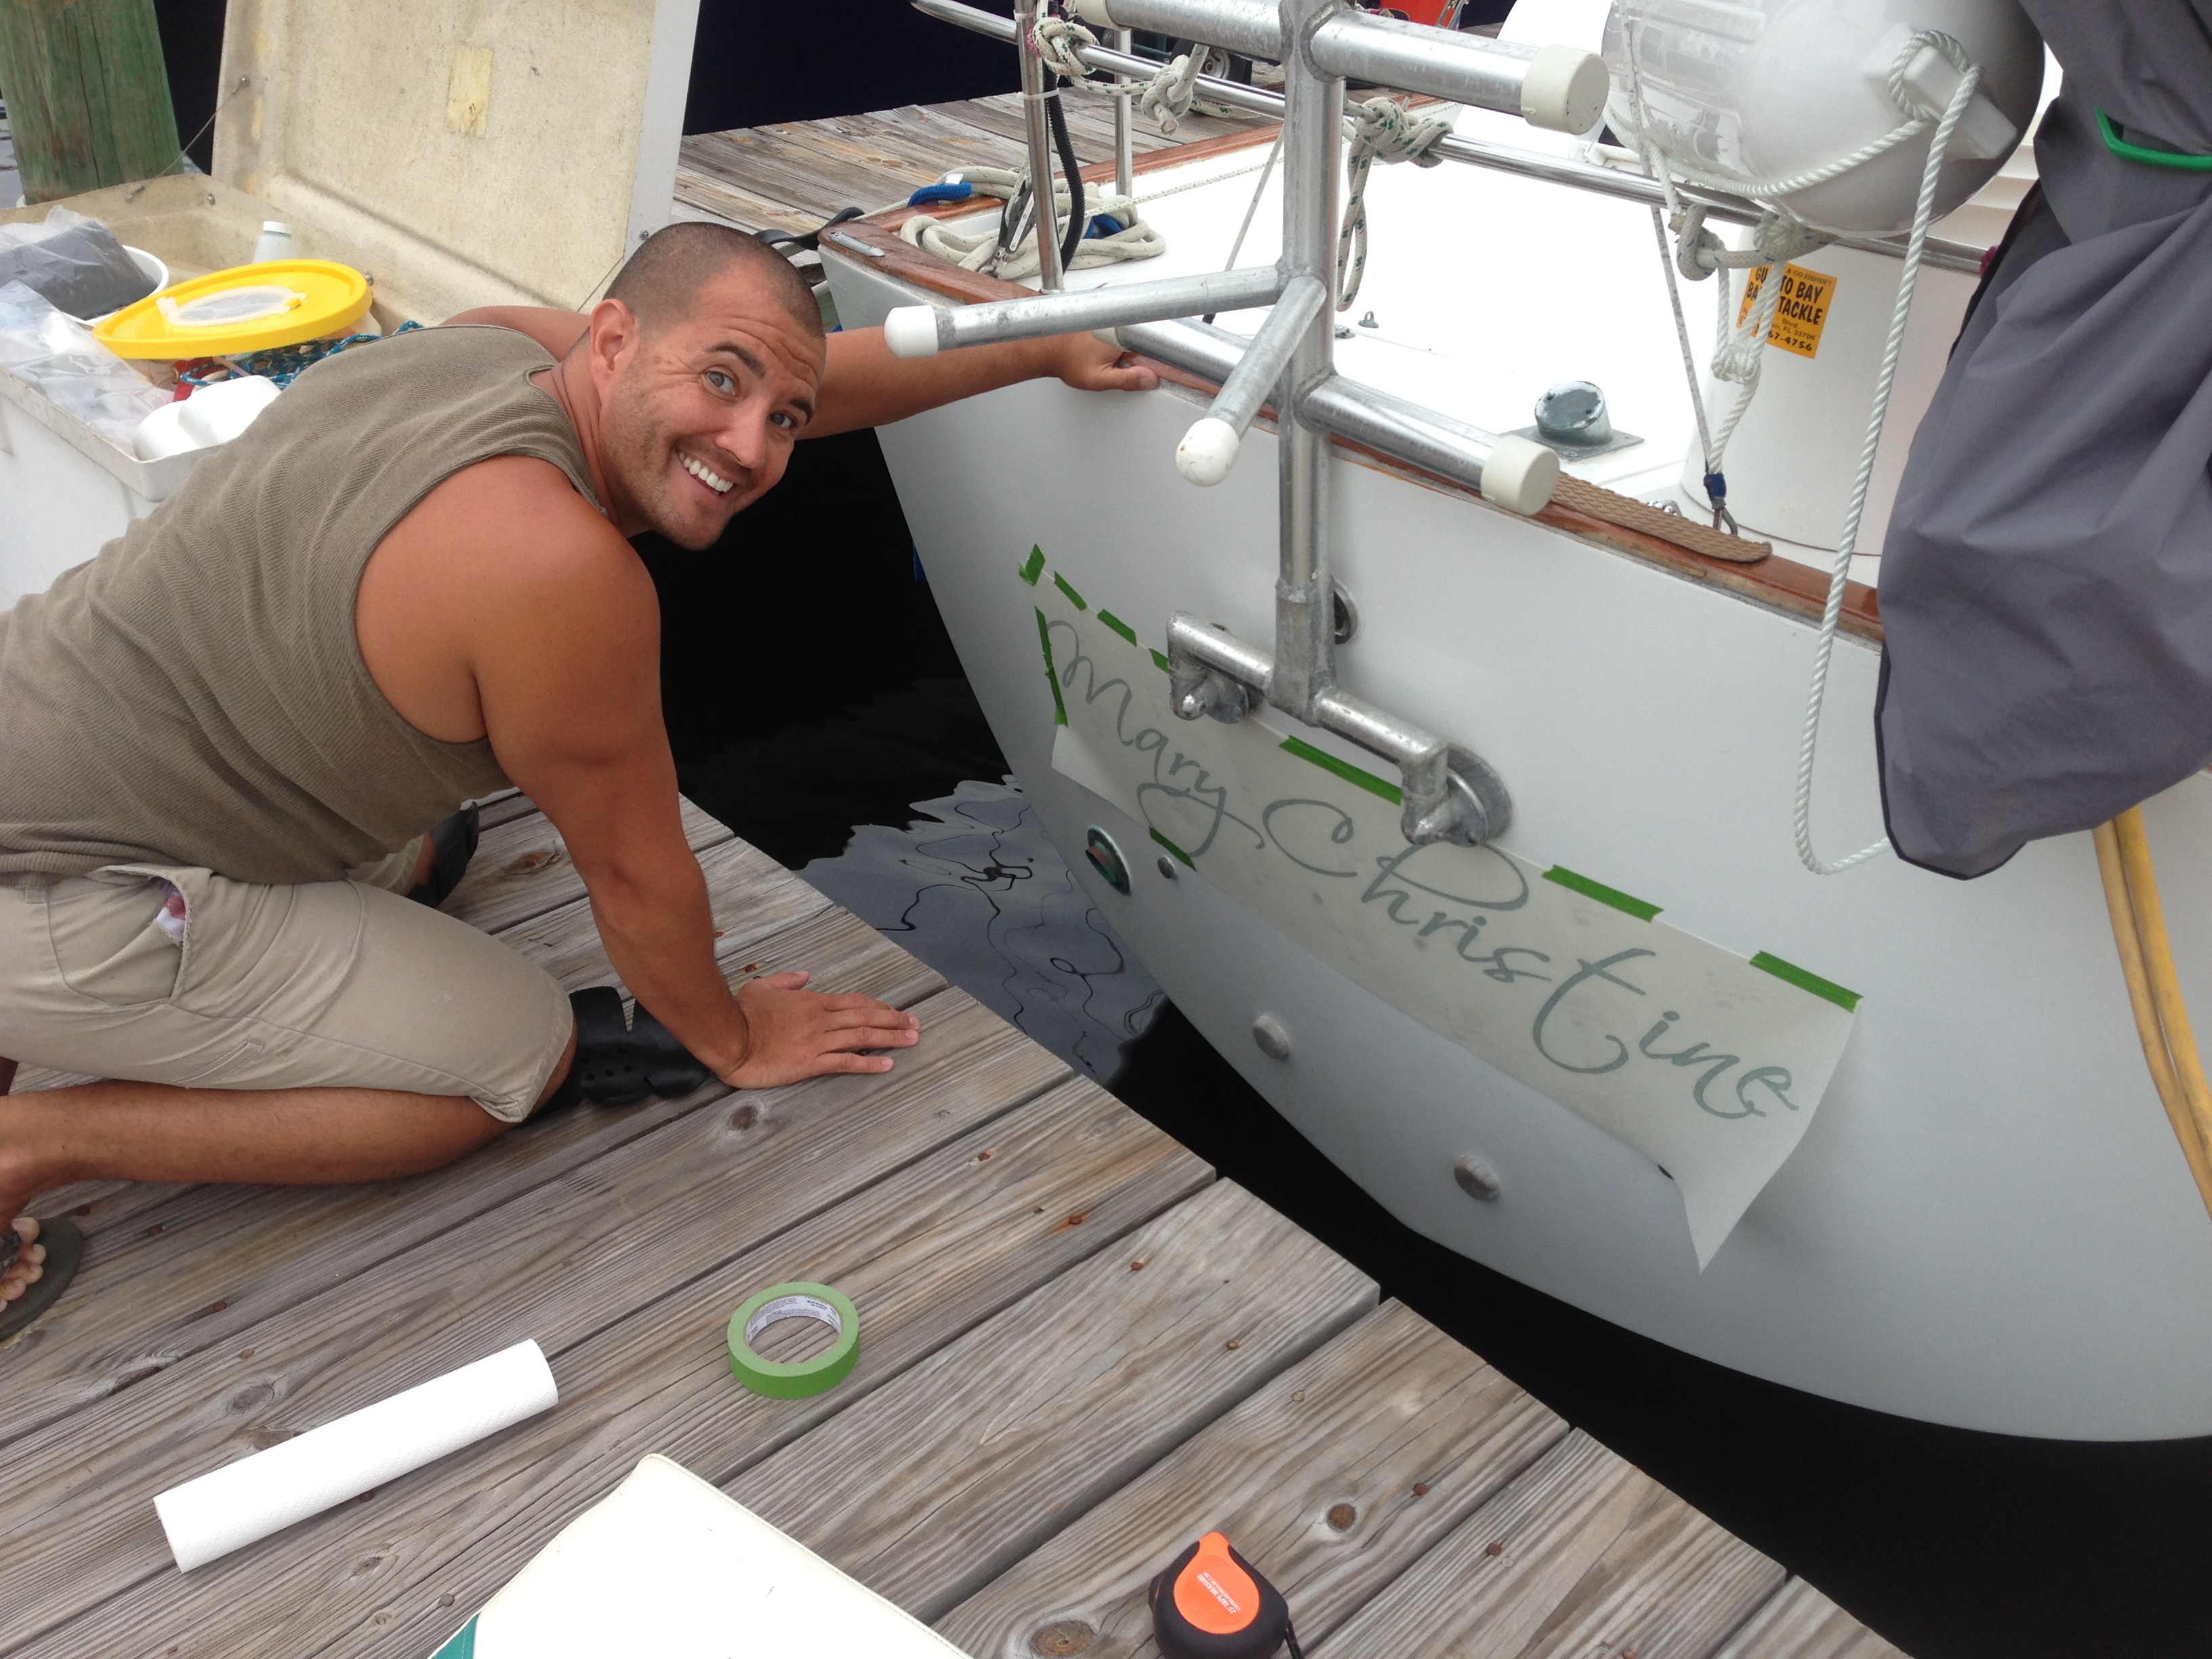
24 hours later we proceeded with the Renaming ceremony and poured champagne overboard to the gods of the wind and gods of the sea as described in the link above. We were finally ready to apply the new lettering and give the Mary Christine a beautiful new look. I had researched the best way to apply new lettering on boats and decided that vinyl would suit us just fine. We could have opted for painting the name on like many people do when you have a vintage boat. This would have cost us at least a few hundred dollars though and doesn’t always last as long. Knowing we don’t plan on returning to the U.S. very soon we opted to go with vinyl which would be easier to replace if it ever got damaged. There are SO MANY places, both local and online to buy vinyl lettering and all seem to have different advice for the application. Some warn of dry applications being too hard for amateurs like us and instead tried to sell us on the wet application method which you can slide around before squeegying out the liquid to set the placement. More important for us was to find the “right” look. Most of the online sites didn’t have much for font or color options and we were getting discouraged. I spent several nights up late on the computer.
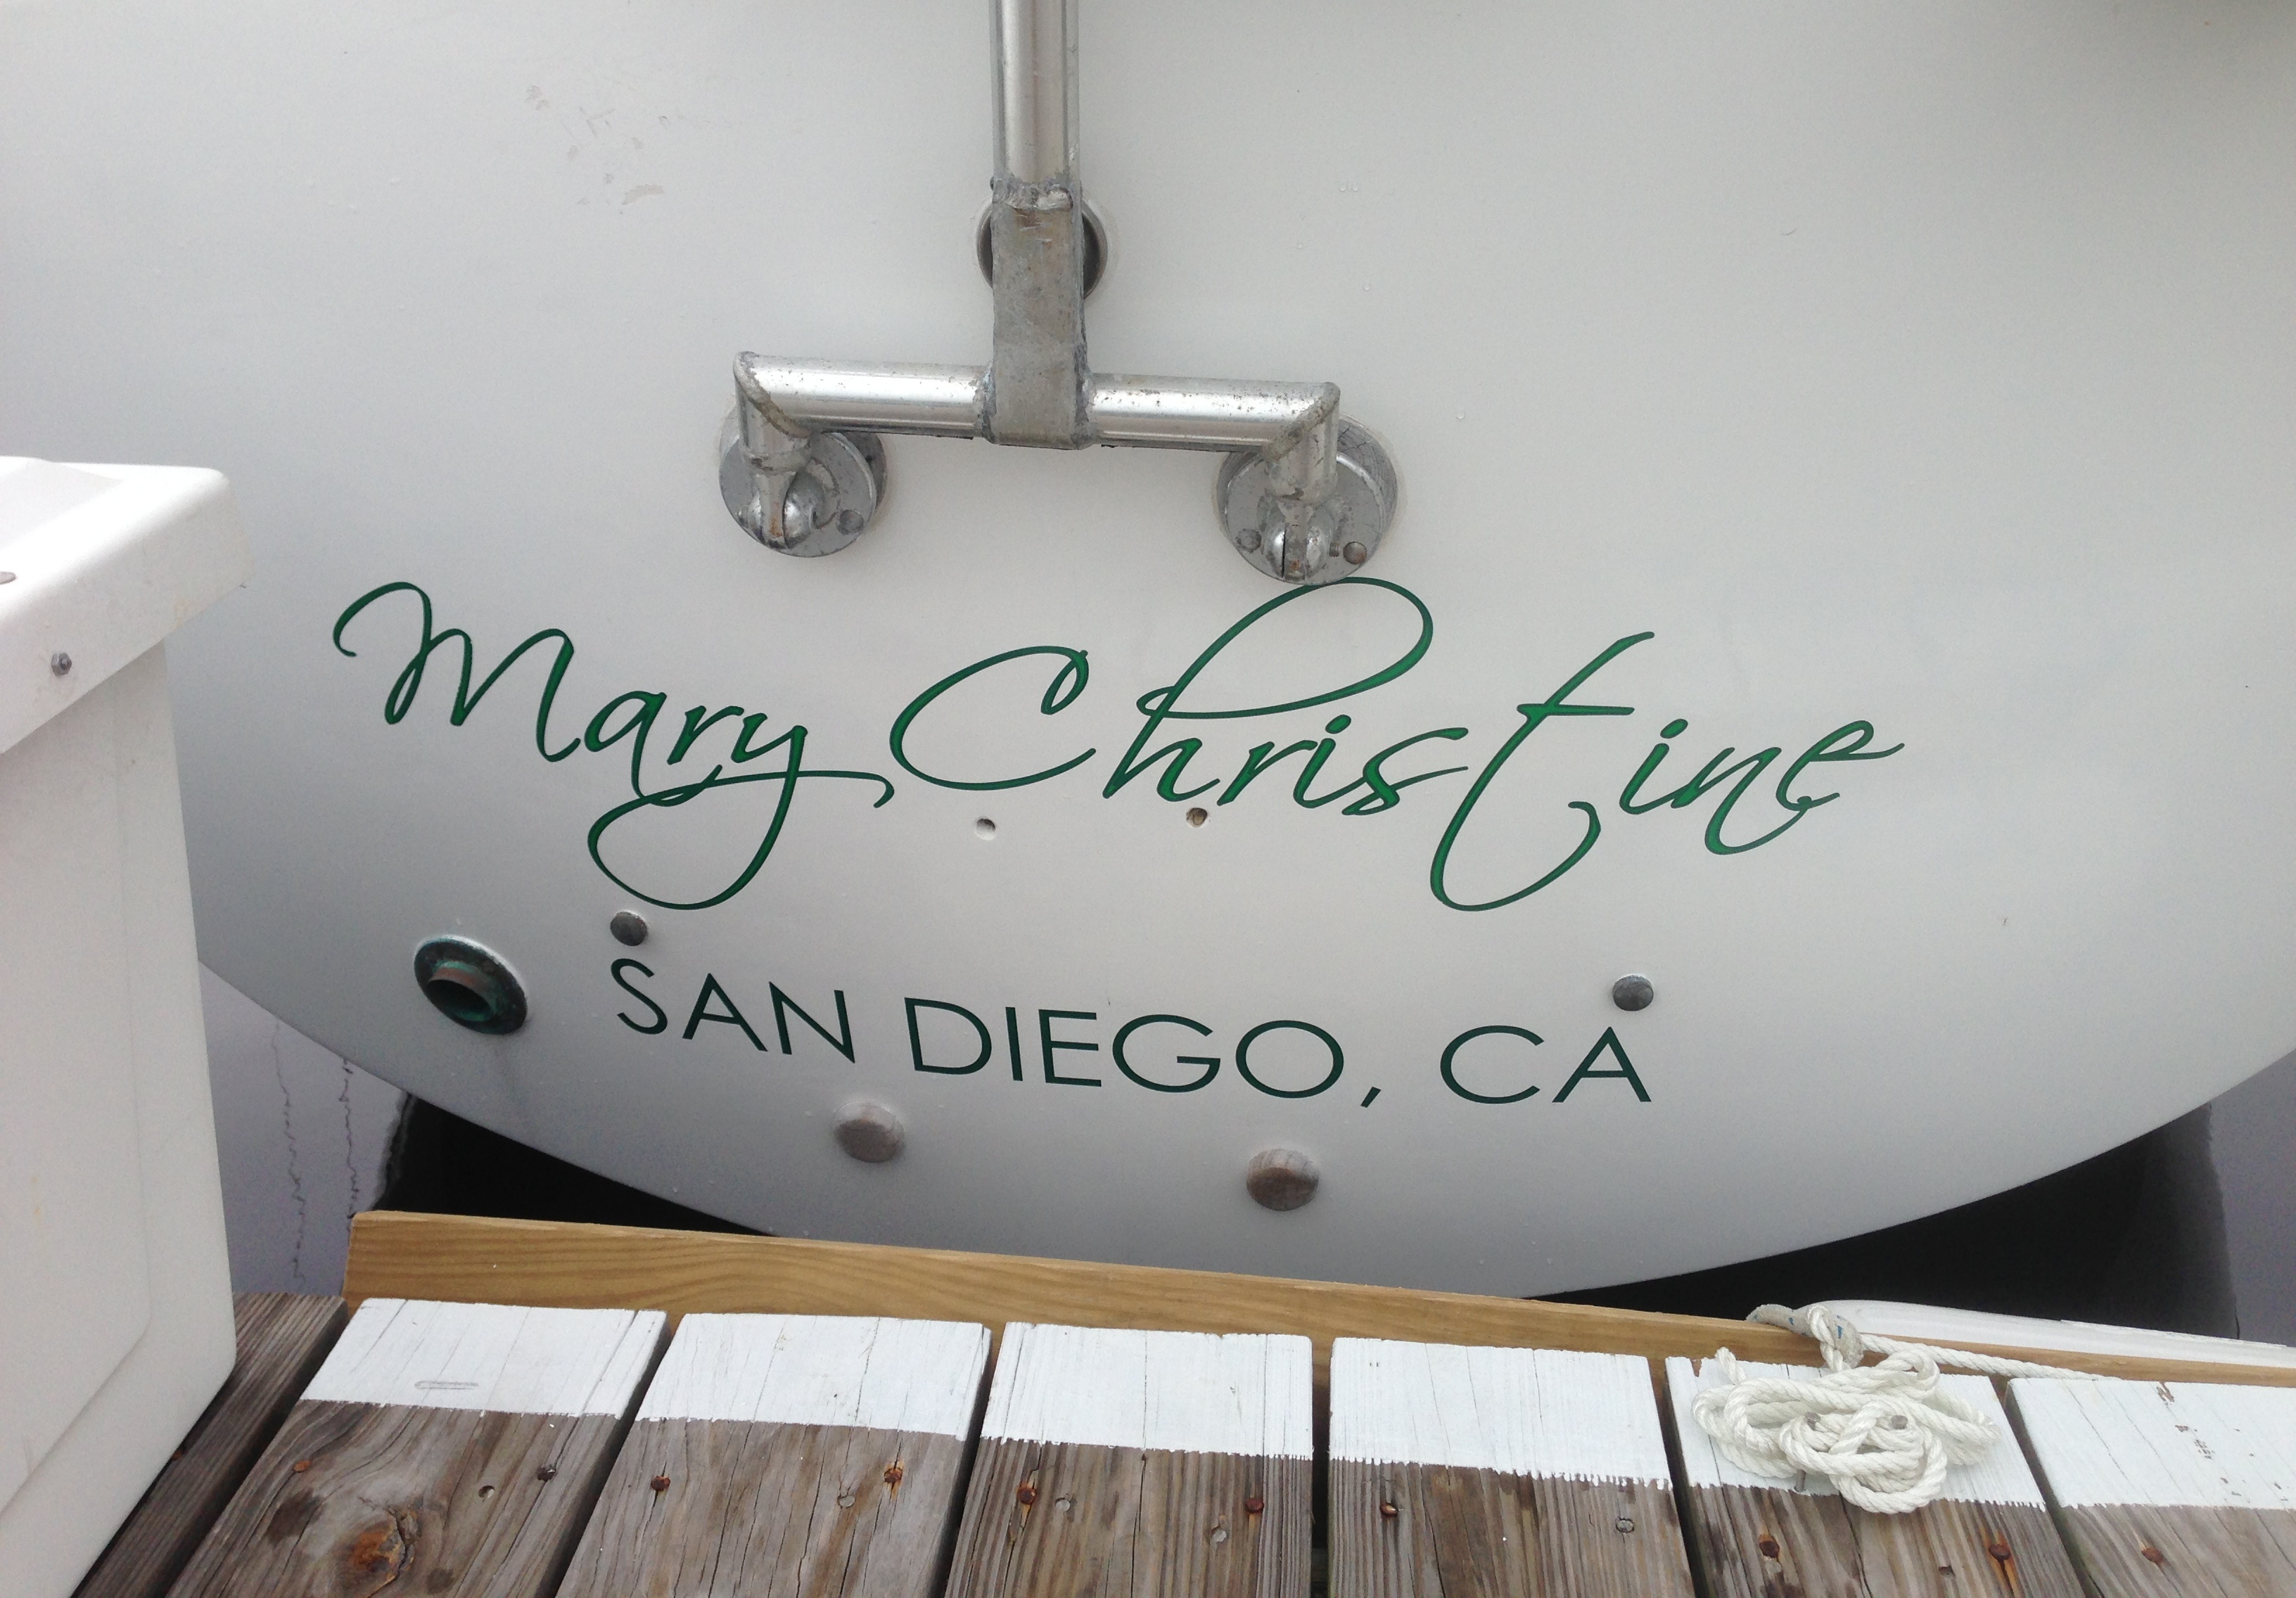
Finally I stumbled upon DoItYourselfLettering.com and I can’t even describe how awesome this site is!!! They do a lot more than just boat lettering, there are vinyl lettering options for lots of different applications. The online interface for creating your design is top-notch and by far better than all the other sites I looked at. Even if you don’t need any lettering done I recommend checking out their site just to play around with the design tools incase you can think of somewhere fun to put the letters later :) Just like the website says, Brad is the owner and he personally answered my call when I had a question about my order. Just by caller ID he knew who I was, what I ordered and all my shipping info. They guarantee their product so if you have any trouble installing it yourself they will send you a replacement for FREE!! It really was pretty easy to install though, just a little patience to make sure its level and centered, and you end up with a DIY project that looks very professional. The customer service was outstanding and the pricing is unbeatable, even with adding a border color, selecting “ready to install” and upgrading to a Premium 3M Cast Vinyl material for an additional $15. The total for both the name and the hailing port was less than $80. If you are putting the lettering on a boat, we highly recommend using the premium material since it will hold up much better in the sun and salt. We selected Scriptina for the font on the name and Century Gothic for the hailing port. If you have any questions about ordering lettering for your boat or other toys please contact us!! I love to spread the word and support great services and products when I find them so others can share the same great experience that I have had.
She is really starting to look as beautiful as we could have dreamed!! It’s all coming together now :)
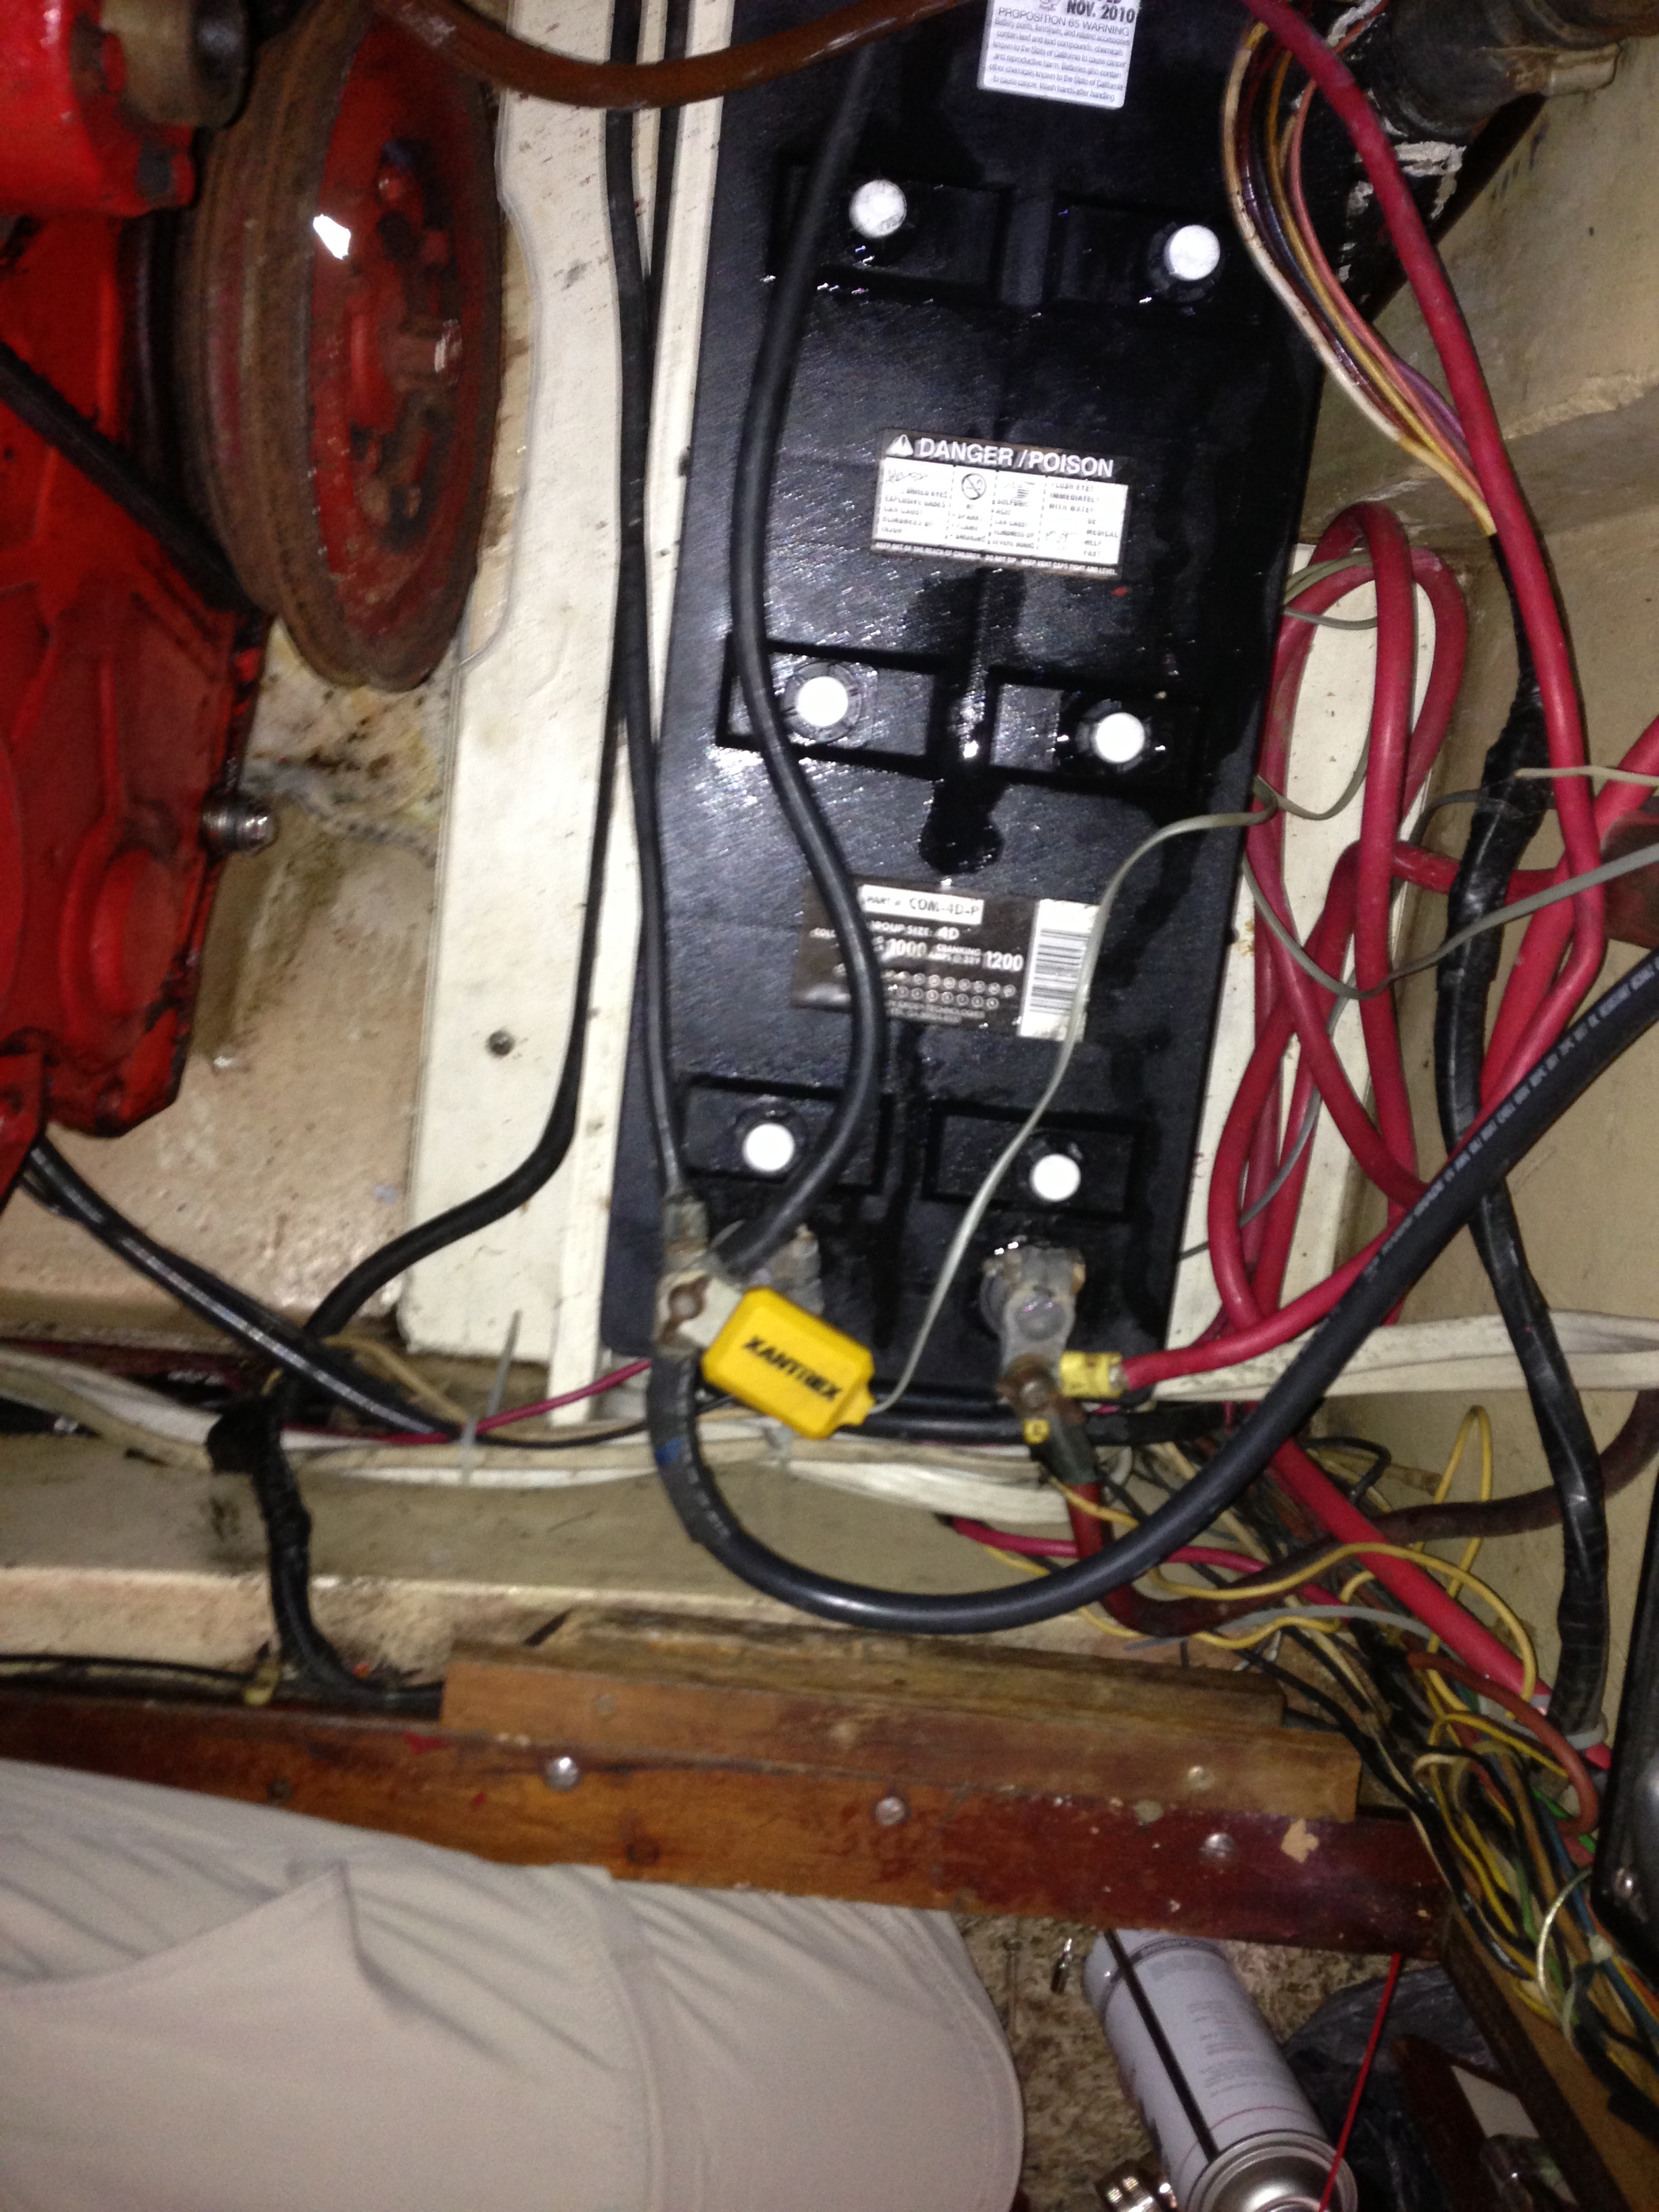
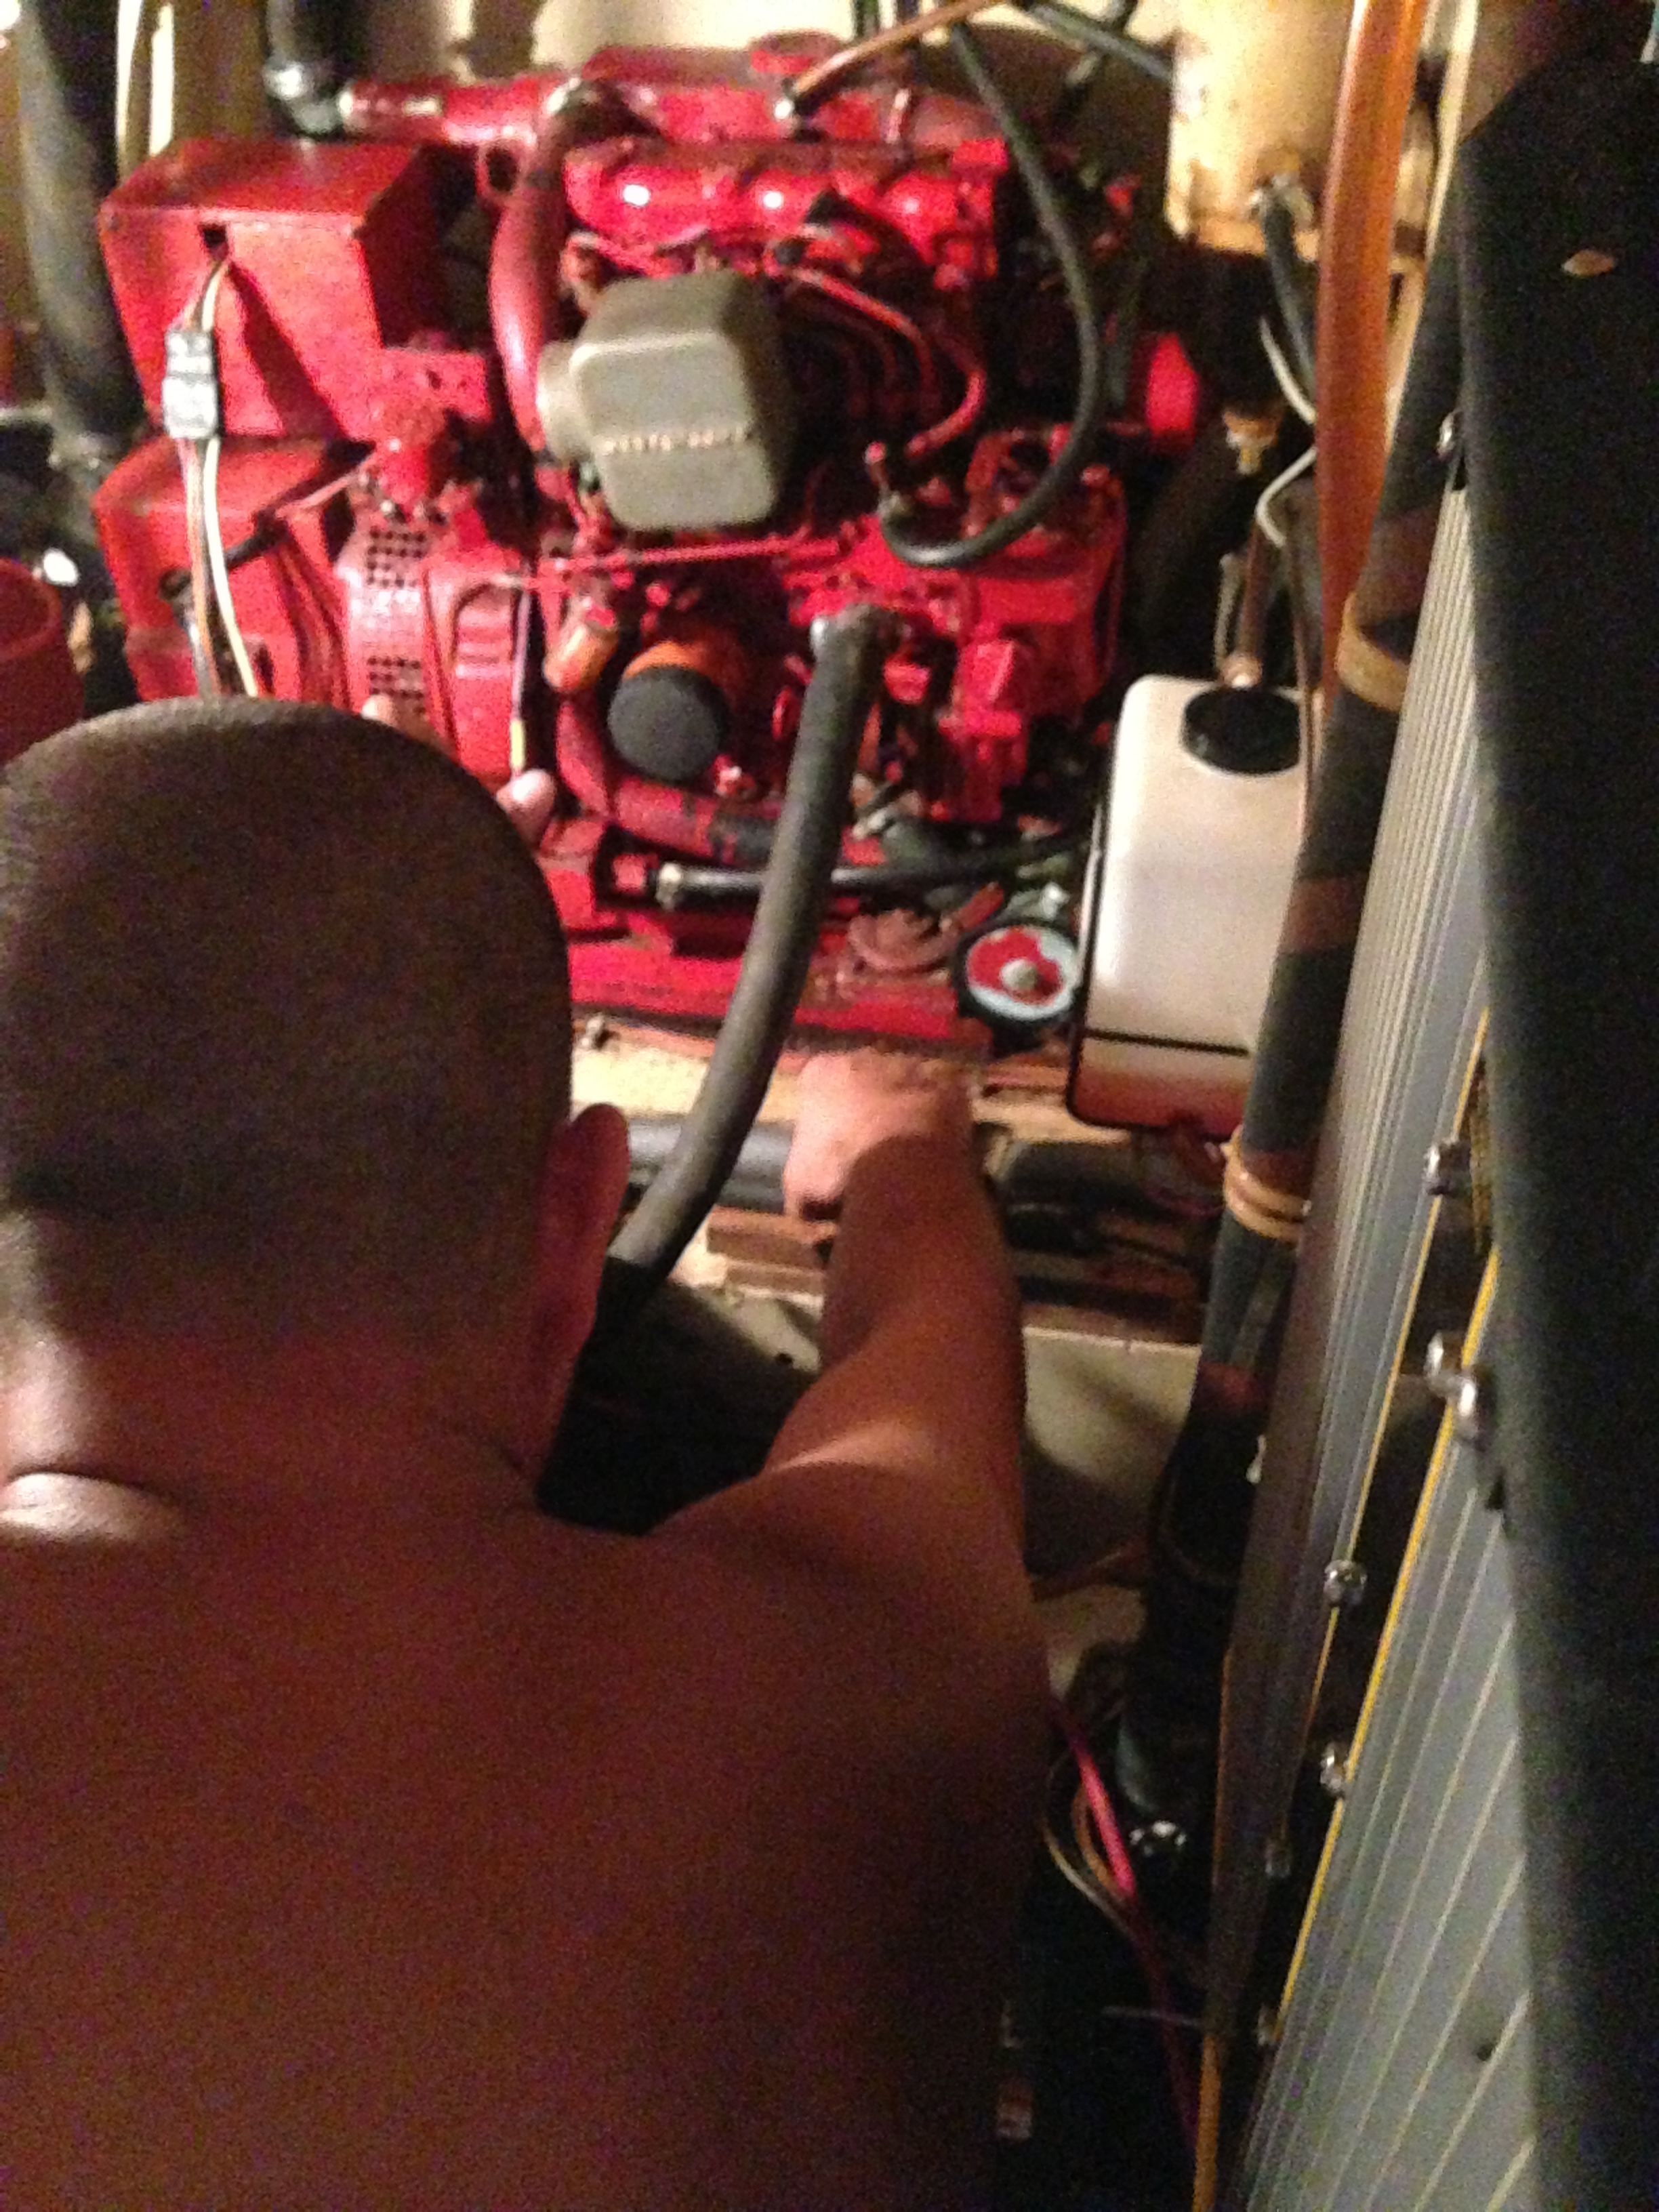
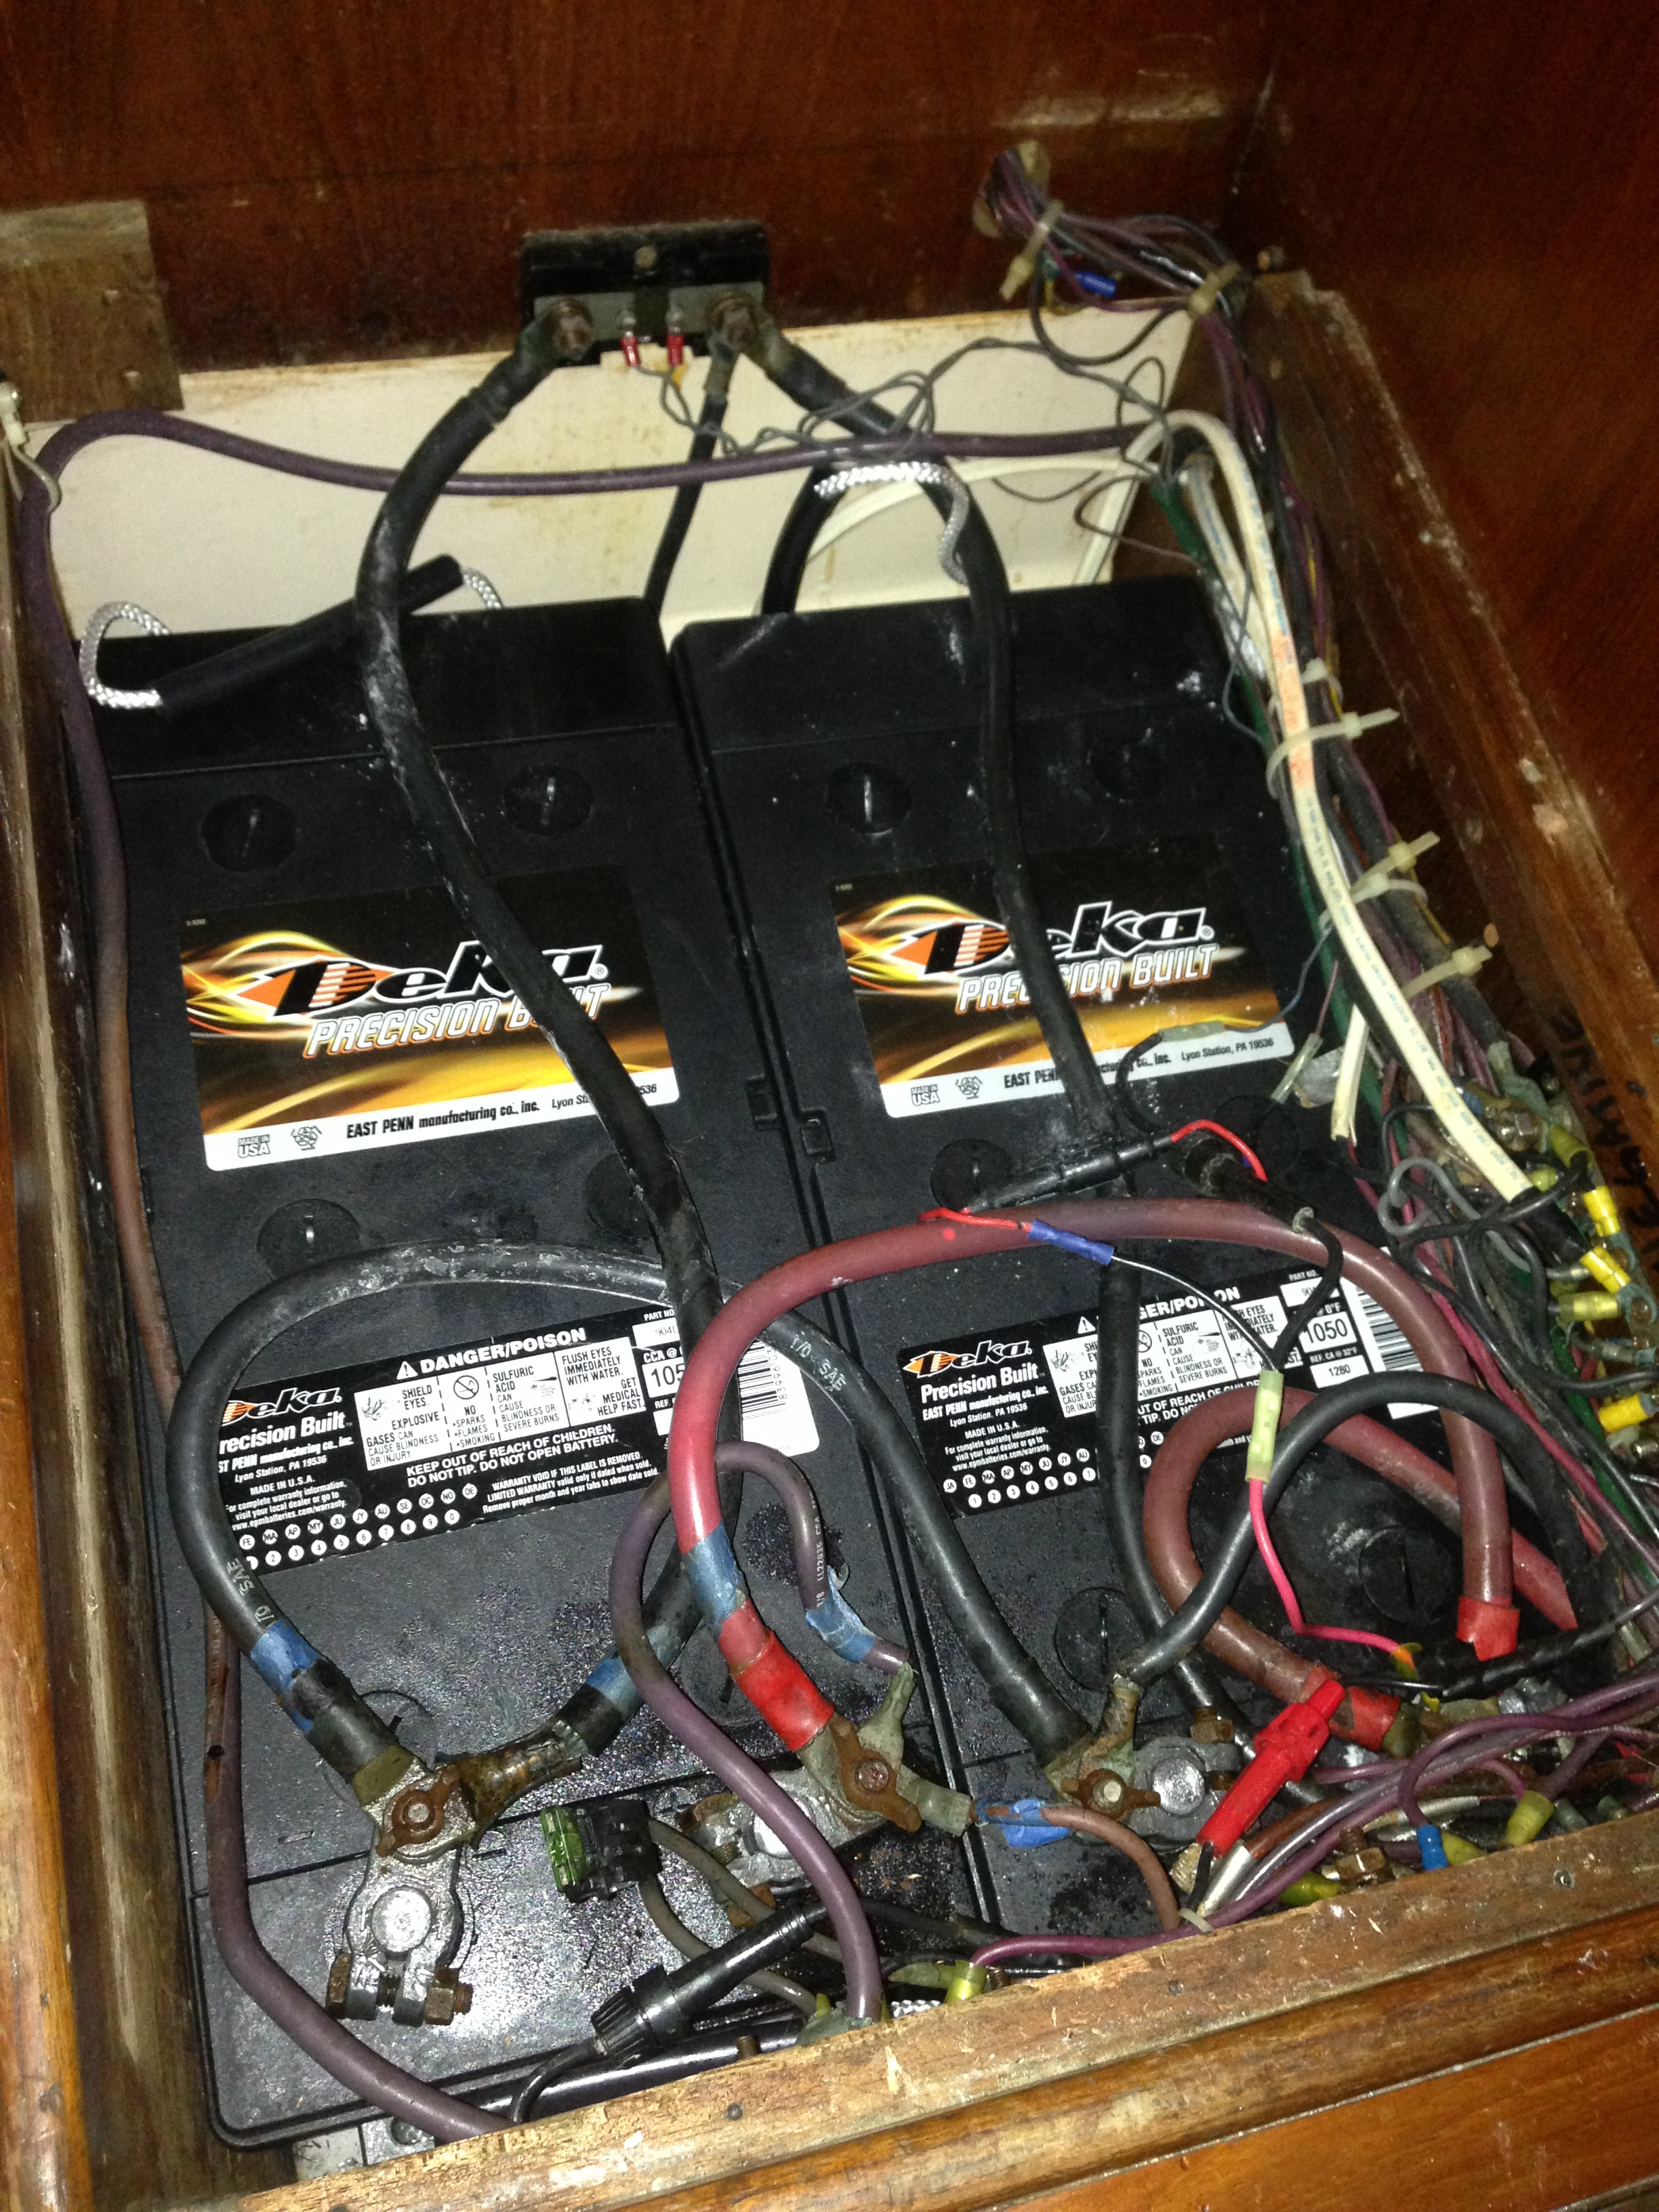
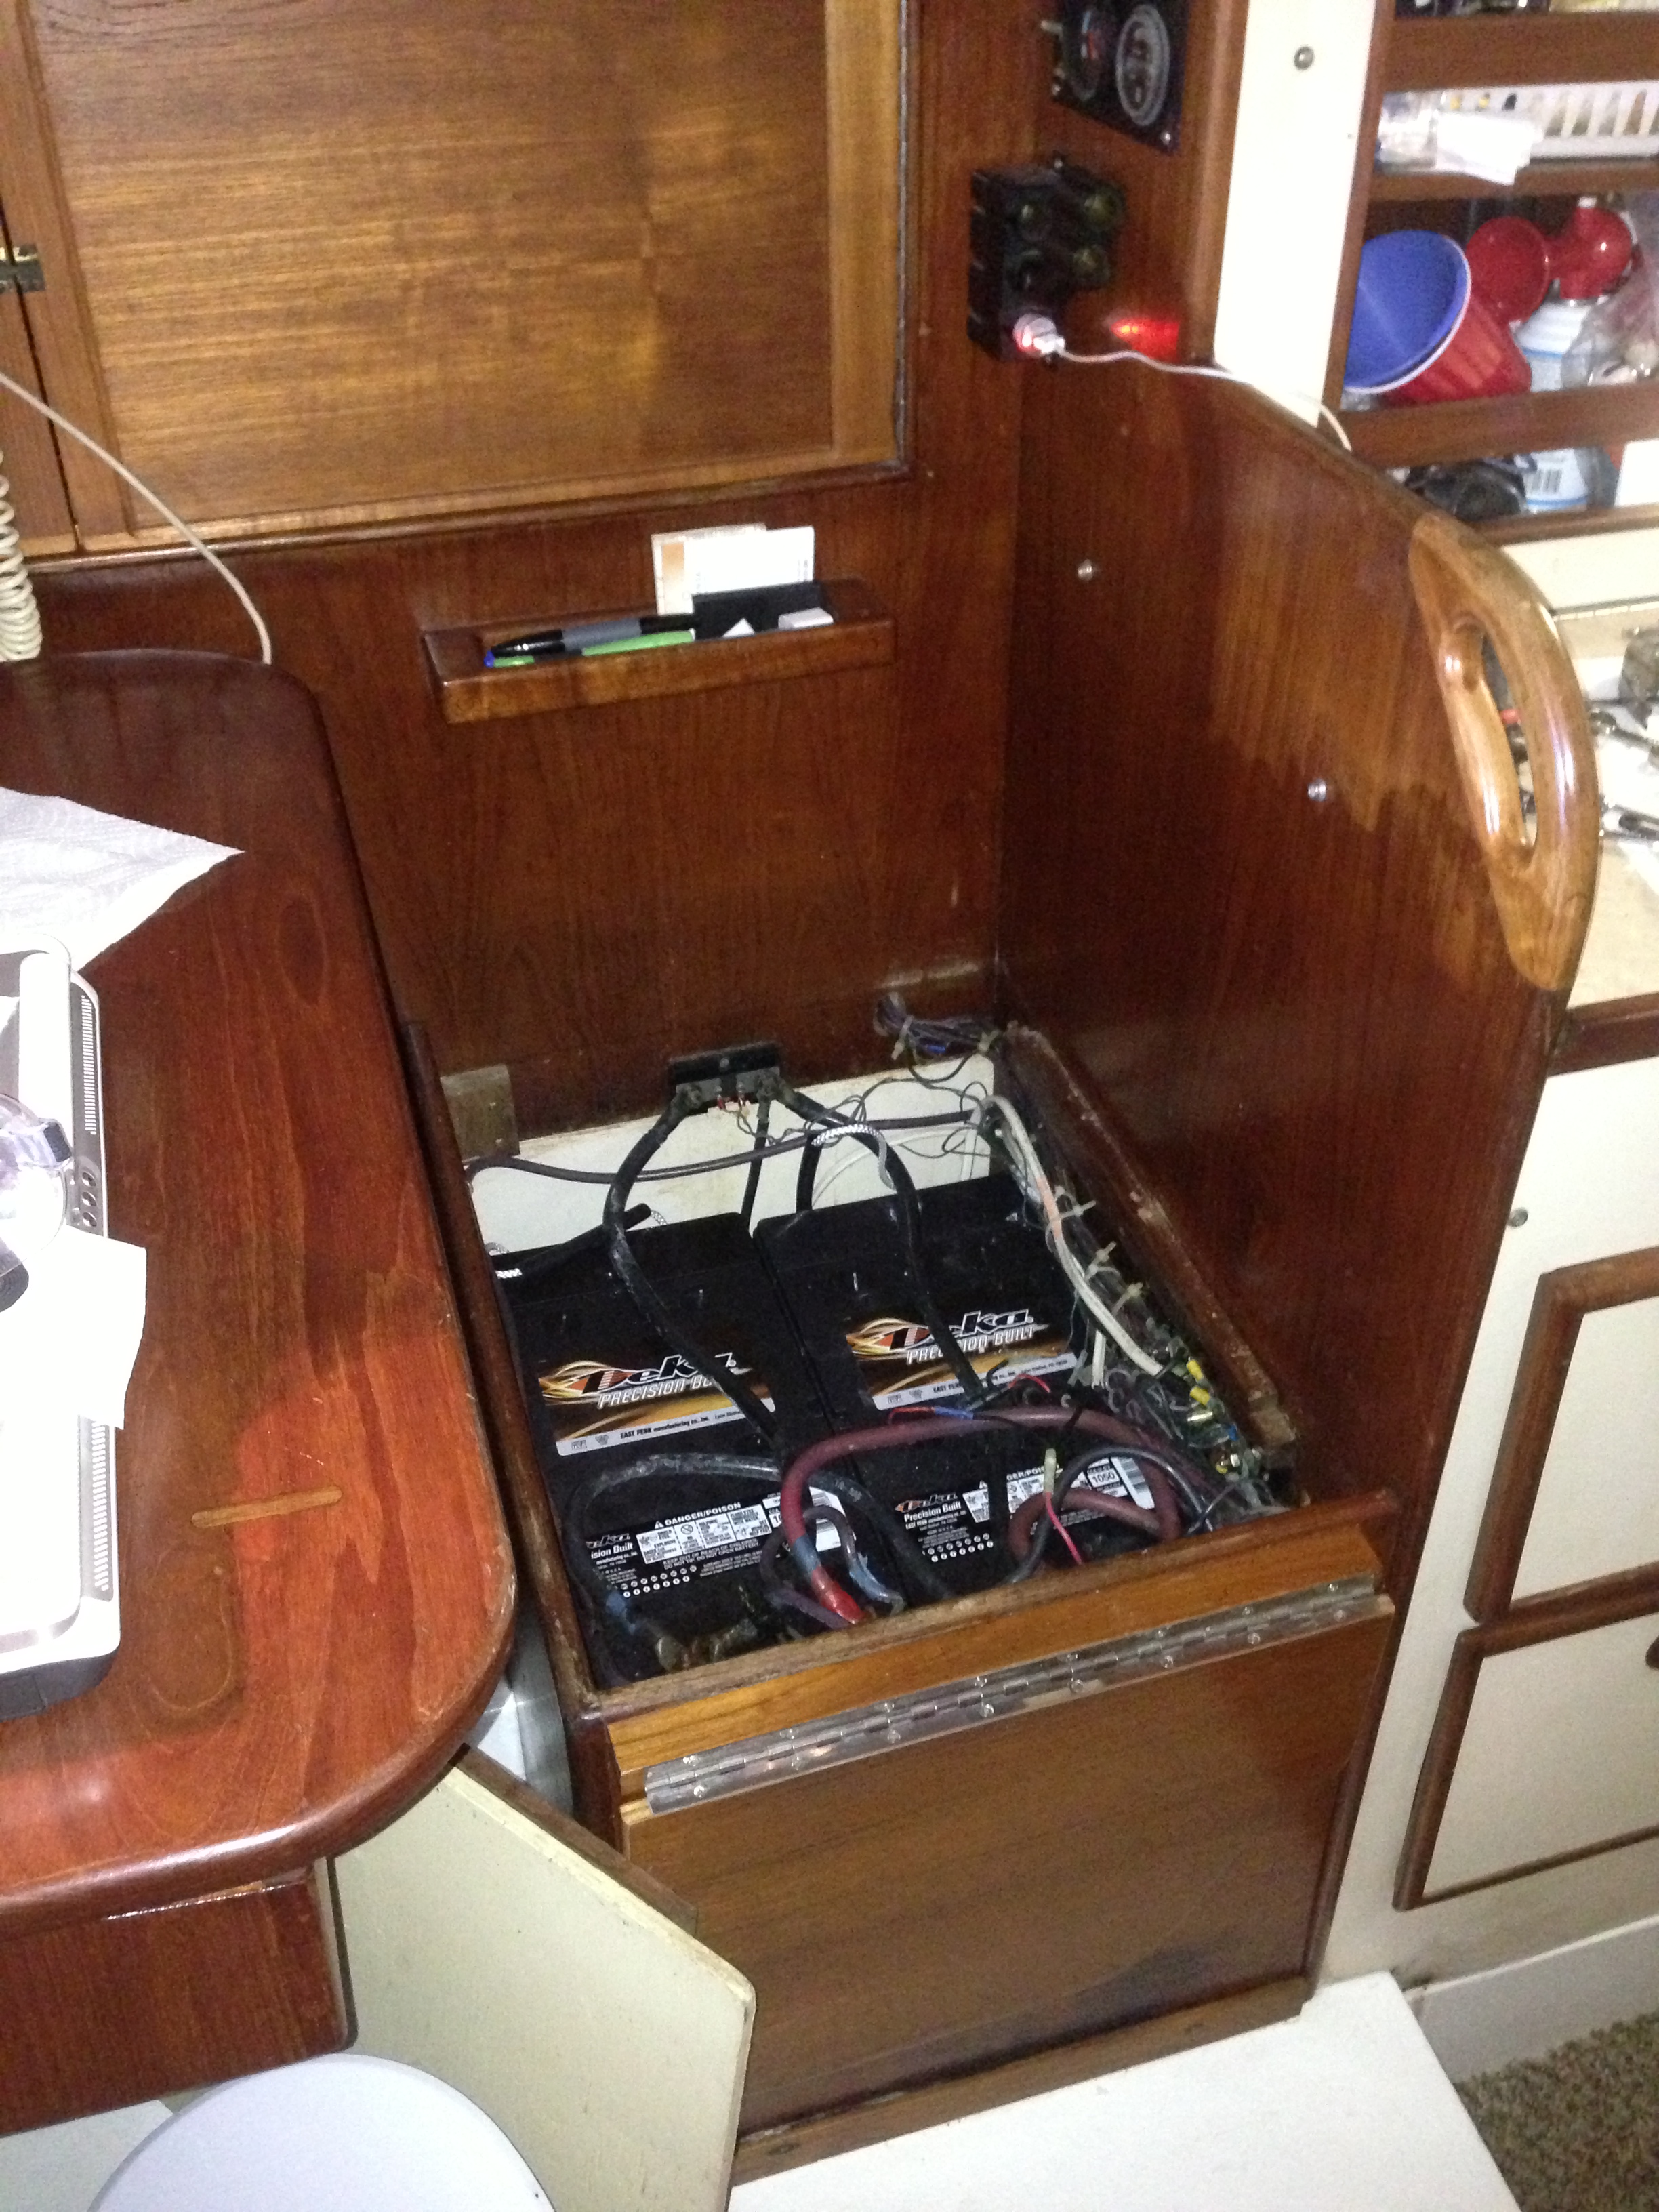
Our batteries were about three years old and started to get noticeably HOT. Two of the 4D batteries reside underneath the nav station seat and my toosh was getting too toasty!! The third is in the engine room. When we first arrived at the boat in September the water level inside the battery cells was very low. About 16oz of distilled water per cell were needed to bring them up to the proper level, but even after that they were still bubbling over, seeping out of the vents on the top of the batteries. While it’s not straight battery acid that’s coming out, it’s still very corrosive and dangerous. You can see the spillage in the picture above (disregard the terrible quality!)
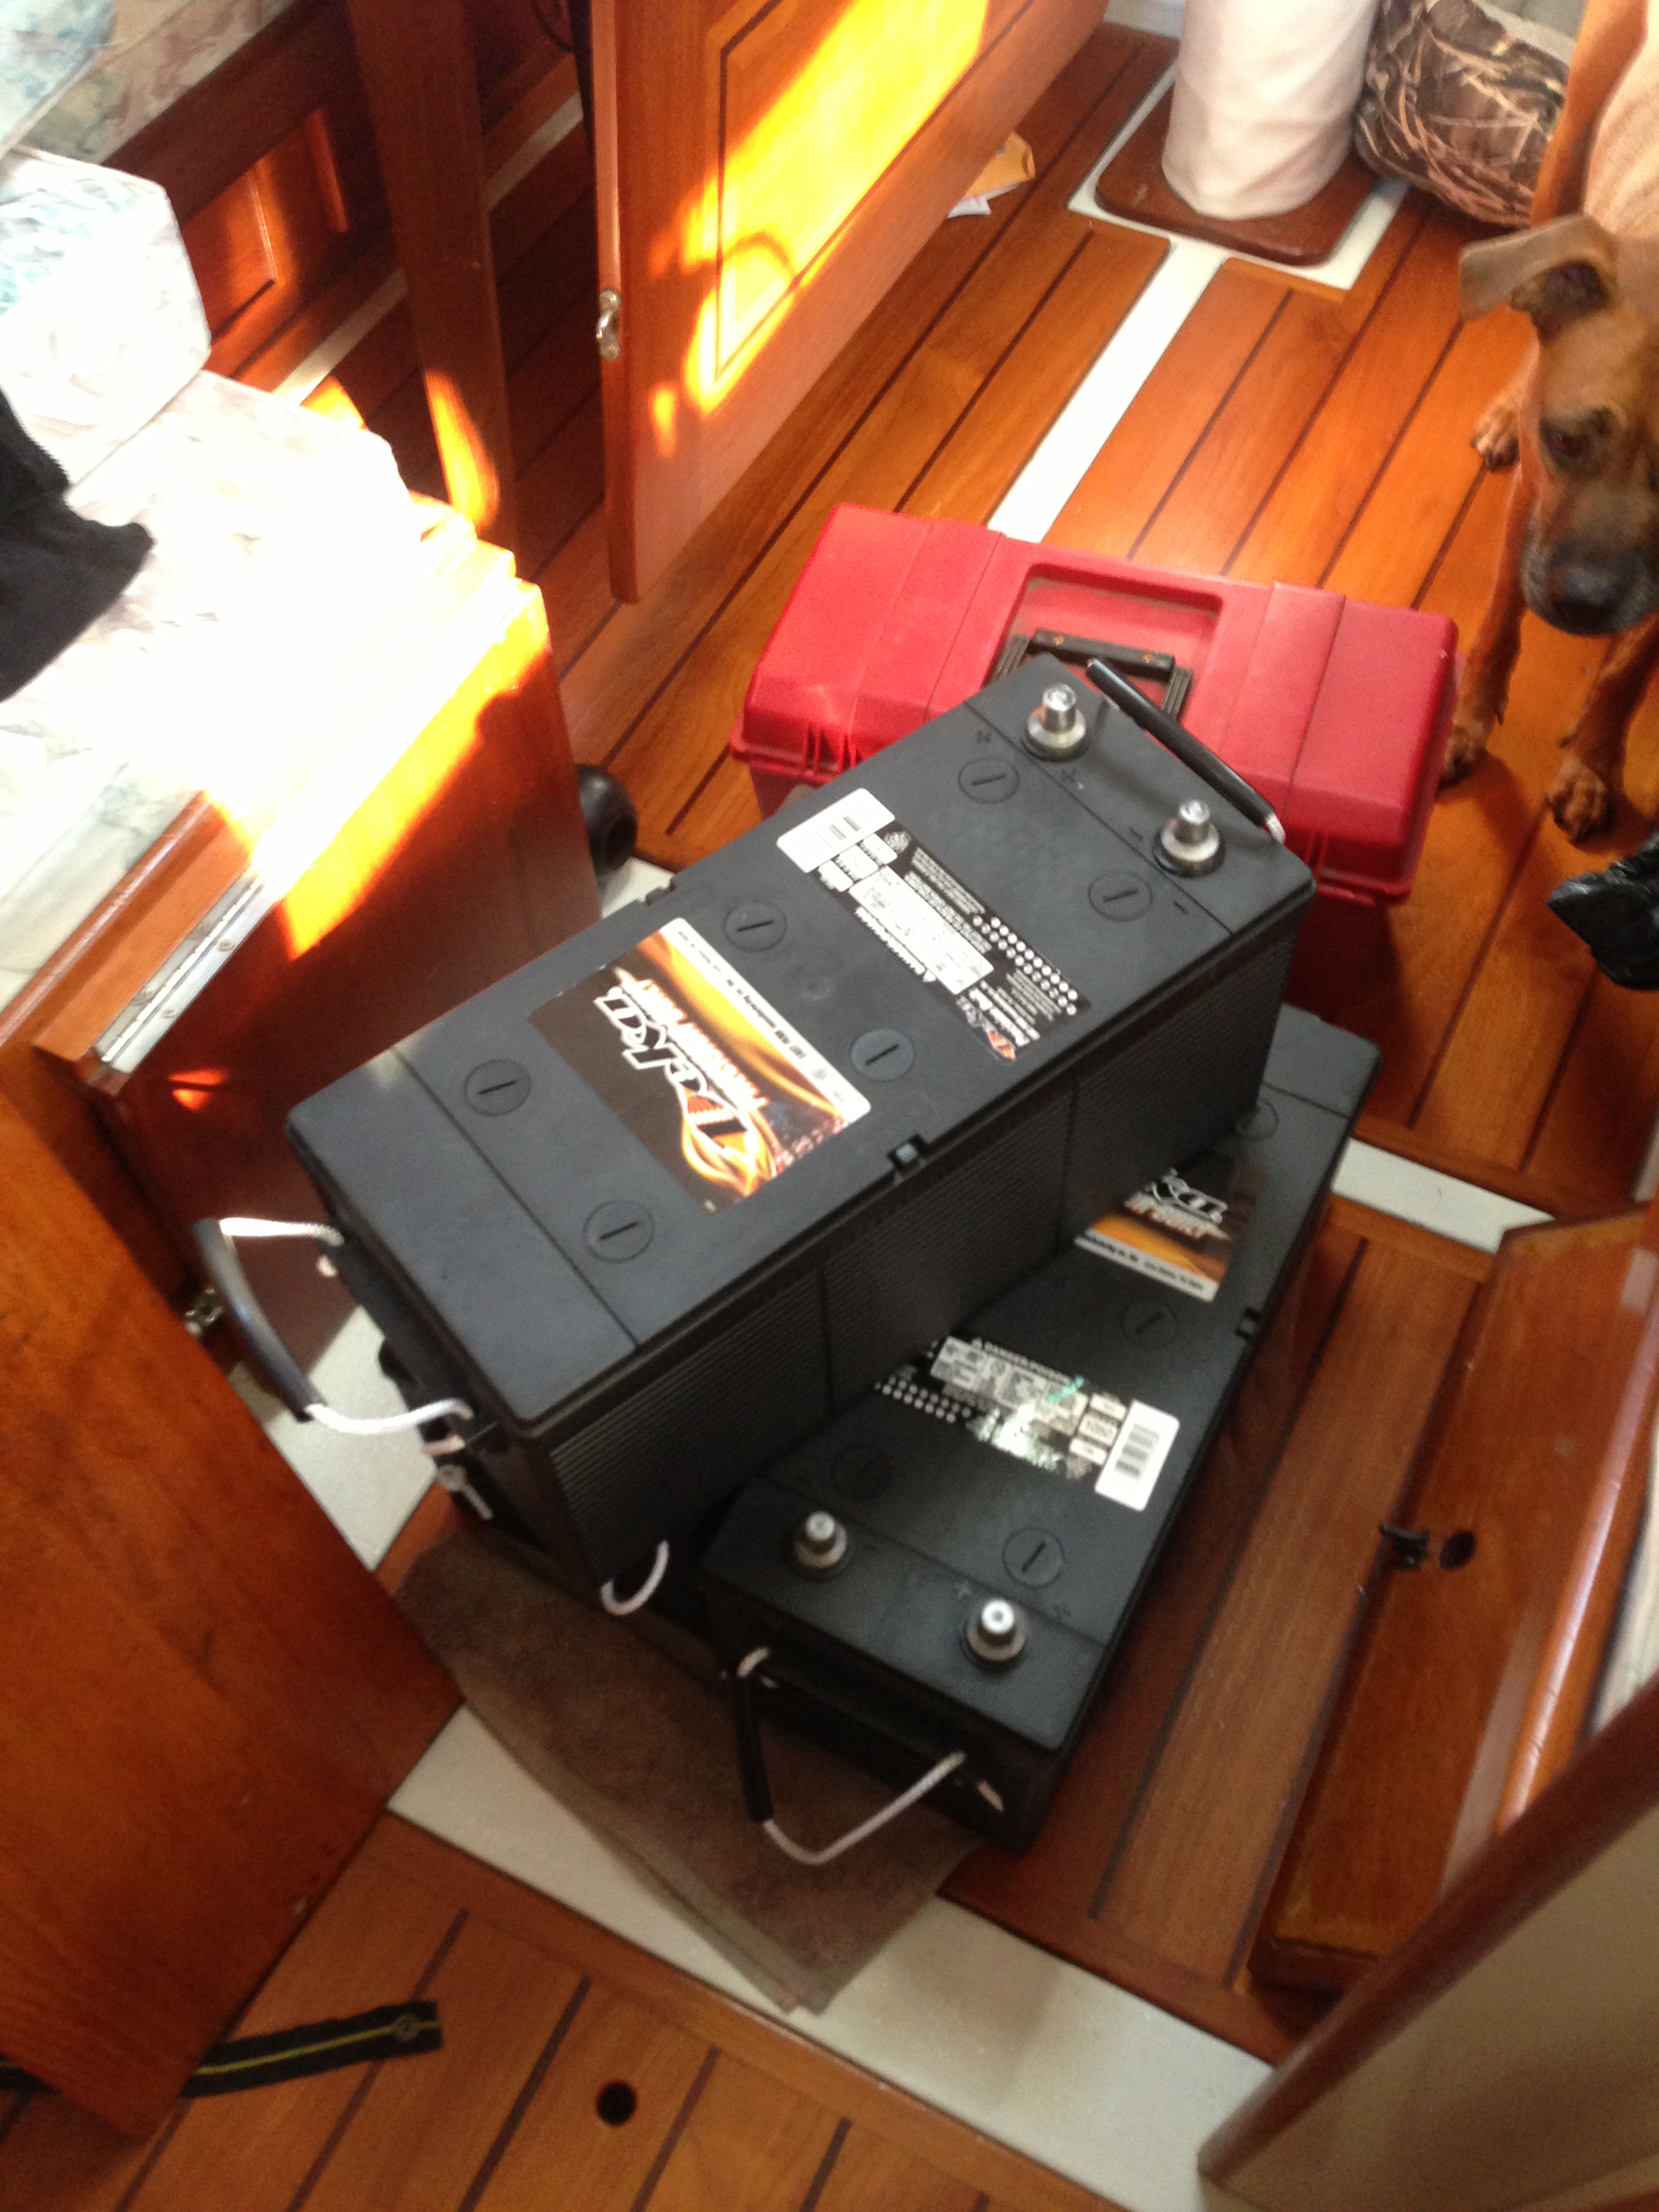
This was a high priority boat project and we couldn’t put it off any longer. We would have liked to put in 8D batteries to yield more amperage for a longer duration but the housing just wasn’t big enough and it’s not critical enough to rebuild the existing box or expand elsewhere. Our research discouraged us from the higher priced AGM batteries or gel batteries. The increased life just wasn’t enough justification for the higher price, and we’ve also heard from many salty dogs that they don’t always have a longer life either. We don’t mind the additional maintenance of refilling the distilled water every couple of months, especially if it means saving a few hundred dollars on these bad boys. We went with some Deka Lead Acid batteries for $220 each. Plus, we were able to get them from the yard right here at our Marina. The guys even said they would come pick up the old batteries at our slip. What a deal! The first step was to shut off all the power. No big deal, it’s just in the high 80’s outside and muggy as all hell. No power means no air conditioning…
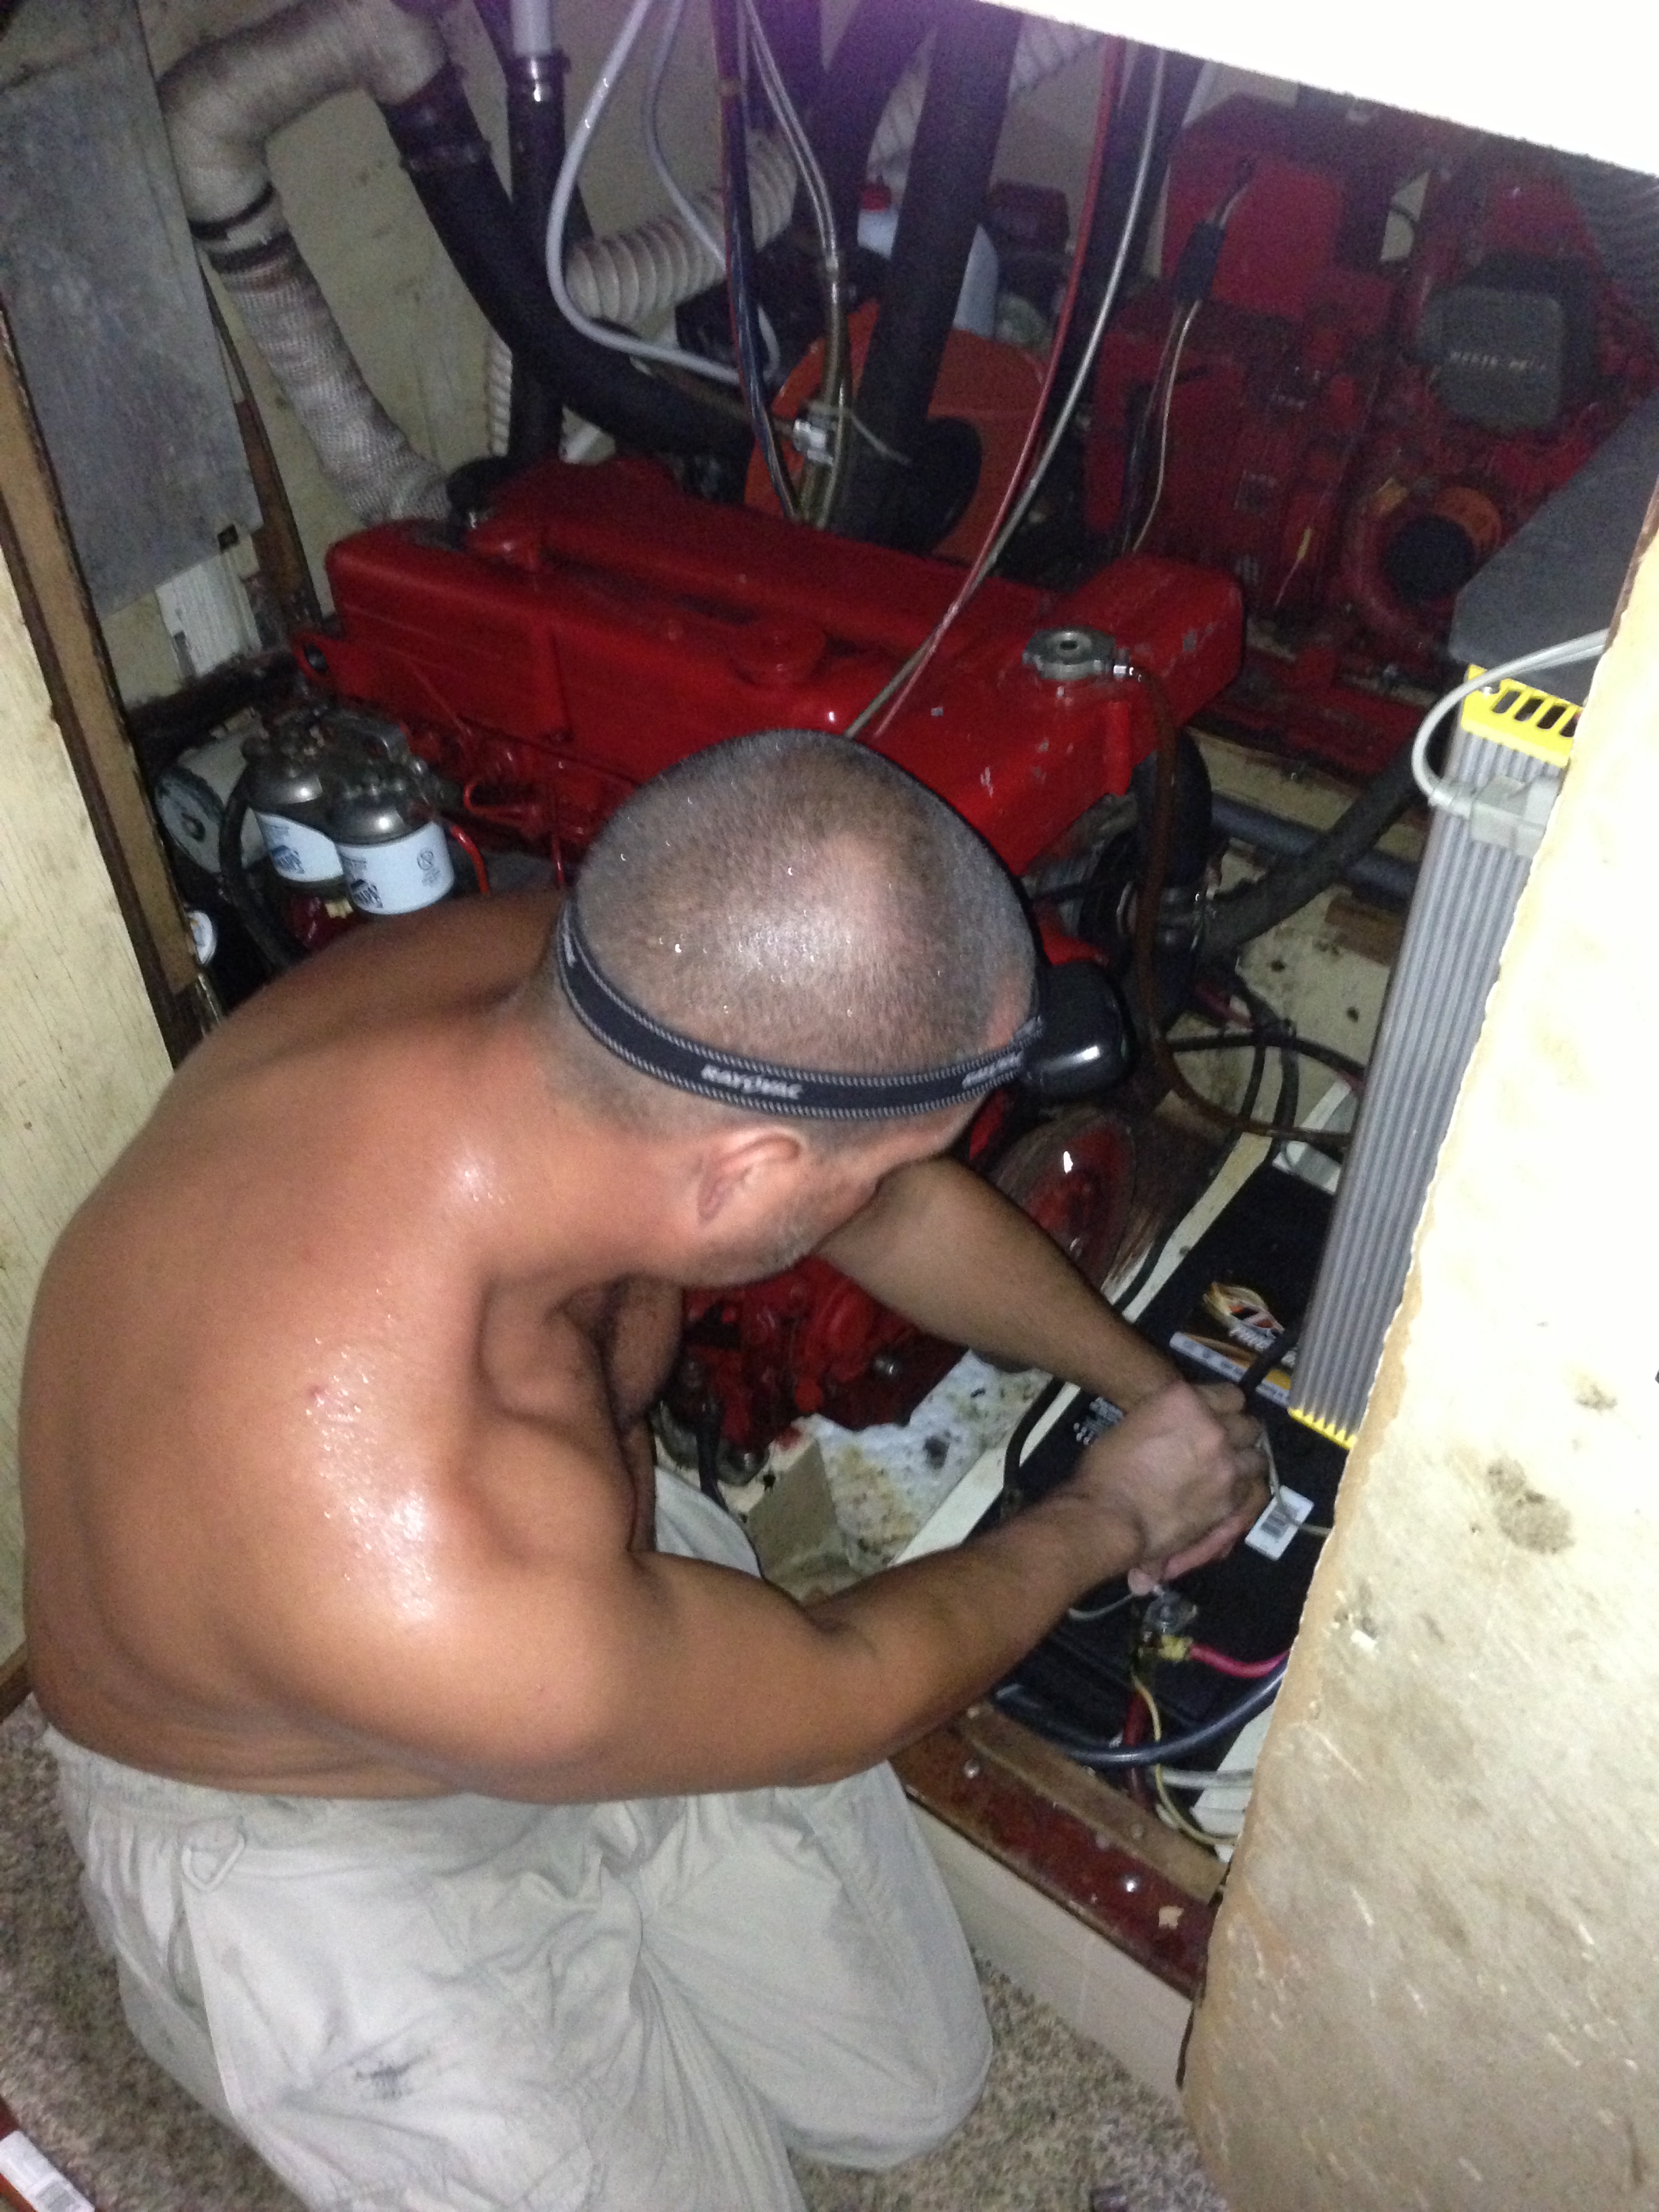
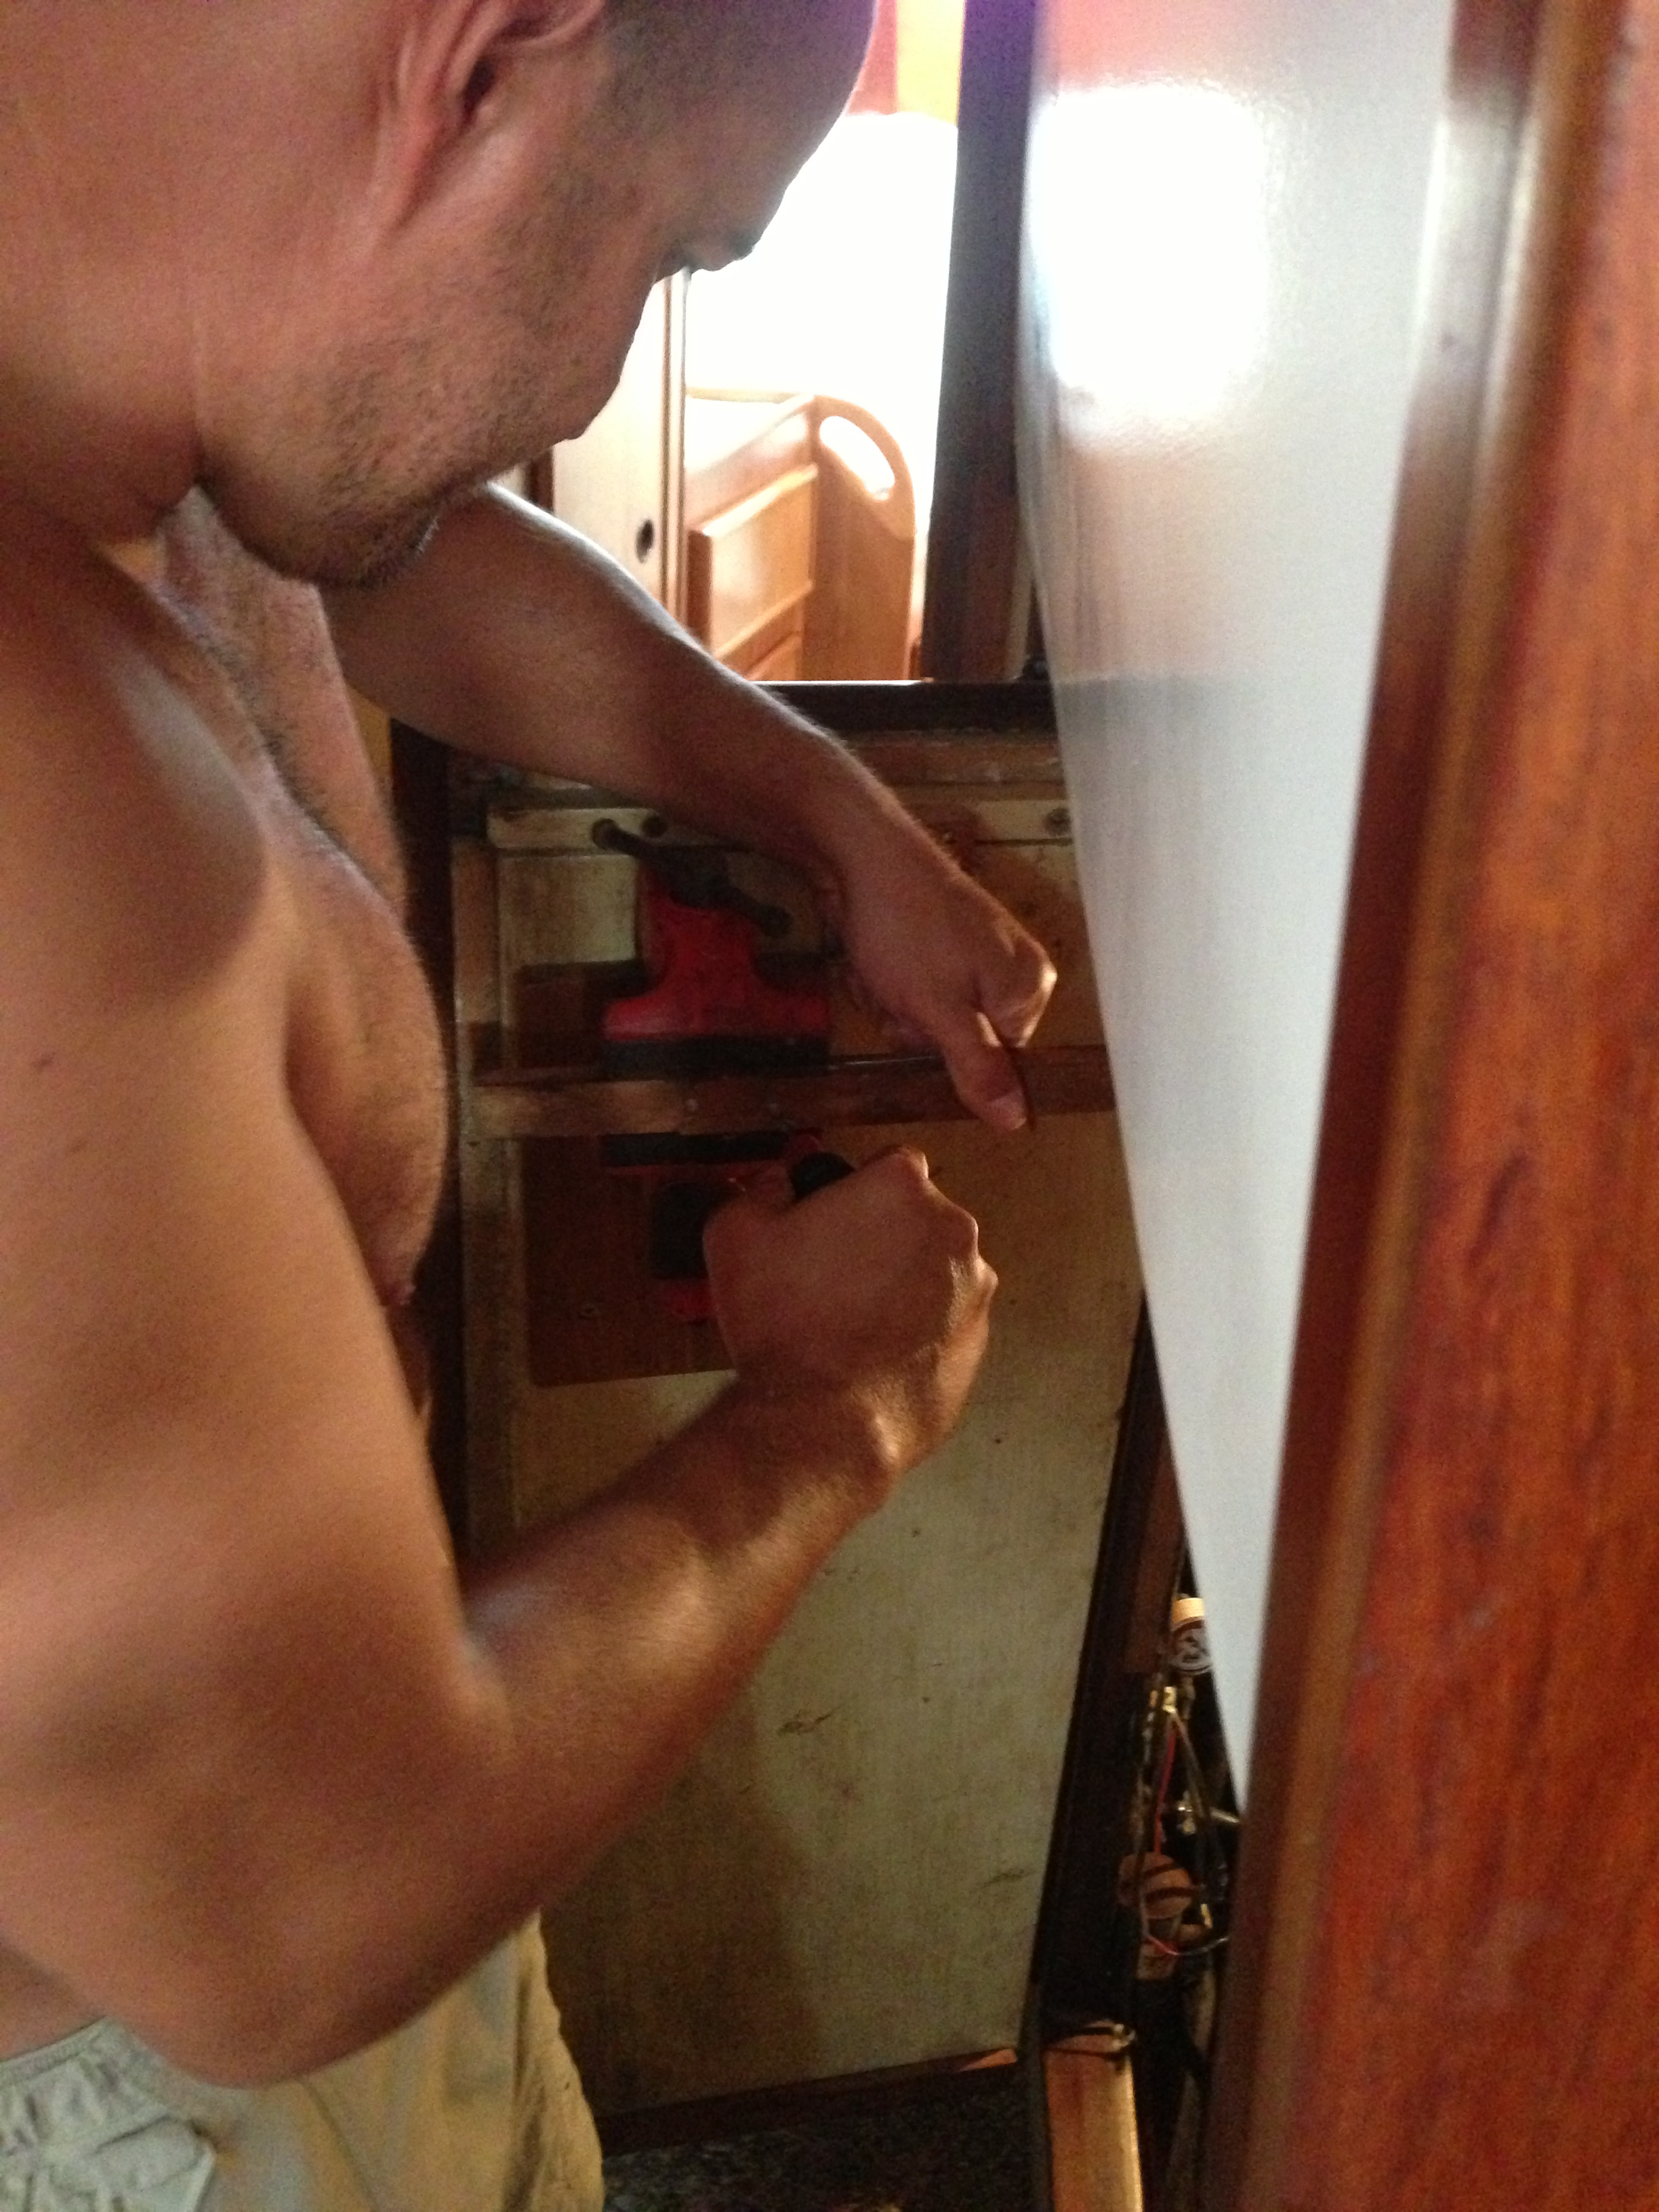
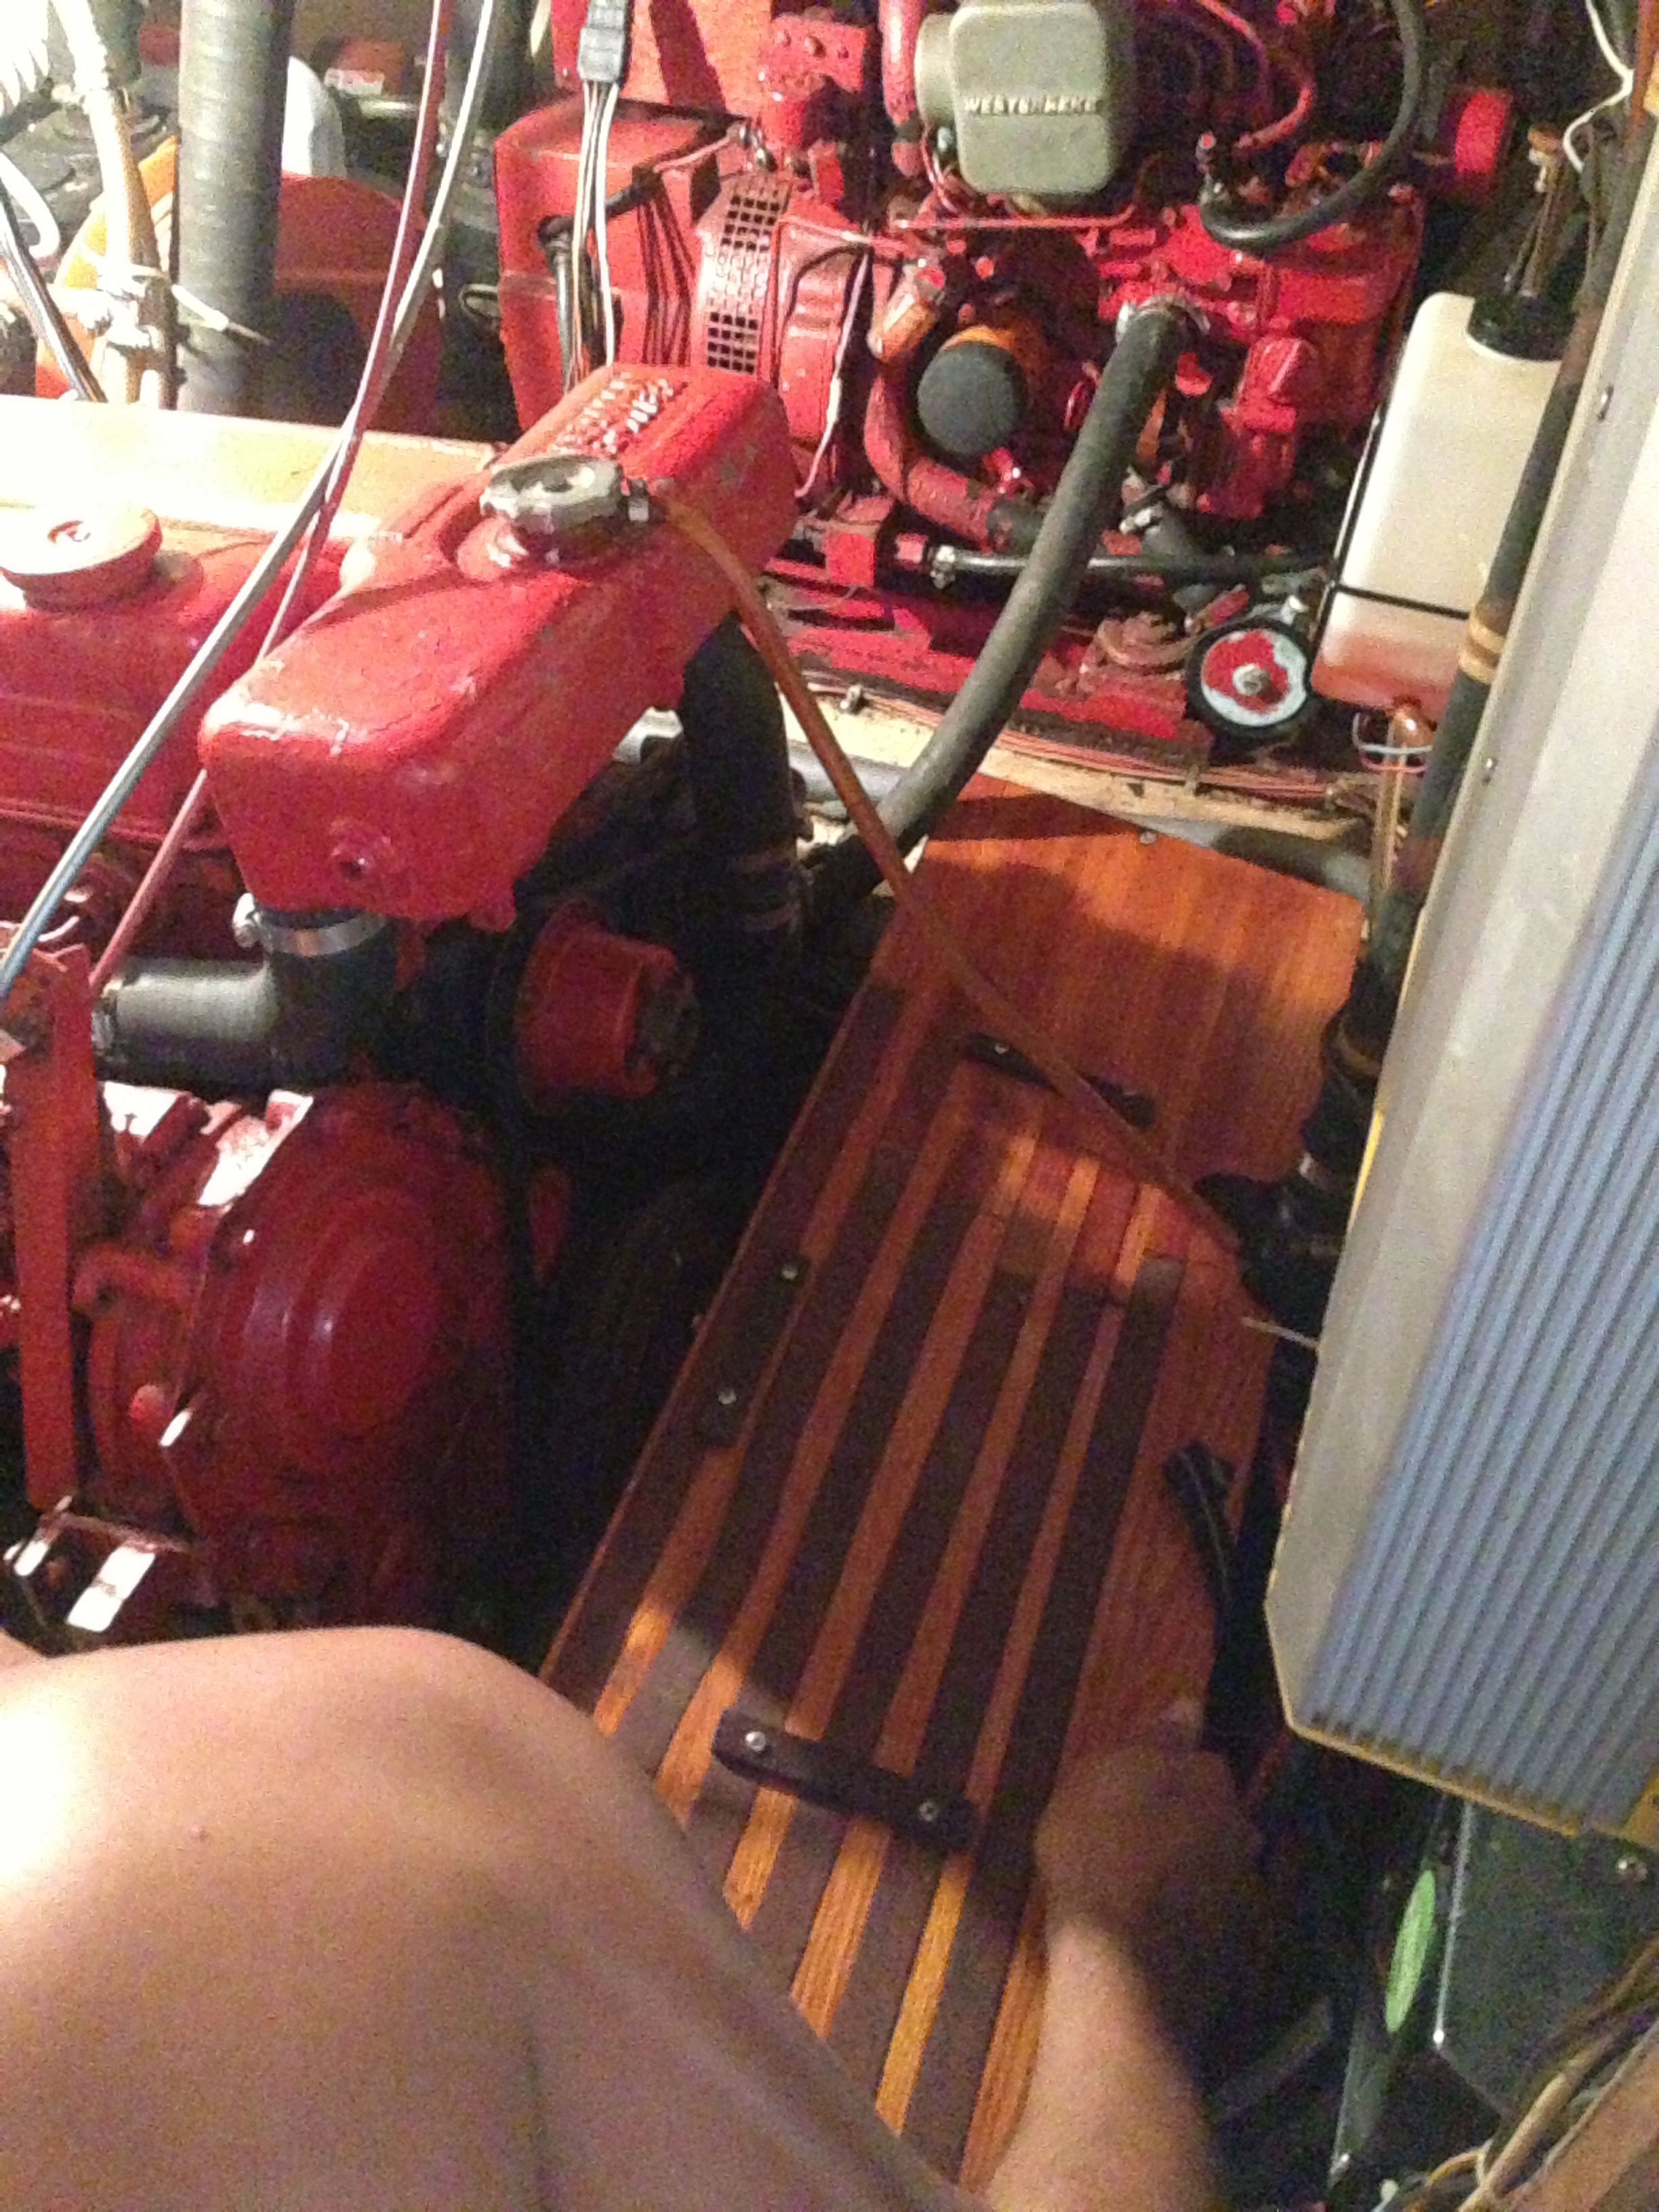
Peter put on his safety glasses and gloves, then used a little T-9 to loosen up the terminals and the first one was ready to come out. A whopping 80lbs of battery and seeping lead acid had to be lifted out of that hole without dripping anywhere. Peter and I got it onto a black trash bag, but there was NO WAY I could help him lift it up the vertical 5′ ladder and through our companionway into the cockpit or over the lifelines onto the dock. Our super nice neighbor Karl donated some sweat equity and came to the rescue. It’s not a real boat project unless you get sidetracked and start a new one before finishing the first one, right?? Don’t forget, we still have NO POWER and NO A/C since we are only 1/3 done with the batteries. In order for the wood platform to screw back in properly over the top of the new battery, we got the chance to use our handy-dandy vice that was left by the previous owner on the back side of our engine room door. There was a small piece of wood that was beginning to split so we used some liquid nails and a screw to fix’er back up.
The clock ticks on and we finally get the board back in place. My red toolbox fits perfectly where the previous owner had his toolbox. He laid non-skid strips down with screwed on wood blocking to hold the toolbox in place while underway. There’s also a strap that goes over the top for double measure. The snap that holds the strap also busted off but that’s a little less critical so we’ll add that one to the “list” for another day. On to finishing the batteries…
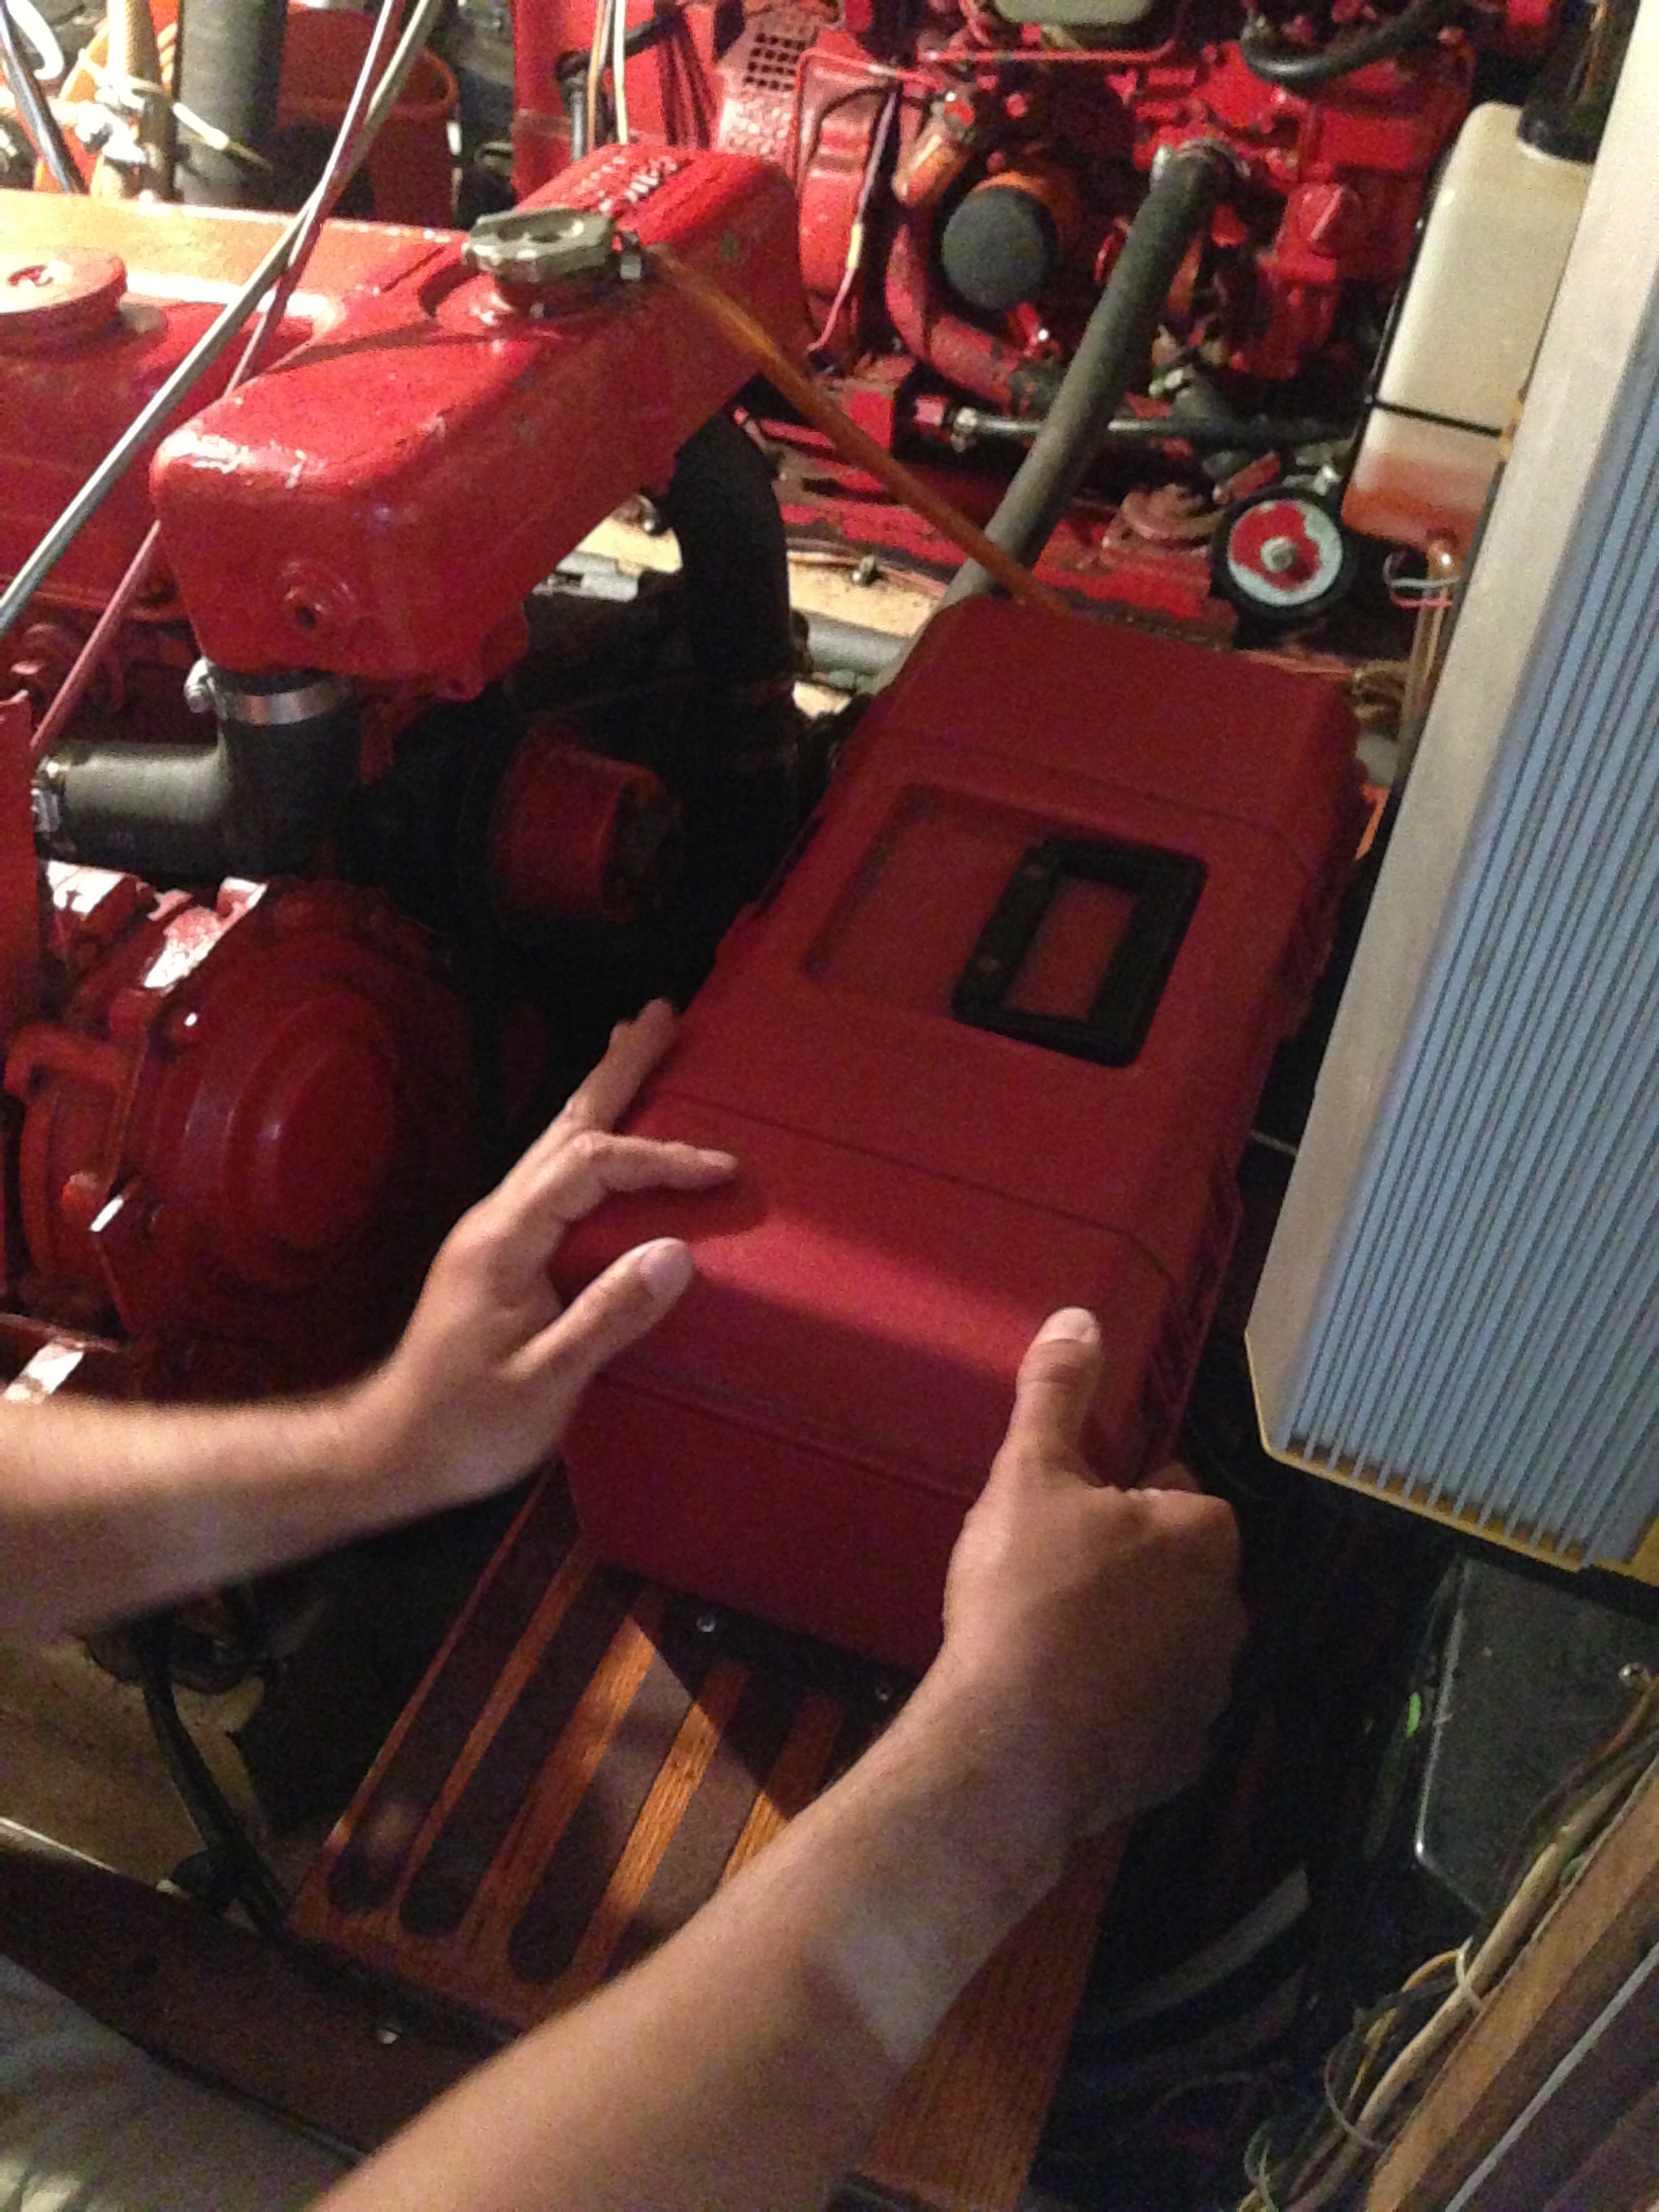
The last two sit more than snuggly inside the nav station seat and there is a grip of wires in the way making it extra difficult to remove the old leaking batteries. We are running out of daylight. It’s not getting any cooler and we are both sweating all over the place. I am able to lift the first one out of the box with Peter, but not the second one. Karl comes back over to help us out again. Two men are stronger than one! Now we just have to get them hooked back up properly and quickly. The headlamp came out long ago. Good thing we have little batteries to help us shine light on the big ones!!
Before lifting the new batteries in, we need to clean out the box with baking soda and water to neutralize all the spillage. We’re not sure how long it had been like this, but there was an awful lot of corrosion and that’s never a good thing on a boat. Luckily the structural integrity of the box wasn’t affected and we won’t need to rebuild anything… yet. Now totally dark, and still sweating, we tried to air out the fumes from the neutralization as best we could. We were determined to get this finished in one night so I mustered up all the strength and gumby-like leverage I had to help Peter drop them into place one at a time. After all the wires were put back together the right way and the terminals got a fresh coating of T-9, it was time to see if we had juice. Whew!! Everything seemed to be okay.
We were both so tired and on the verge of dehydration that when we plugged the shore power back in to get some air conditioning, we plugged them in the opposite locations. The fault warning was going off and it took us a few minutes to realize it had nothing to do with the connections for the new batteries, but that it could be the shore power cables. Peter went out to switch them and the beeping stopped. Finally! Light and cool air!!! The poor puppies had been waiting so patiently for dinner and potty time. We got the pups outside first, then back for their dinner and then we were finally able to head to the showers to get cleaned up.
The work wasn’t done yet… we still had to neutralize the acid that had leaked out and down onto the carpet. We sprinkled some more baking soda and let it do its work. There was more reaction than we were expecting, but its all cleaned up now. We’ll be tossing that piece of carpet for sure and replacing it very soon. Another thing to add to the list!
All in all, our first major boat project took longer than we anticipated but it was successful in the end. Next time we replace the batteries, it will hopefully take us half the time and we will be sure to start the process on a cool day and early in the morning :)